
Stripe Connect Setup
If your church wants to accept online donations, you connect your church to Stripe -- the payment processor TimelyChurch uses. This is a one-time setup that takes about 10 minutes for you, plus 1-3 business days for Stripe to verify your church.
Plan requirement: Online giving via Stripe Connect is part of the Pro plan (active or in trial). See Trial and Plan Selection.
Before You Begin
Have these ready -- Stripe will ask for them:
- Your church's legal name (as registered with the IRS or your equivalent tax authority).
- Your EIN (Employer Identification Number, also called Tax ID).
- A bank account number and routing number for the account where deposits should land. Most churches use their main operating account.
- Your church address (must match what's on file with your bank).
- A photo ID for an authorized signer of the church (typically the senior pastor or treasurer). Stripe asks for this for KYC compliance.
- A mobile phone number for verification codes.
Tip: Use your church's operating bank account, not the personal account of a pastor or treasurer. This keeps donations cleanly attributable to the church and simplifies your bookkeeping.
Step 1: Open the Online Giving Setup
The Stripe Connect card lives on the Integrations tab of Church Settings. There are two ways to get there:
Option A: From the sidebar, expand Finances → click Giving → click the Activate online giving link near the top of the page. (This link appears only until Stripe is connected.)
Option B: From the bottom of the sidebar, click Church Settings → choose the Integrations tab.
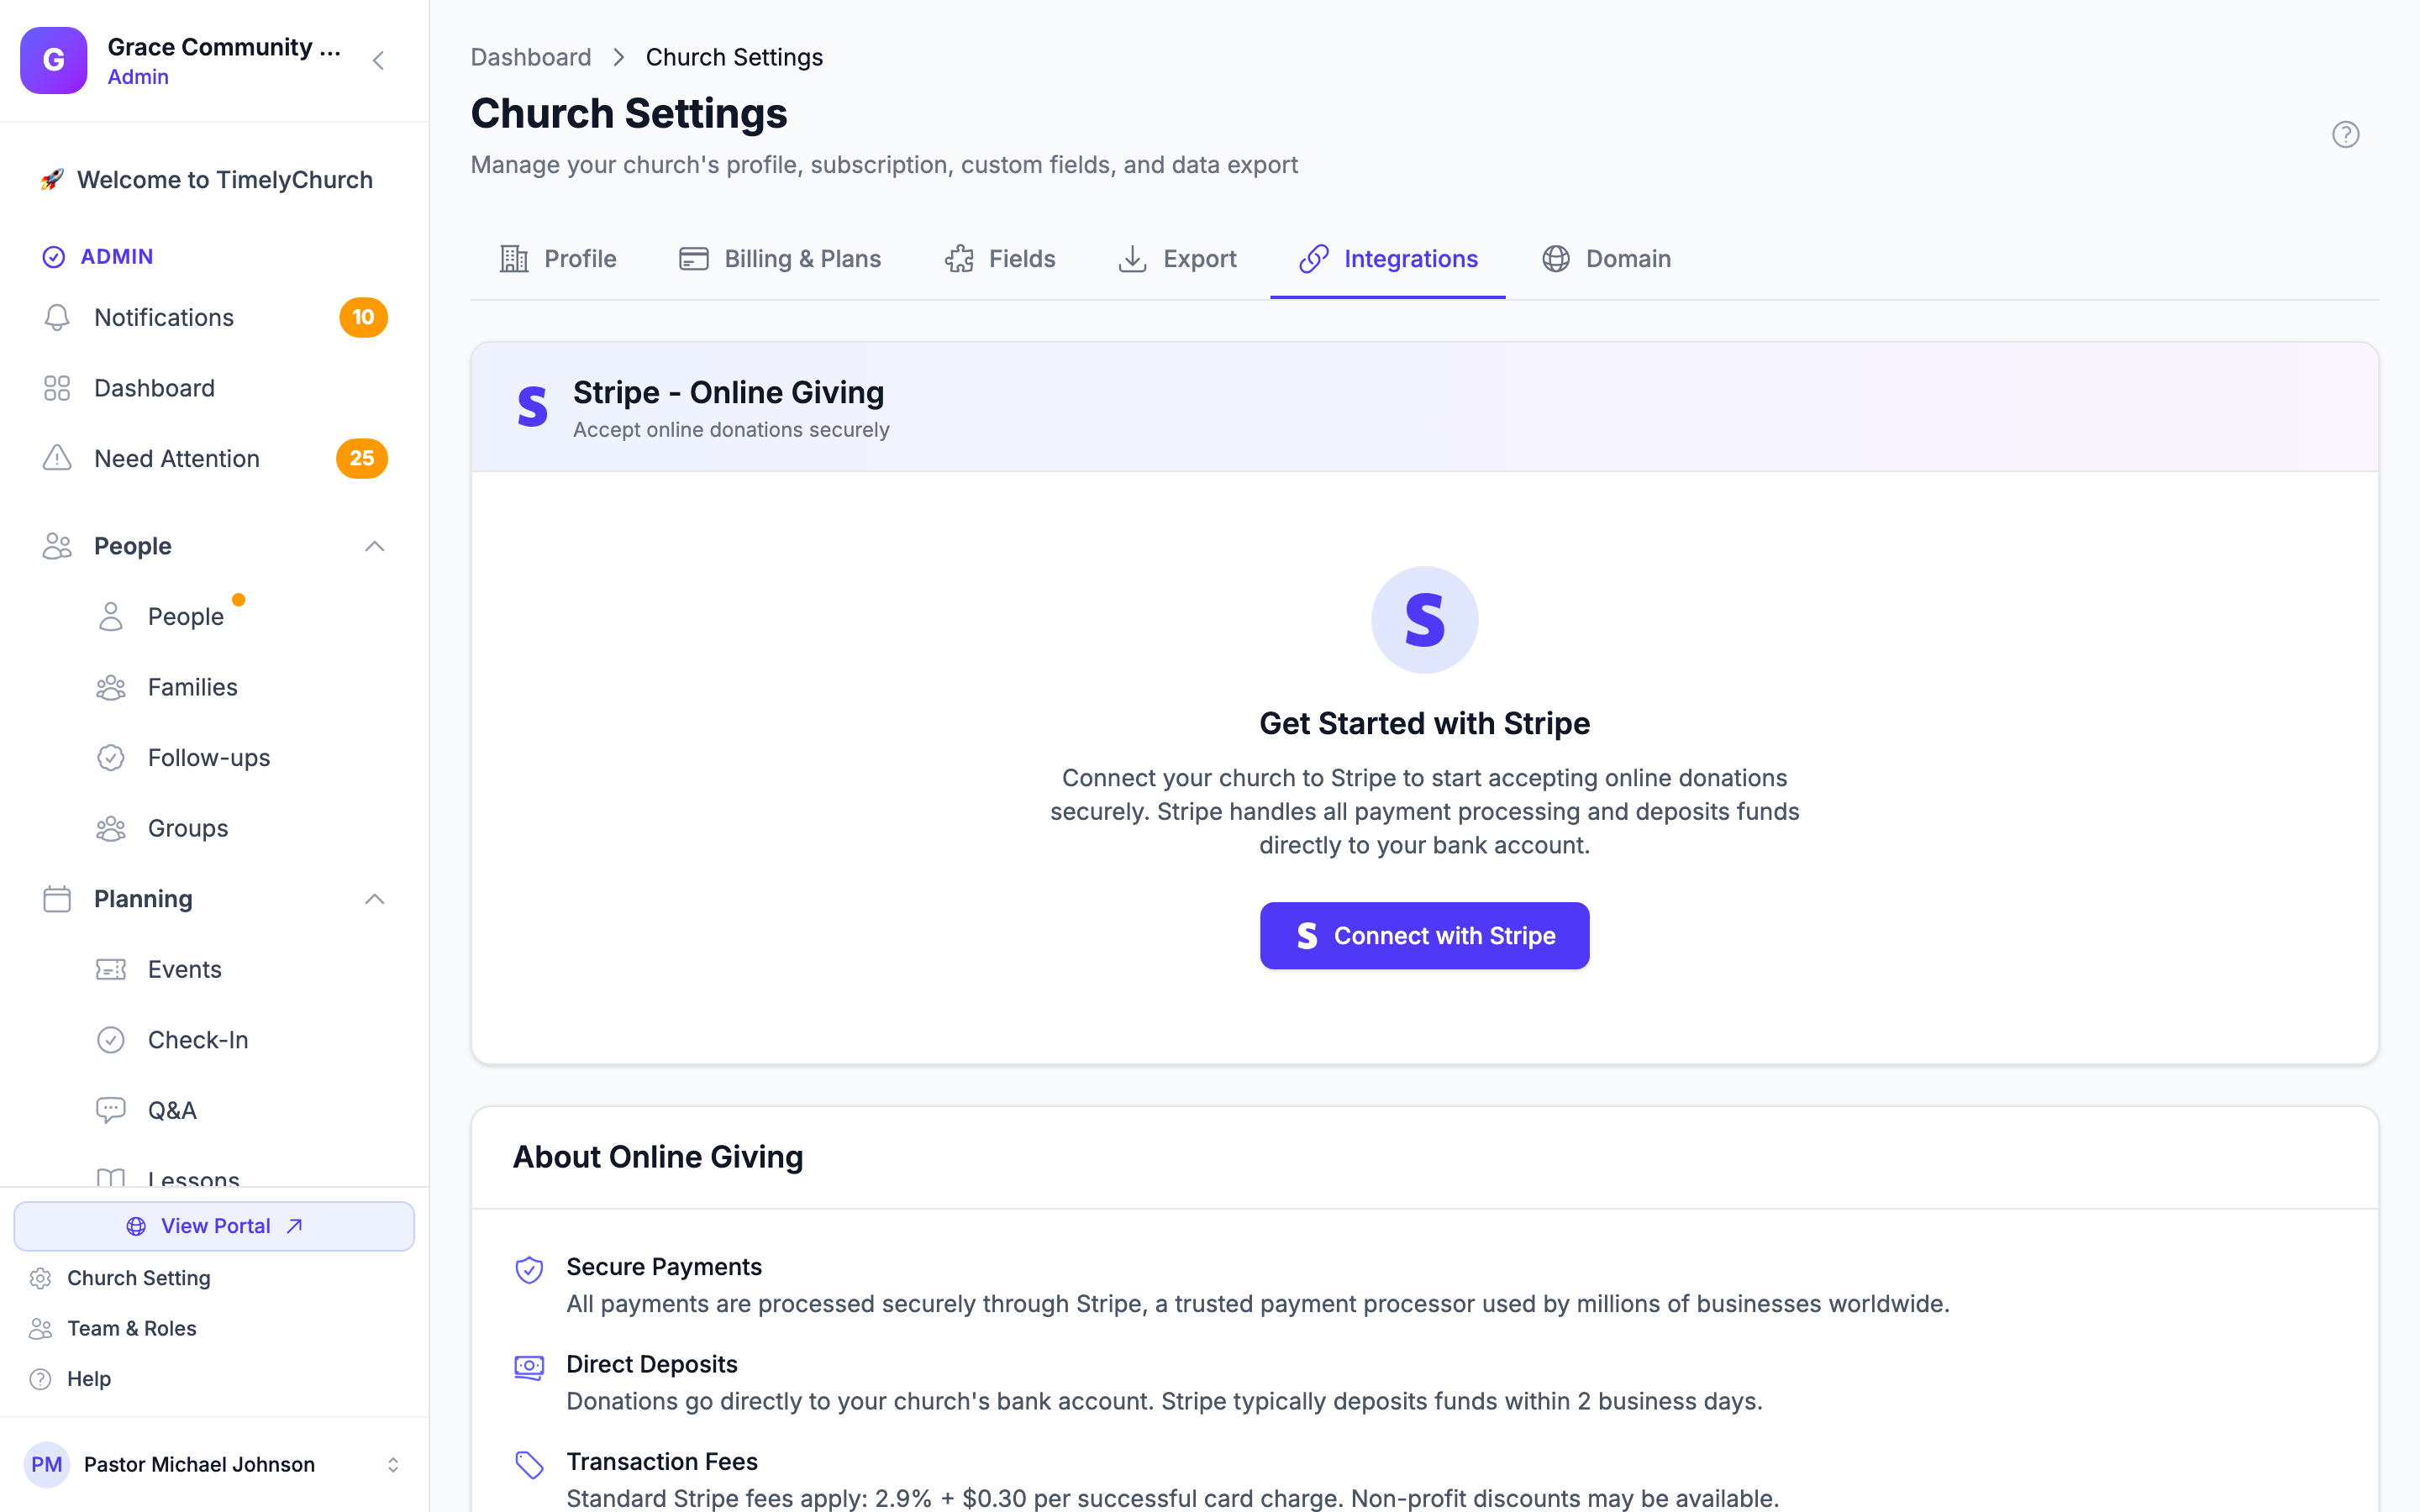
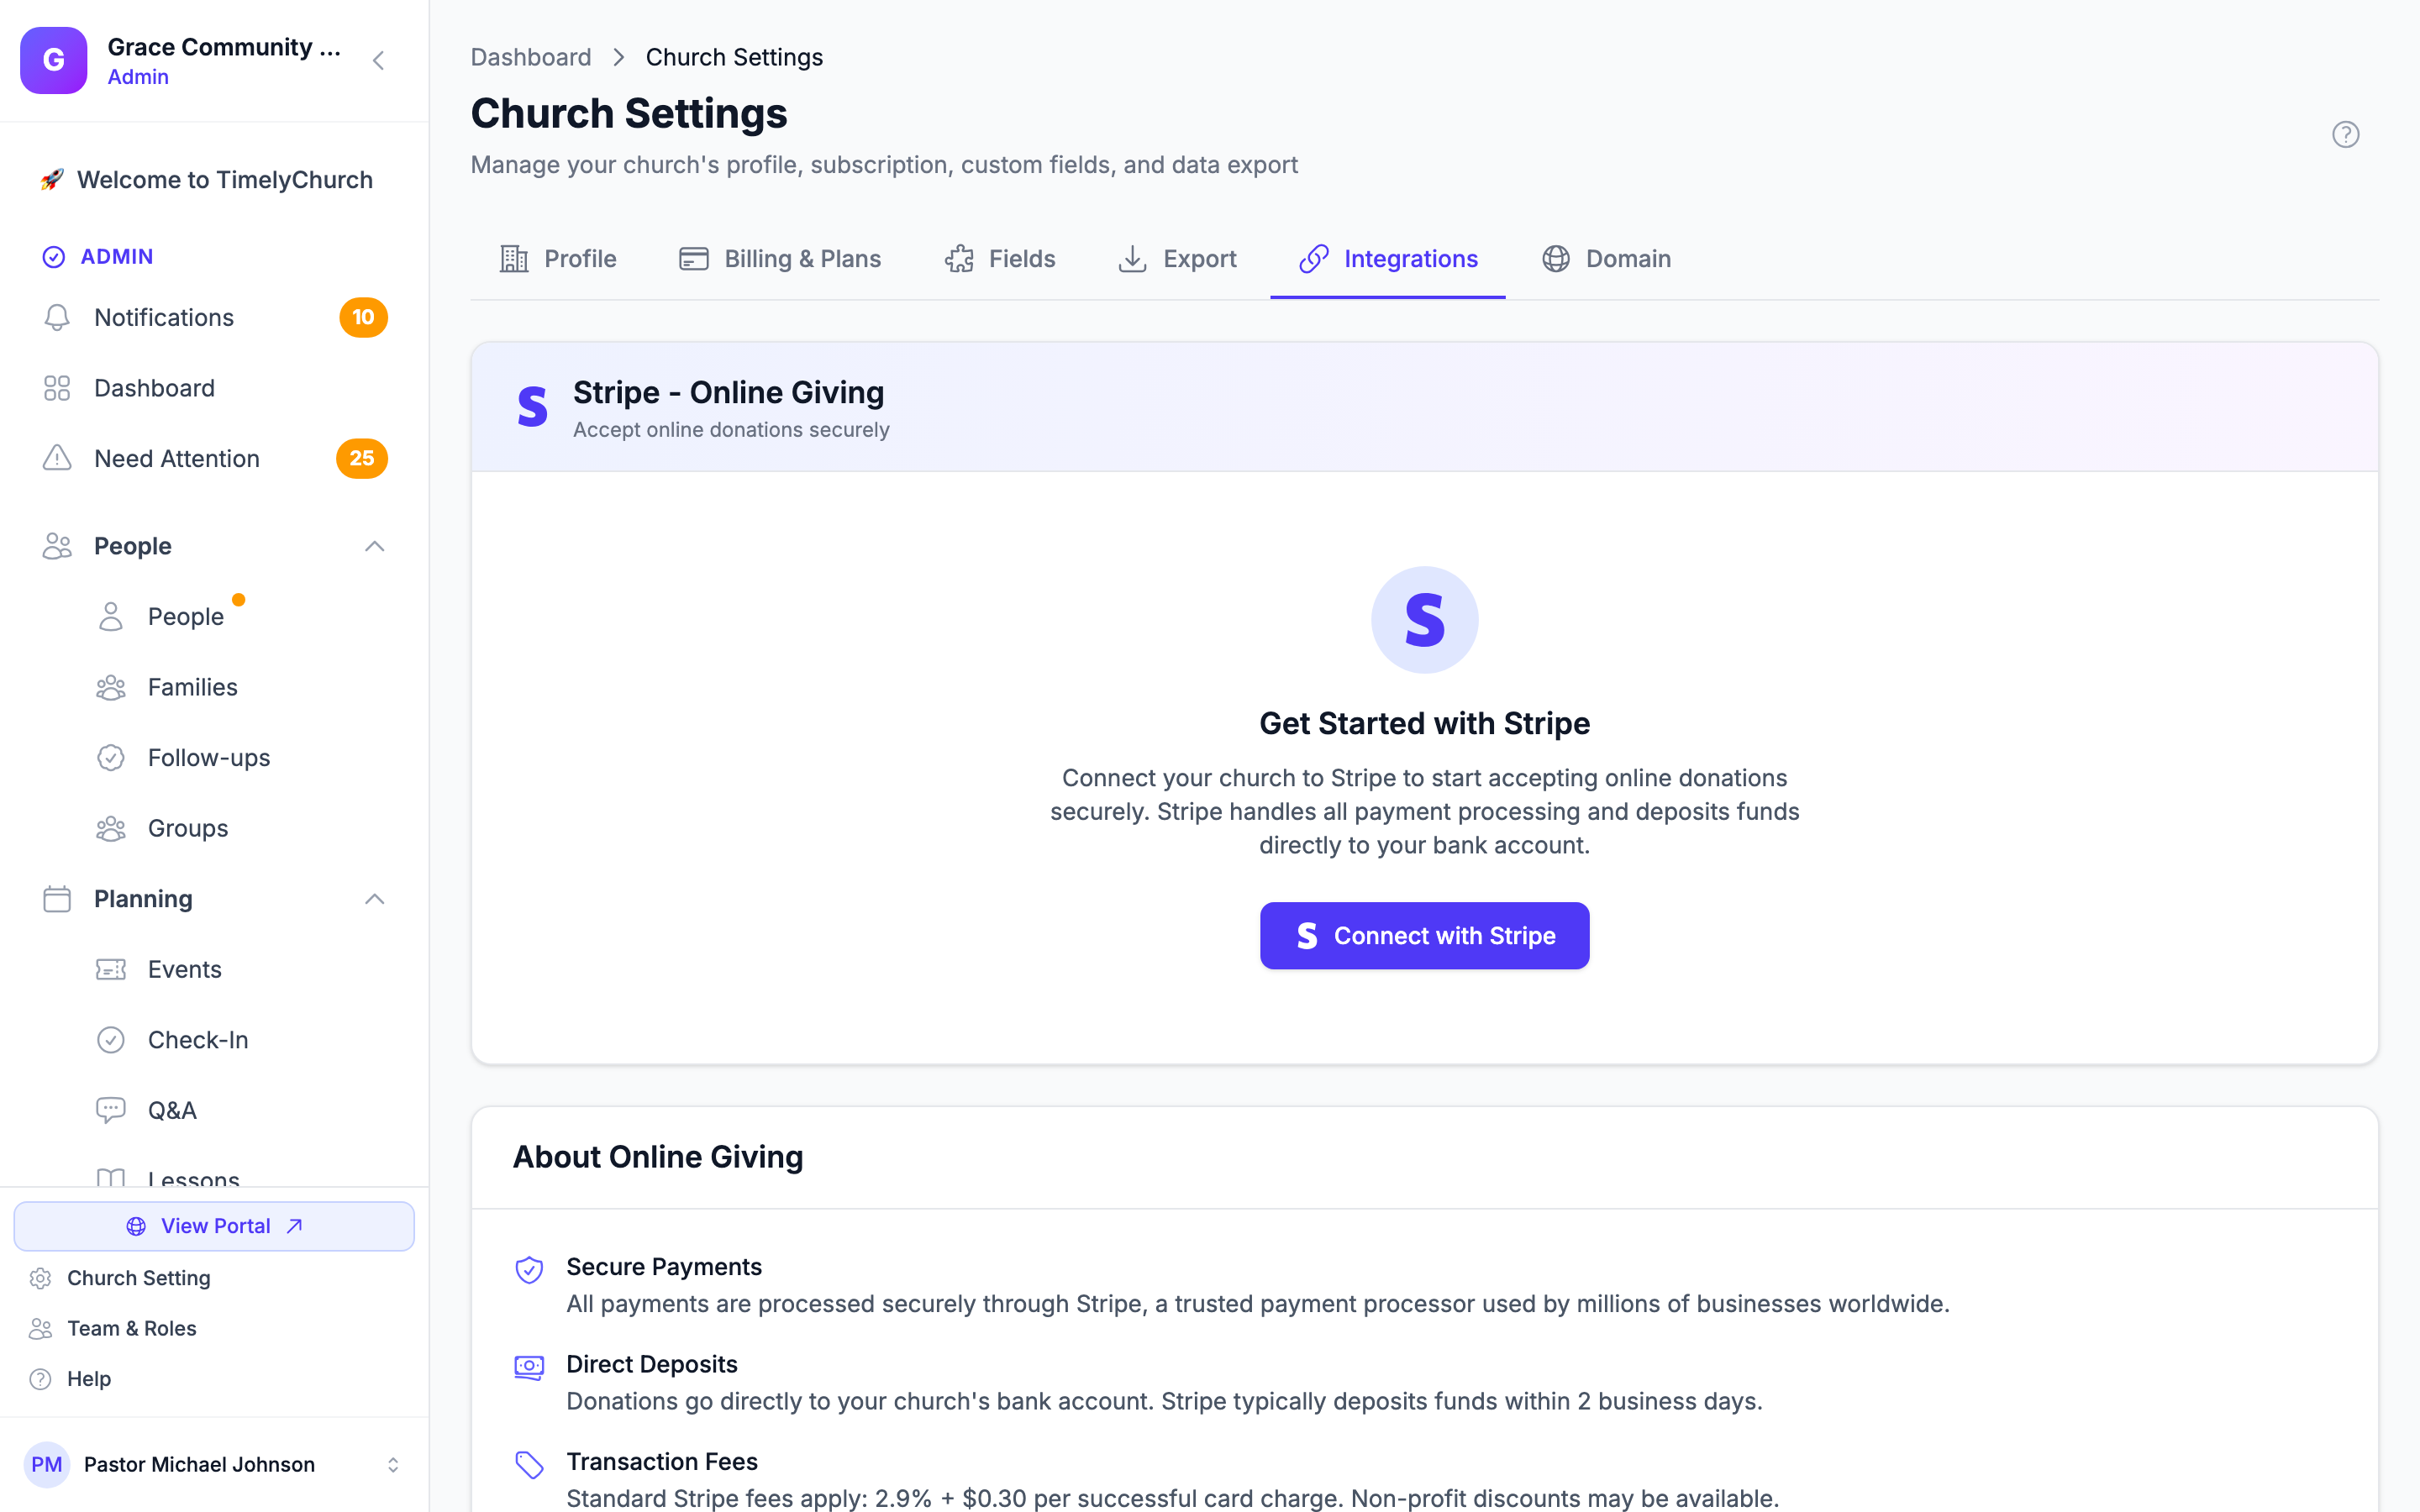
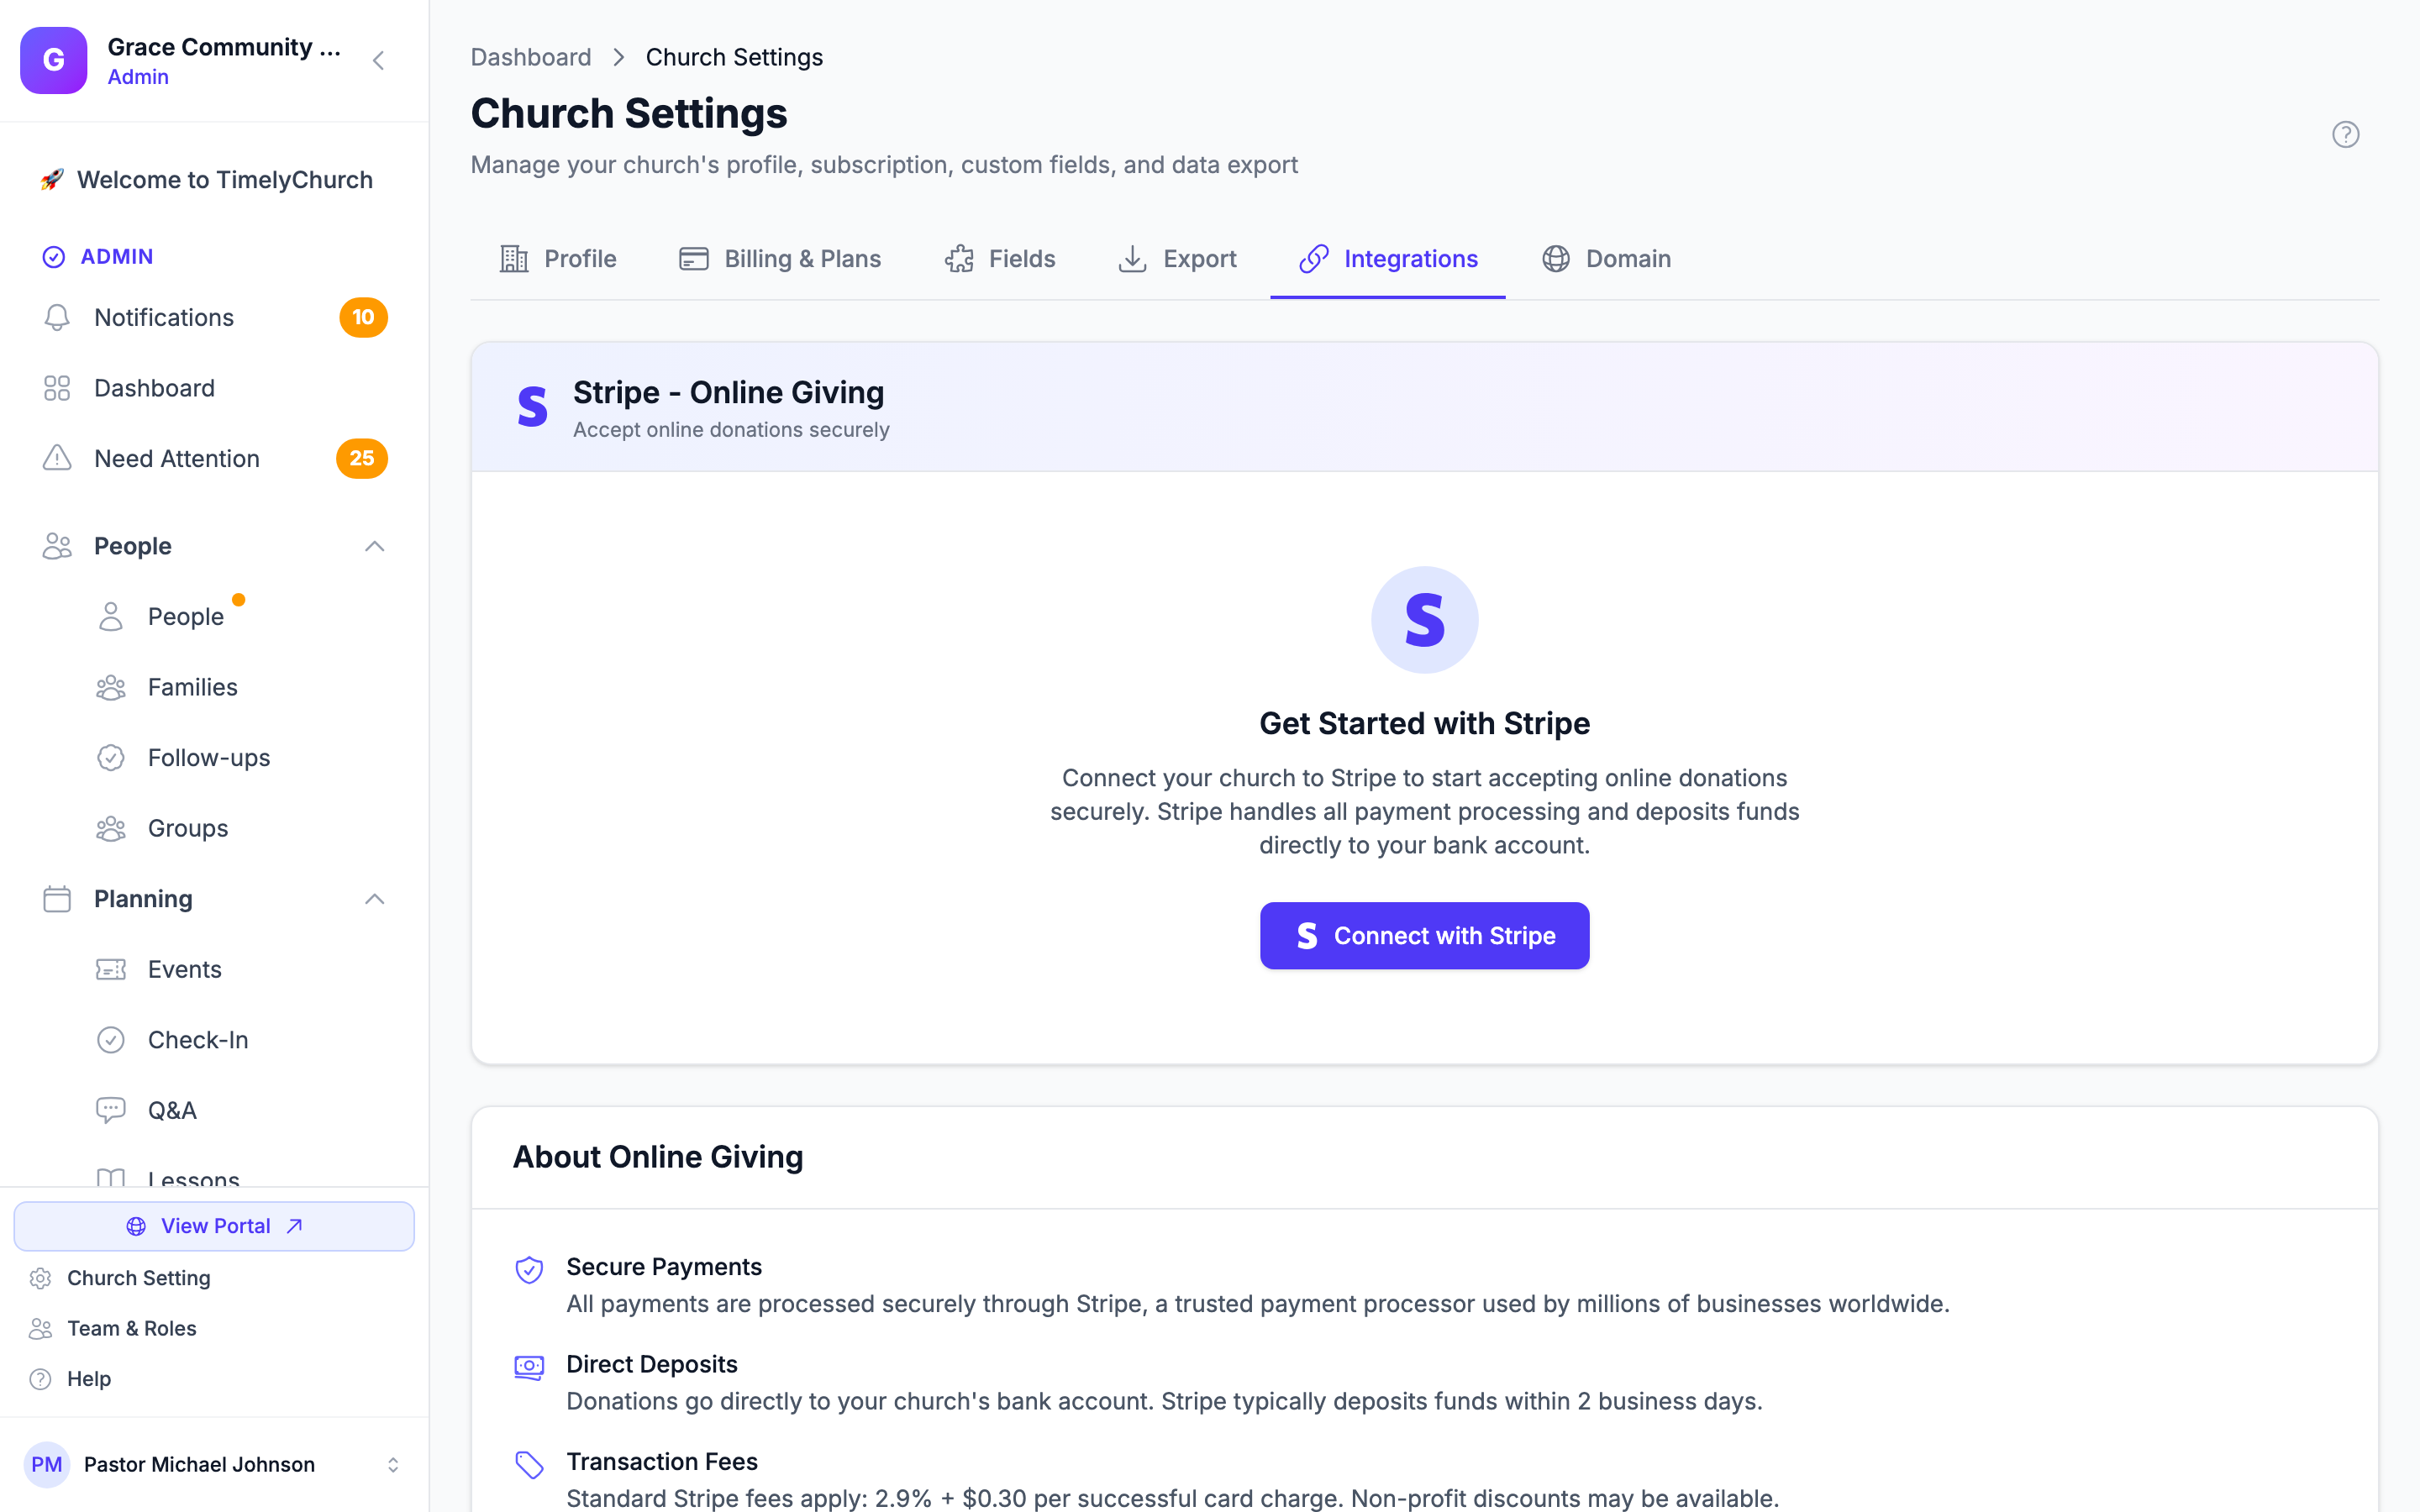
You'll see a Stripe - Online Giving card with a Get Started with Stripe message and a Connect with Stripe button.
Note: The Integrations tab also has a separate Telegram card for the bot and broadcasts -- that's a different integration. For online giving, use the Stripe - Online Giving card at the top.
Step 2: Click "Connect with Stripe"
This launches Stripe's official onboarding flow in your browser. You'll see Stripe's branding (not TimelyChurch's) -- that's normal. You're now talking directly to Stripe.
Local development note: Stripe Connect requires a public HTTPS URL. If you're running TimelyChurch on
localhost, the Connect with Stripe button returns you to the Integrations tab with a message explaining you need a public URL (use ngrok for testing, or deploy to a staging server). This shouldn't affect production users.
Step 3: Complete Stripe's Onboarding Form
Stripe will walk you through several screens. Be honest and accurate -- this is a financial onboarding and Stripe verifies the data.
Business Type
Select Non-profit (most churches qualify) or Company if your church is incorporated. Don't pick "Individual" -- you're operating as a church entity.
Legal Entity Information
- Legal name (must match your tax registration).
- EIN.
- Country of operation.
- Business address.
Representative / Authorized Signer
The person legally authorized to operate the bank account on behalf of the church. Typically the senior pastor, treasurer, or executive pastor. They'll need to provide:
- Name and date of birth.
- Home address (this is required by Stripe for KYC; it's not made public).
- Last 4 of SSN (for US churches; international varies).
- A photo of government ID (driver's license or passport).
Bank Account
Routing number and account number. Stripe will run small test deposits and withdrawals (a few cents) to confirm the account is valid -- you can check those in your bank statements within 1-2 business days.
Public-Facing Statement Descriptor
This is the text donors will see on their bank or credit card statements (for example, "GRACE BIBLE CHURCH"). Keep it short and unambiguous.
Step 4: Submit and Wait for Verification
After you submit, Stripe takes 1-3 business days to:
- Verify your EIN against IRS records.
- Verify the photo ID.
- Confirm the bank account via micro-deposits.
During this time, the Stripe card on the Integrations tab shows "Setup In Progress" with a status badge, and a three-item checklist (Details Submitted, Charges Enabled, Payouts Enabled). If anything is still outstanding, you'll see an Action Required note and a Continue Setup button. You can keep using the rest of TimelyChurch normally -- only online giving is paused.
You'll get an email from Stripe (and we sync the status to TimelyChurch automatically) when verification completes.
Step 5: Confirm "Ready to Accept Donations"
When verification is complete, the Stripe card on the Integrations tab shows:
- Status: Ready to Accept Donations (with a green check).
- Charges Enabled -- checked.
- Payouts Enabled -- checked.
You'll also see two helpful actions next to the status:
- Stripe Dashboard -- Takes you to your Stripe Express Dashboard where you can view payouts, refund a donation, or download transaction reports.
- Disconnect -- Disconnects your church from Stripe (use this only if you're switching processors or shutting down giving). You'll be asked to confirm first.
Step 6: Turn On Online Giving
Once Stripe is ready, an Online Giving card appears below the Stripe card on the Integrations tab. Switch Enable Online Giving to On to let members give through your giving page. When it's on, the card shows your Giving Page URL with a copy button.
Test it before announcing to your congregation:
- Copy your Giving Page URL from the Integrations tab and open it in a private/incognito window.
- Make a $1 test donation using a real credit card (you can refund it from the Stripe Dashboard afterward).
- Confirm the donation appears in TimelyChurch under Finances → Giving with the correct fund, amount, and donor.
What Happens After Setup
Once you're live:
- Donations made through your giving page are processed by Stripe.
- TimelyChurch records each donation against the donor's Person profile.
- Donations are deposited into the Fund the donor selected (General Fund, Building Fund, etc.).
- Stripe takes its standard processing fee from each donation (typically 2.9% + 30 cents for US cards). TimelyChurch does not add any platform fee on top of Stripe's.
- Stripe pays out the net amount to your bank account on a rolling schedule (typically every 2 business days for new accounts, faster as you build history).
- For year-end giving statements, donations linked to a Person in your directory are automatically included.
Troubleshooting
"Stripe Connect requires a public HTTPS URL."
You're running TimelyChurch on localhost. Stripe doesn't allow connecting from localhost URLs. For local development, use a tunnel like ngrok. For production, this error shouldn't appear -- if it does, contact support.
Verification was rejected. Stripe will email you with the specific reason -- usually a mismatched name/EIN or unclear photo ID. Fix the issue in Stripe's dashboard, resubmit, and the verification will re-run. TimelyChurch syncs the new status automatically.
Payouts aren't arriving. Check the Stripe Dashboard for the payout schedule and any holds. Stripe may temporarily hold funds for very new accounts or after unusually large donations.
A donor was charged but the donation isn't showing in TimelyChurch. Check Finances → Giving with the date filter set wide. If the charge succeeded in Stripe but isn't in TimelyChurch, contact support -- this usually indicates a webhook issue we can fix on our end.
I want to disconnect from Stripe. On the Integrations tab, click Disconnect on the Stripe card and confirm. After disconnecting, online giving is turned off and new donations stop processing immediately. Your existing donation records remain in TimelyChurch (we never delete history), and you can reconnect later.
Related Articles
- Trial and Plan Selection
- Church Settings
- Quick Start Checklist
- See the Giving & Donations section of the knowledge base for portal giving setup, fund management, and giving statements.
- See the Accounting section for how donations flow into your chart of accounts.