
Organizing Lessons with Curriculum Folders
As your lesson library grows, a flat list stops being useful. Folders in Drive give it structure -- "Preschool," "Elementary — Spring Quarter," "Youth: Romans" -- and they can hold lessons and files side by side, with folders inside folders when you need them. Open a folder and everything inside it is right there.
Browsing Folders
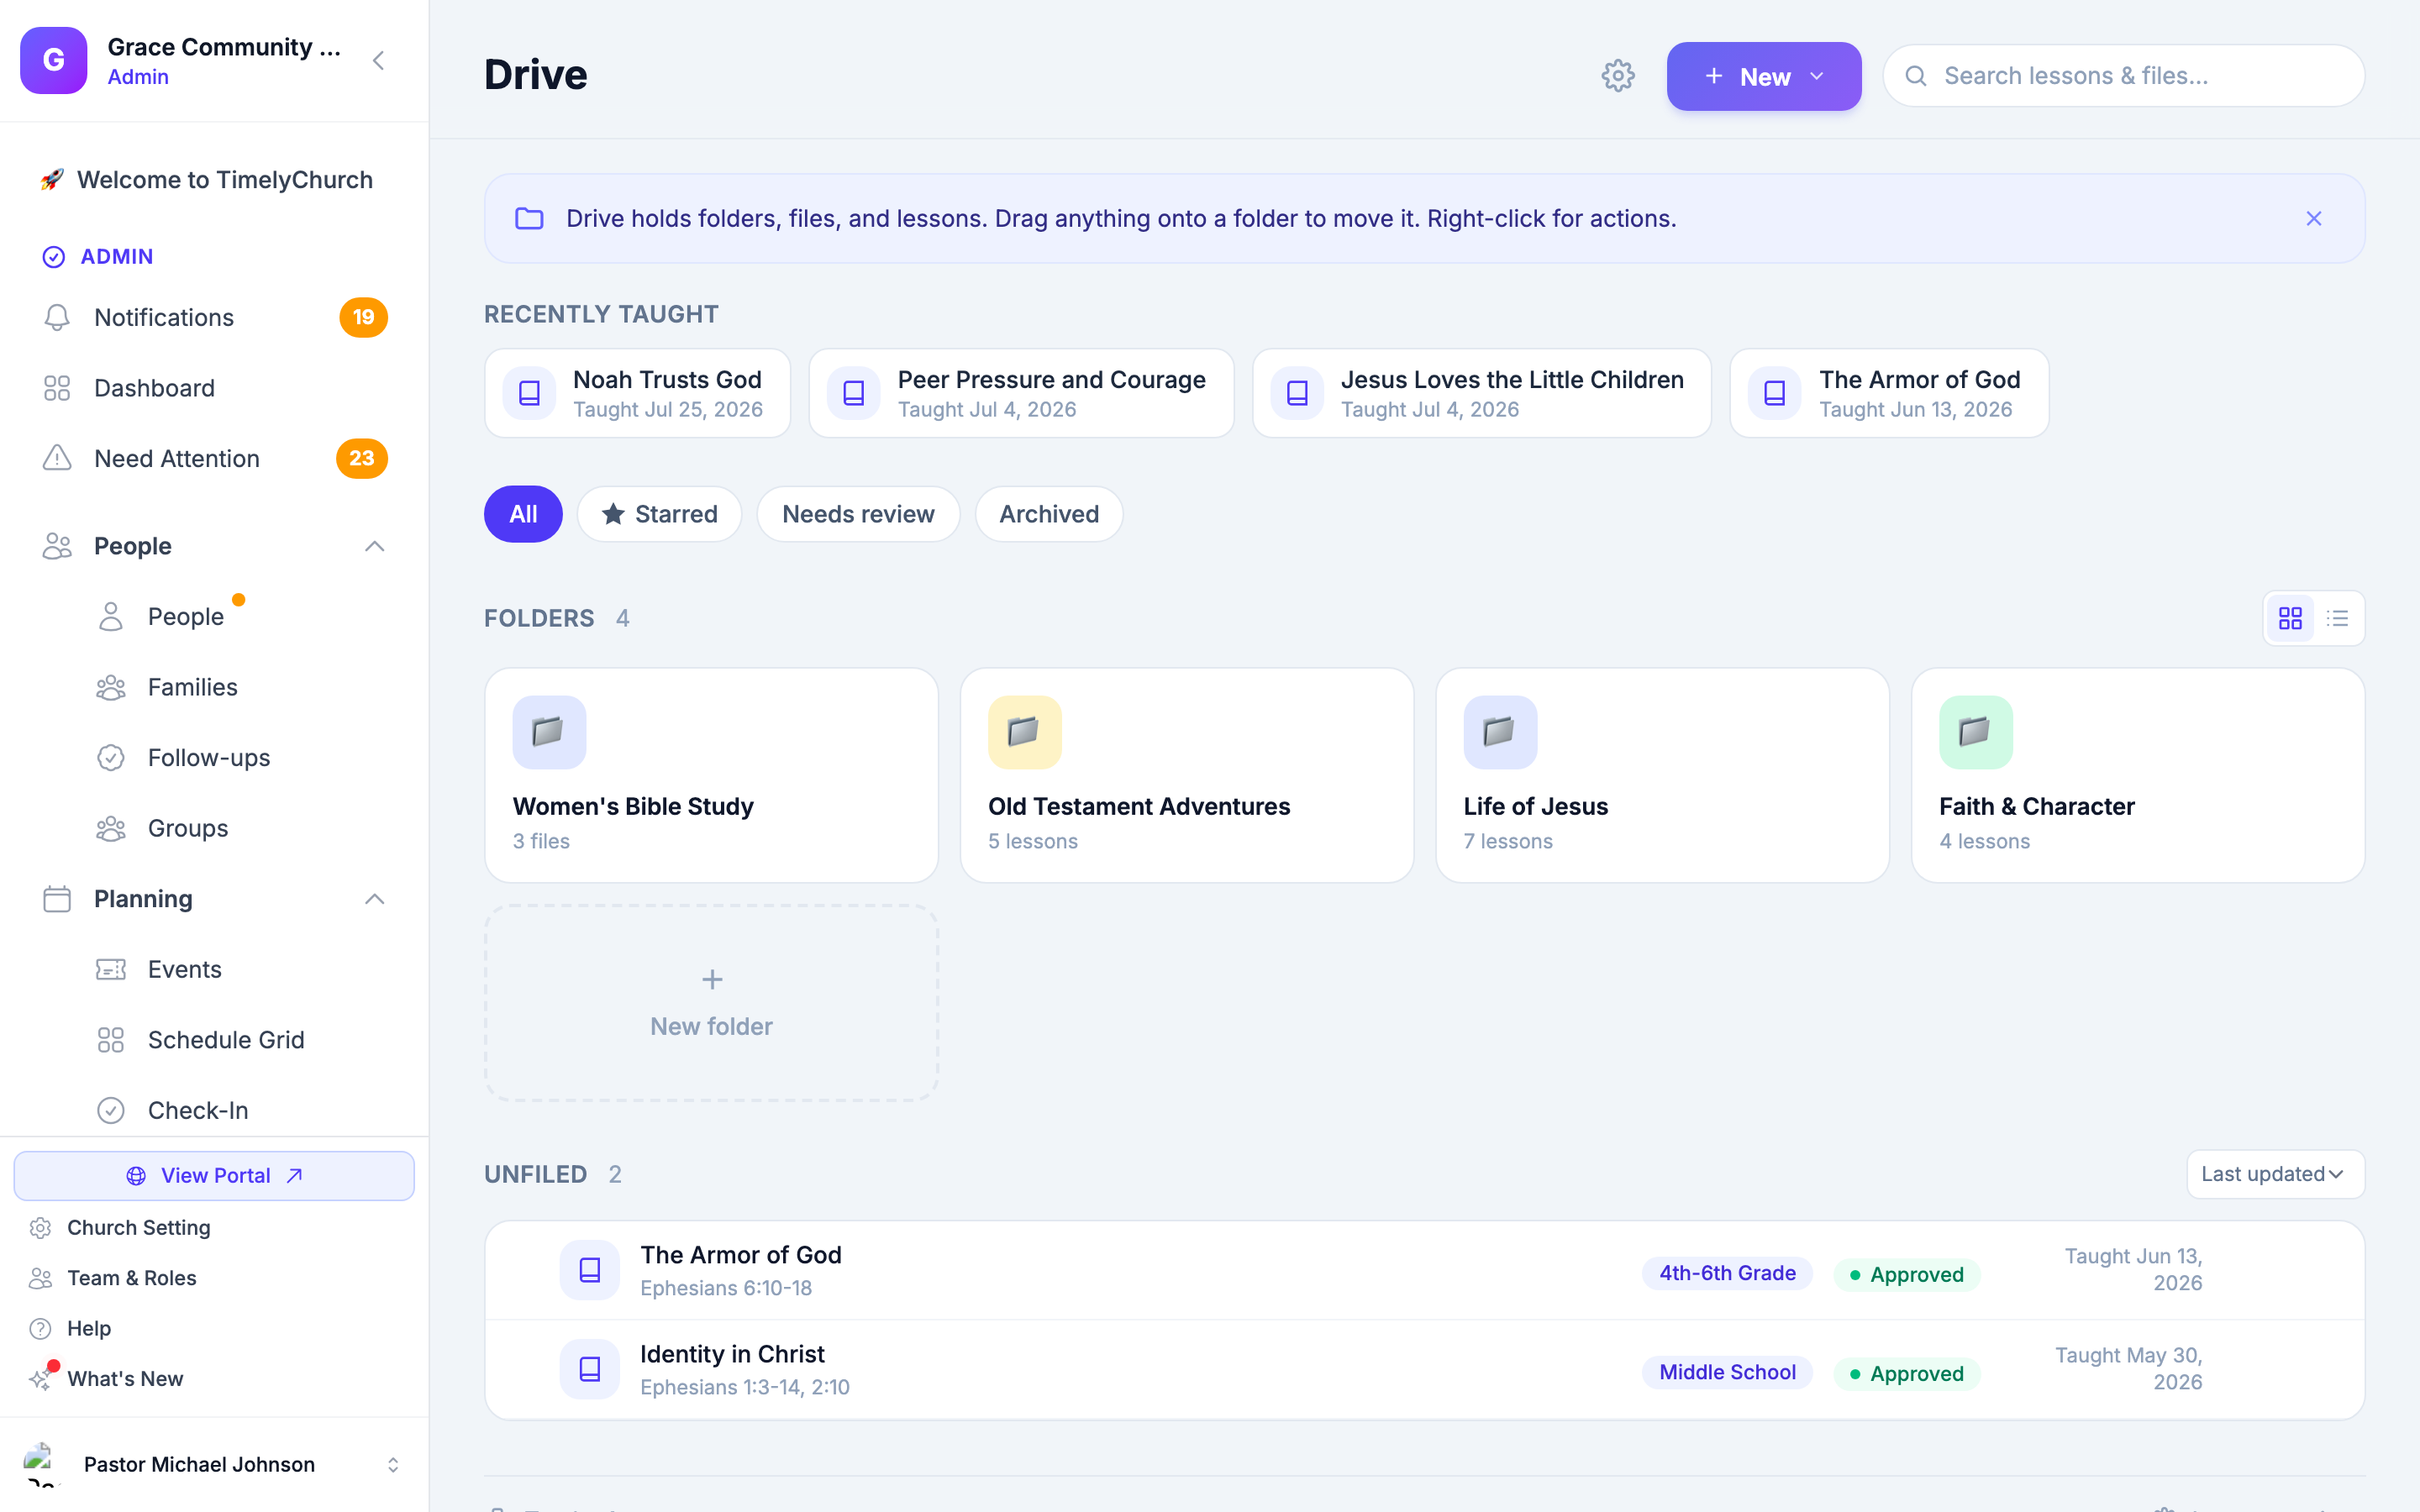
Open Drive from the Planning section of the admin sidebar. Your top-level folders appear as tiles (or rows in list view), each with its emoji, name, and how many lessons and files it holds. Anything not filed in a folder yet is gathered under Unfiled.
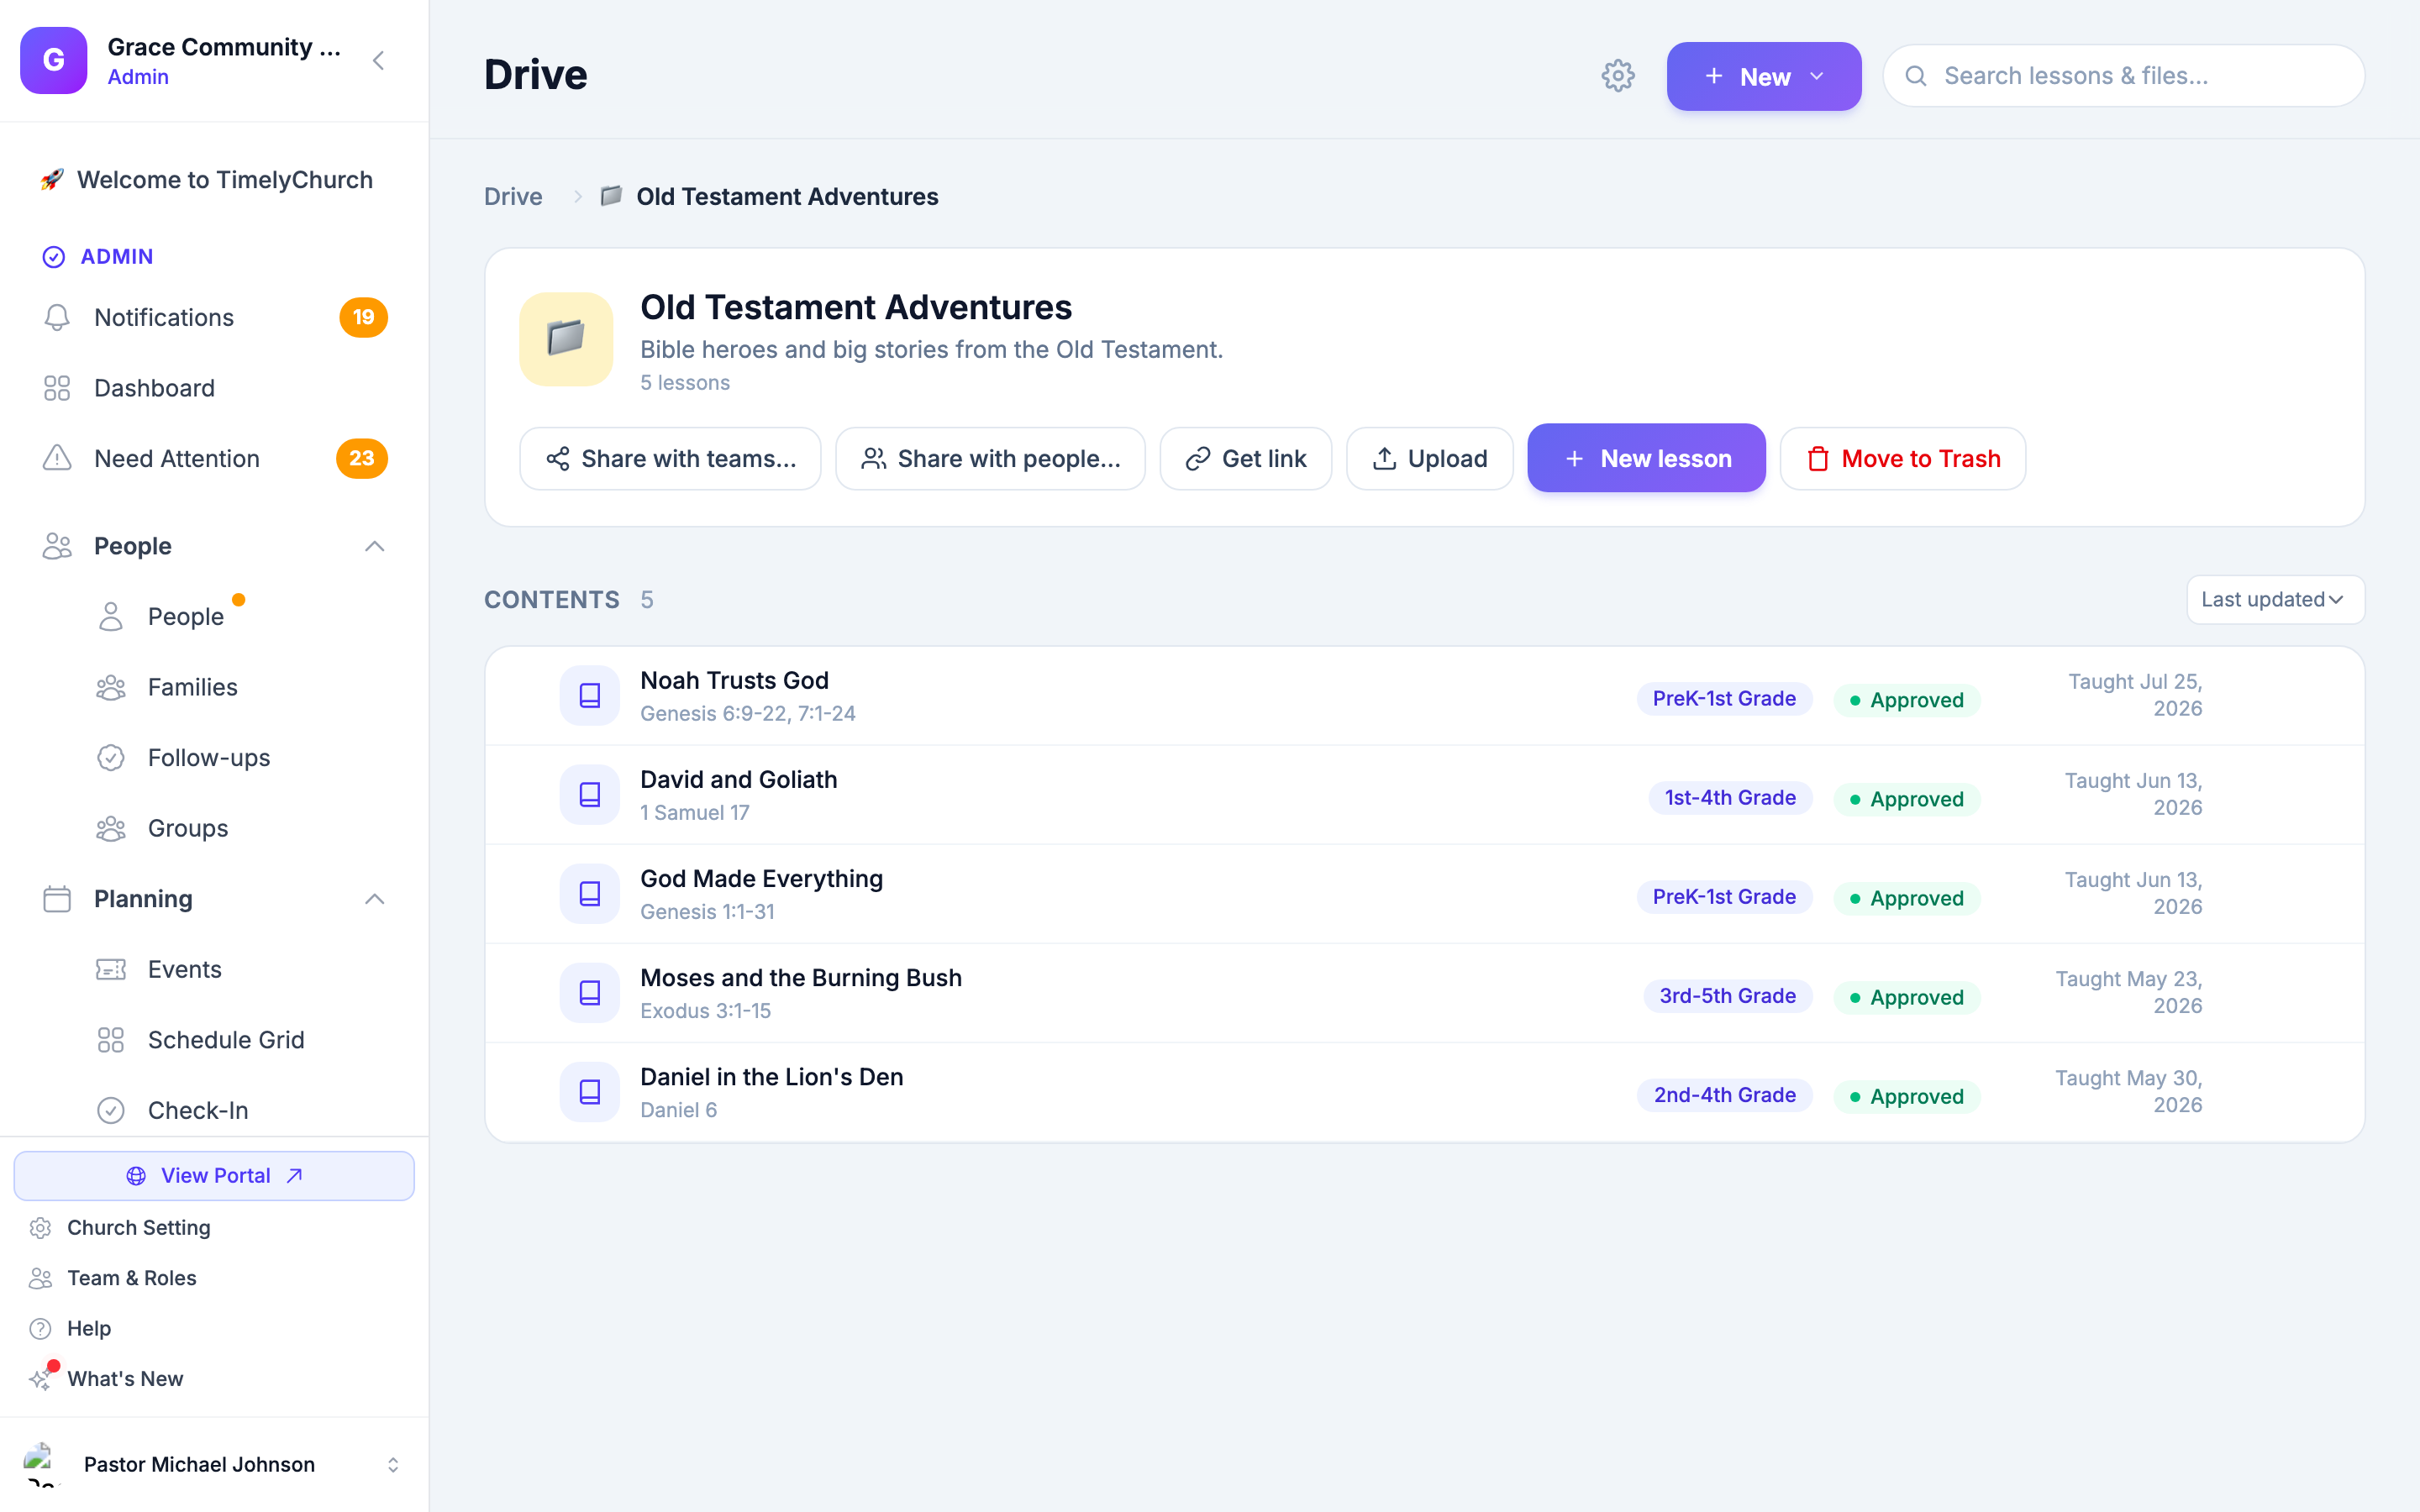
Click a folder to open it. You see what is inside it, one level at a time -- subfolders first, then lessons and files. The trail across the top (the breadcrumb) shows the whole path back to Drive; click any step to go back up.
Creating and Managing Folders
Folder management is available to people whose role can edit lessons.
- Create a folder -- choose New › New folder. Give it a Folder name, an Emoji, and a Color, then click Create folder. If you have a folder open, the new folder is created inside it.
- Rename or restyle -- open the folder and click the pencil next to its name (or double-click the name), or choose Edit folder from the folder's menu.
- Move a folder -- choose Move to folder… from the folder's menu and pick where it should go, or drag it onto another folder. A folder can't be moved inside itself or into one of its own subfolders.
- Move to Trash -- from the folder's menu, or the Move to Trash button inside the open folder. A folder can only be moved to the Trash when it is empty; otherwise TimelyChurch says what is still inside (for example "This folder still has 3 lessons inside it. Move or remove them before deleting it.").
Folders in the Trash can be restored from Drive's Trash page (see Managing the Lesson Library).
Putting Things in Folders
- New lessons and uploads go into the folder you have open. Inside a folder, use New lesson or Upload (or Upload files on an empty folder).
- Drag any lesson, file, or folder onto a folder tile, a folder row, or a step of the breadcrumb.
- Move to… -- on a tablet or phone, use the item's Move to… action (or select several items and click Move). The Move window has a Find a folder… search, Unfiled (no folder), and New folder to create one on the spot, then Move here.
- On the lesson itself -- while editing a lesson, the Curriculum field chooses which folder it lives in.
Working with Files
Files -- a permission slip, a photo, a worksheet -- live in folders right alongside lessons.
- Preview -- click a file to preview PDFs, images, and videos without downloading them. PowerPoint files are download-only for now.
- Rename -- choose Rename on the file. "Only the name shown in Drive changes. The file itself, and any link you have already shared, keep working."
- Download, Star, Move to…, and Move to Trash work the same as for lessons.
See Uploading Large Lesson Materials for how big files are handled.
Sharing a Folder
A folder's menu (or the buttons at the top of an open folder) offers three ways to share it:
- Share with teams… -- give a whole team access in the member portal. See Share a Drive Folder with Your Team.
- Share with people… -- give specific people access. See Share a File or Folder with a Specific Person.
- Get link -- a link anyone can open, with an optional PIN and expiry. See Share a File or Folder with a Link.
The Lesson Page: About + Materials
Open any lesson and you get everything about it on one page -- its scripture, objectives, supplies, and parent take-home fields -- alongside its Materials.
Attached PDFs, images, and videos preview right on the page, so you can confirm you've got the right handout before class without downloading a stack of files. Click Add material to upload a file or add an External link; give it a short label under What is this? (for example "Teacher study guide") so people know which one to open. You can change that label later with Edit note.
Making the Categories Your Own
Folders organize your lessons; categories and audiences label them. Both are yours to shape under Lesson settings (the gear icon at the top of Drive):
- Categories -- rename, recolor, add your own, or deactivate ones you don't use.
- Audiences (age ranges) -- define the age bands your ministry actually uses, each with a name, an emoji, a color, and an age range (for example, "Kids 0–11," "Youth 12–18").
These are what the lesson forms offer, so setting them up once makes every new lesson quicker to file.