
Person Profile Overview
Every person in your TimelyChurch directory has a detailed profile page. This is your one-stop view for everything about that individual -- their personal information, family connections, attendance history, giving records, group involvement, notes, follow-up tasks, and more. The profile is organized into tabs so you can quickly find what you need.
Opening a Person's Profile
- Go to People from the left sidebar.
- Click on any person's name in the list.
- Their full profile will open.
Profile Header
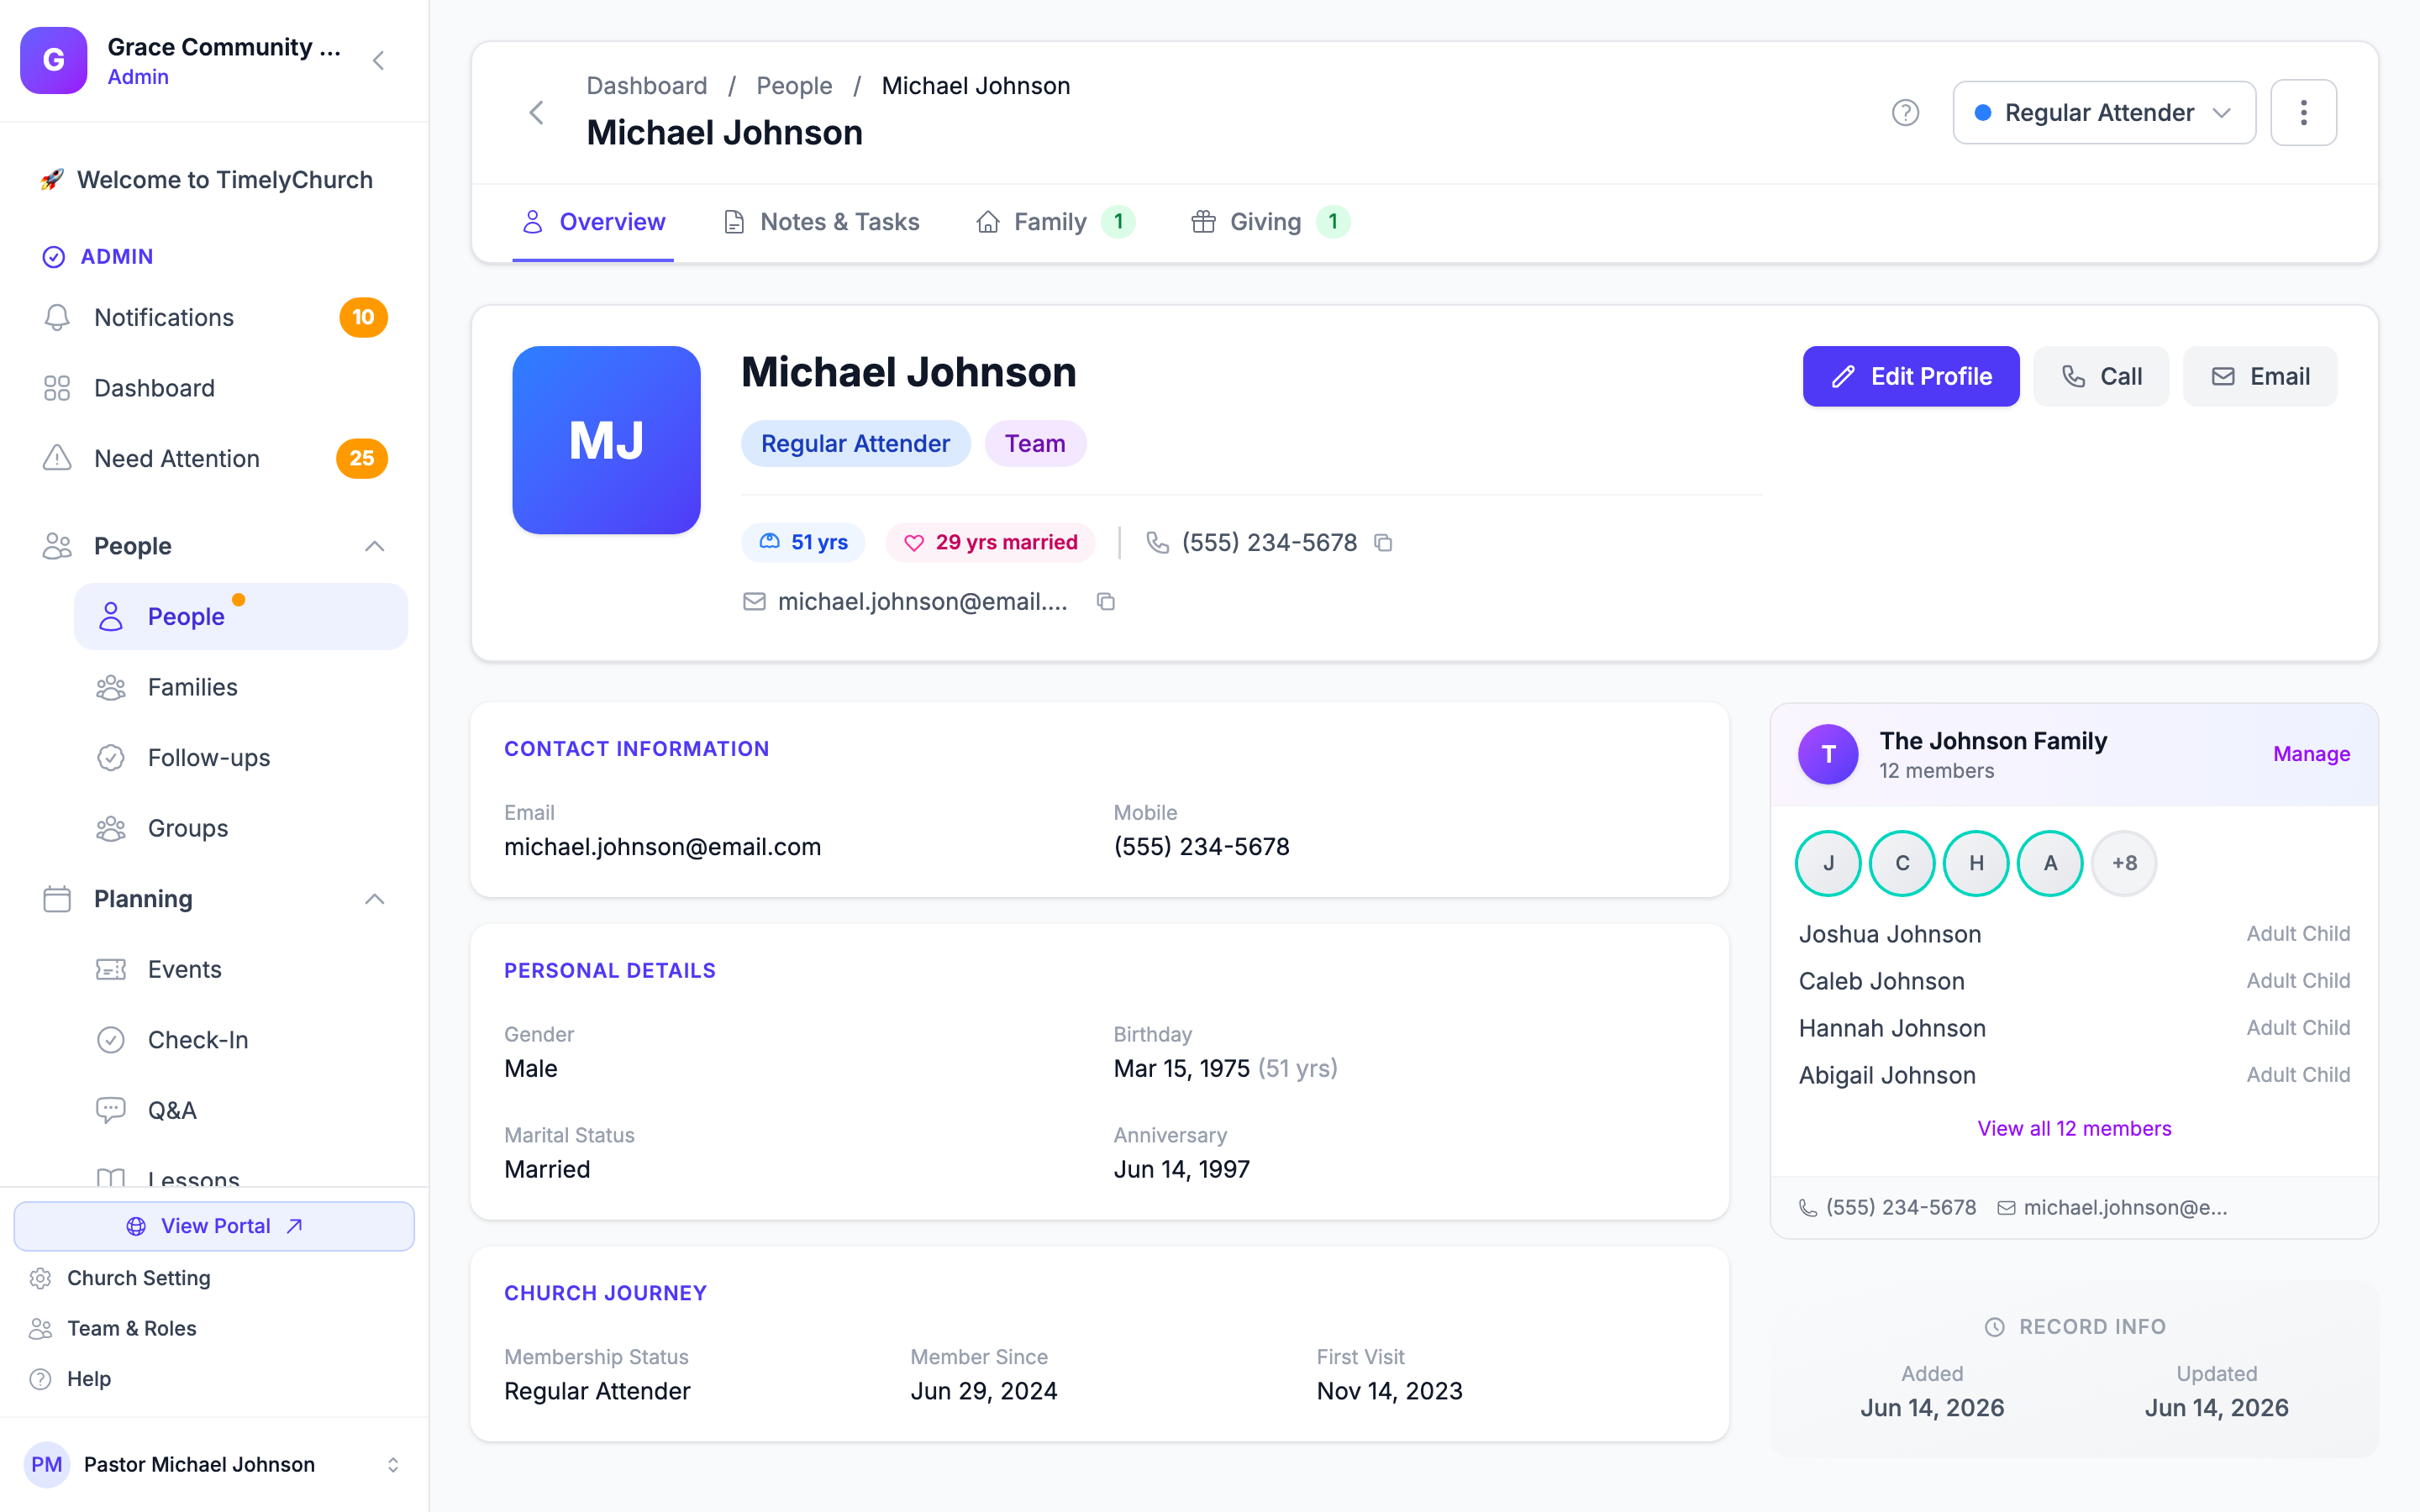
At the top of the Overview tab you will see this person's summary card:
- Profile Photo -- The person's photo (or their initials if no photo has been uploaded). You can upload, change, or remove the photo while the profile is in edit mode.
- Full Name -- Including prefix (Mr., Mrs., Dr., etc.), first name, middle name, last name, suffix (Jr., Sr., III, etc.), and nickname.
- Membership Status Badge -- A colored badge showing their current status. The badge label matches whichever status is currently set (Member, Regular Attender, Visitor, Participant, In Progress, No Longer Member, Inactive, Former, or Campaign Donor).
- Active/Inactive Status -- Whether this person is currently active in your database.
- Edit Profile button -- Switches the Overview tab into edit mode so you can update fields inline, then Save Changes or Cancel.
- Status button -- Next to the Actions menu at the top of the profile. If you can edit people, click it to open Change Status and pick Member, Regular Attender, Visitor, Participant, In Progress, or No Longer Member. Choosing No Longer Member opens Record Departure, where you enter the Date Left, a Reason, and optional Notes. The other statuses are set from the profile form.
- Actions Menu -- The three-dot menu opens quick actions (see Actions Available from Any Profile).
- Consent not on file -- An amber badge under the name of a child (under 18) whose parent or guardian has not yet given consent for the church to store allergy and medical information. See Allergy and Medical Information for Children below.
The Tabs
A profile has up to seven tabs across the top. The first three always appear; the rest only show when there is relevant data (and Giving depends on your plan):
- Overview -- always shown
- Notes & Tasks -- always shown
- Family -- always shown
- Involvement -- appears when the person is in any group, class, small group, or serving team
- Attendance -- appears when there are check-ins or attendance records
- Giving -- appears when your plan includes Giving
- Forms & Registrations -- appears when the person has form submissions or event registrations
Many tabs display a small count badge (for example, the number of notes and pending tasks, family members, or donations).
Overview Tab
The Overview tab contains all the core personal information for this person, shown in a clean read-only layout. Click Edit Profile to switch into edit mode, make your changes, and then click Save Changes. Fields are organized into sections:
Name
In edit mode, click the pencil next to the name to change:
- Prefix -- Mr., Mrs., Ms., Miss, Dr., Rev., or Pastor
- First Name, Middle, Last Name
- Suffix -- Jr., Sr., III, etc.
- Nickname -- What they go by
Contact Information
- Email (primary) and Secondary Email
- Mobile, Home Phone, and Work Phone (with optional extension)
- Address -- Street, Apt/Suite, City, State, ZIP, and Country
Personal Details
- Gender -- Male or Female. (TimelyChurch currently supports these two values only. If you import data from another church app that uses additional gender labels, those values will need to be mapped to Male, Female, or left blank.)
- Birthday -- With automatically calculated age
- Marital Status -- Single, Married, Divorced, or Widowed
- Anniversary
Church Journey
- Membership Status -- One of nine values:
- Member -- Officially a member of the church
- Regular Attender -- Attends regularly but has not pursued formal membership
- Visitor -- Has attended at least once; default for new contacts
- Participant -- Engaged in church life (programs, classes) without being a member or regular attender
- In Progress -- Currently going through membership preparation
- No Longer Member -- Was a member; relationship has ended (use the Departure Details below to record why)
- Inactive -- Still in your records but not currently engaged
- Former -- A historical attender or member you are keeping for the record
- Campaign Donor -- Connected to your church through a campaign or one-time gift, not regular attendance
- Member Since -- When they officially became a member
- First Visit -- When they first attended
- Baptism Date (labelled Baptism in edit mode)
- How They Found Us (labelled Found Us Via in edit mode) -- Referral source (friend, website, drove by, etc.)
- Previous Church
- Departure Details -- Shown only when the status is No Longer Member:
- Date Left -- The date their active relationship ended
- Reason -- Pick one of: Moved, Deceased, Personal Decision, Church Discipline, Transferred to Another Church, or Other
- Notes -- Free-text context (a transfer, the new church name, pastoral context, etc.). Limited to 1,000 characters.
Tip: Changes to Membership Status and to the Departure Details are recorded in the audit log along with the staff member who made the change. This gives leadership a clear paper trail for transfers and discipline decisions.
Emergency Contact
- Contact Name
- Contact Phone
- Relationship -- Spouse, Parent, Child, Sibling, Friend, or Other
Directory Privacy
These settings control what information appears when this person is shown in the member-facing church directory:
- Show me in directory -- Whether this person appears at all
- Show email -- Whether their email is visible
- Show phone -- Whether their phone number is visible
- Show city -- Whether their city is visible
- Show photo -- Whether their profile photo is visible
- Show birthday -- Whether their birthday is visible
- Show anniversary -- Whether their anniversary is visible
- Show on public website -- A SEPARATE opt-in (off by default) that publishes this person to your church's public website People section. This is distinct from the internal member directory above: the directory toggles only affect what fellow members see when signed in, and turning them on never puts anyone on the open internet. Only people you explicitly switch this on for ever appear on the public site, and a known minor's photo, email, and phone are always withheld even when opted in.
Tip: Directory privacy settings give each person control over what their fellow church members can see. Encourage your members to review these settings. The internal directory toggles and the public-website opt-in are independent -- a person can be in the member directory but not on the public website, and vice versa.
Additional Information (Custom Fields)
The Additional Information section shows any custom fields your church has created. These might include things like spiritual gifts, t-shirt size, allergies, volunteer interests, and anything else your church tracks. In view mode only fields with a value are listed; in edit mode every active custom field is available. See Custom Fields for details on setting these up.
Allergy and Medical Information for Children
For a child (under 18), TimelyChurch stores allergy and medical information -- such as the Allergies and Medical Conditions custom fields -- only after a parent or guardian has given consent. A parent gives consent in the member portal: on My Family, they edit the child's information and tick the consent box above the medical fields.
Until consent is on file, the child's profile shows the Consent not on file badge, and saving a value in one of those fields is refused with the message "Guardian consent is required before saving allergy or medical information for a child." Values that were already saved before this rule stay visible.
Notes & Tasks Tab
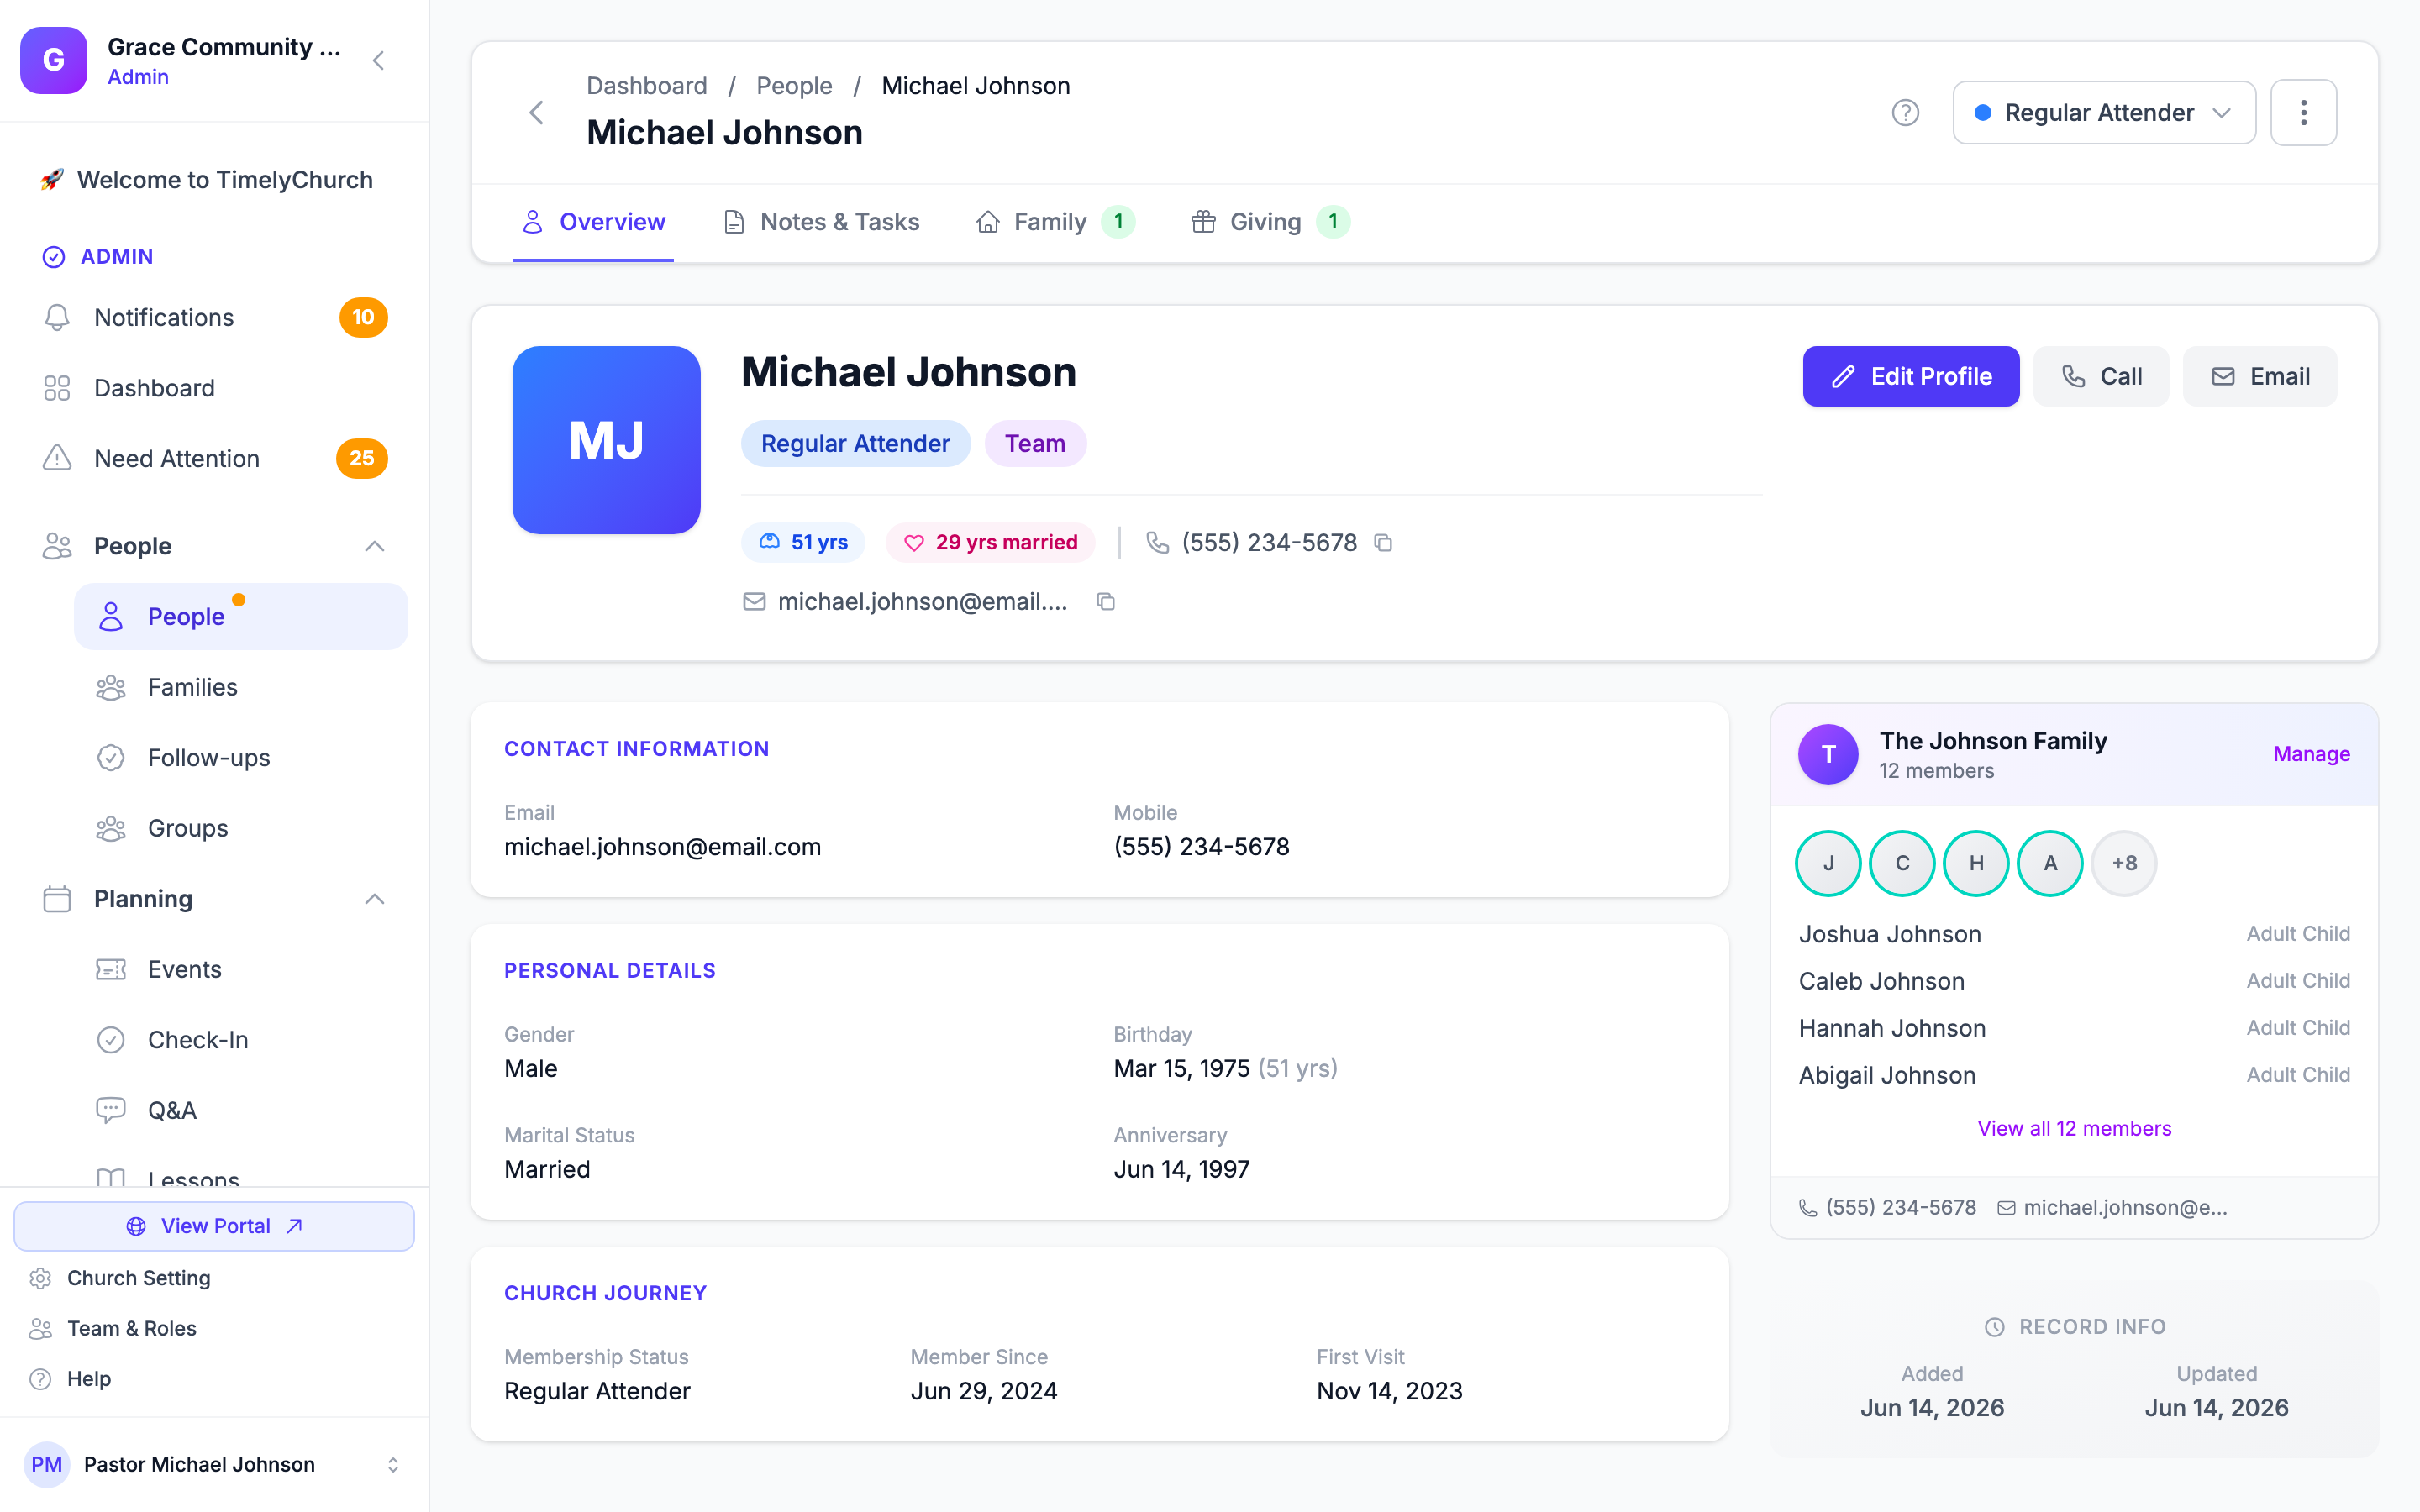
The Notes & Tasks tab is where your team records important information about interactions with this person and tracks any follow-up tasks. It has two sections: Notes at the top and Follow-ups (tasks) below. The tab's count badge reflects the number of notes plus any pending follow-ups.
Adding a Note
- Click Add Note in the Notes section.
- Choose a Type: General Note, Pastoral Care, Prayer Request, Phone Call, Visit, or Meeting.
- Type the Note Content.
- Choose Who can see this note? (the default is All Administrators):
- Private (Only me) -- Only you can see this note
- Shared with specific people/groups -- Share with specific team members, groups, or roles
- All Administrators -- All church admins can see this note
- Everyone -- Everyone in the church can see it
- Optionally, under Follow-up (optional), set a Date and choose who to Assign To.
- Click Add Note.
Managing Notes
- Edit a note by clicking the edit icon
- Delete a note by clicking the delete icon
- Filter notes by type using the Filter menu
- If a note has an open follow-up date, you can mark that follow-up complete right from the note
Tip: Use note visibility settings thoughtfully. Pastoral care notes should typically be set to "Private (Only me)" or shared only with pastoral staff.
Follow-up Tasks
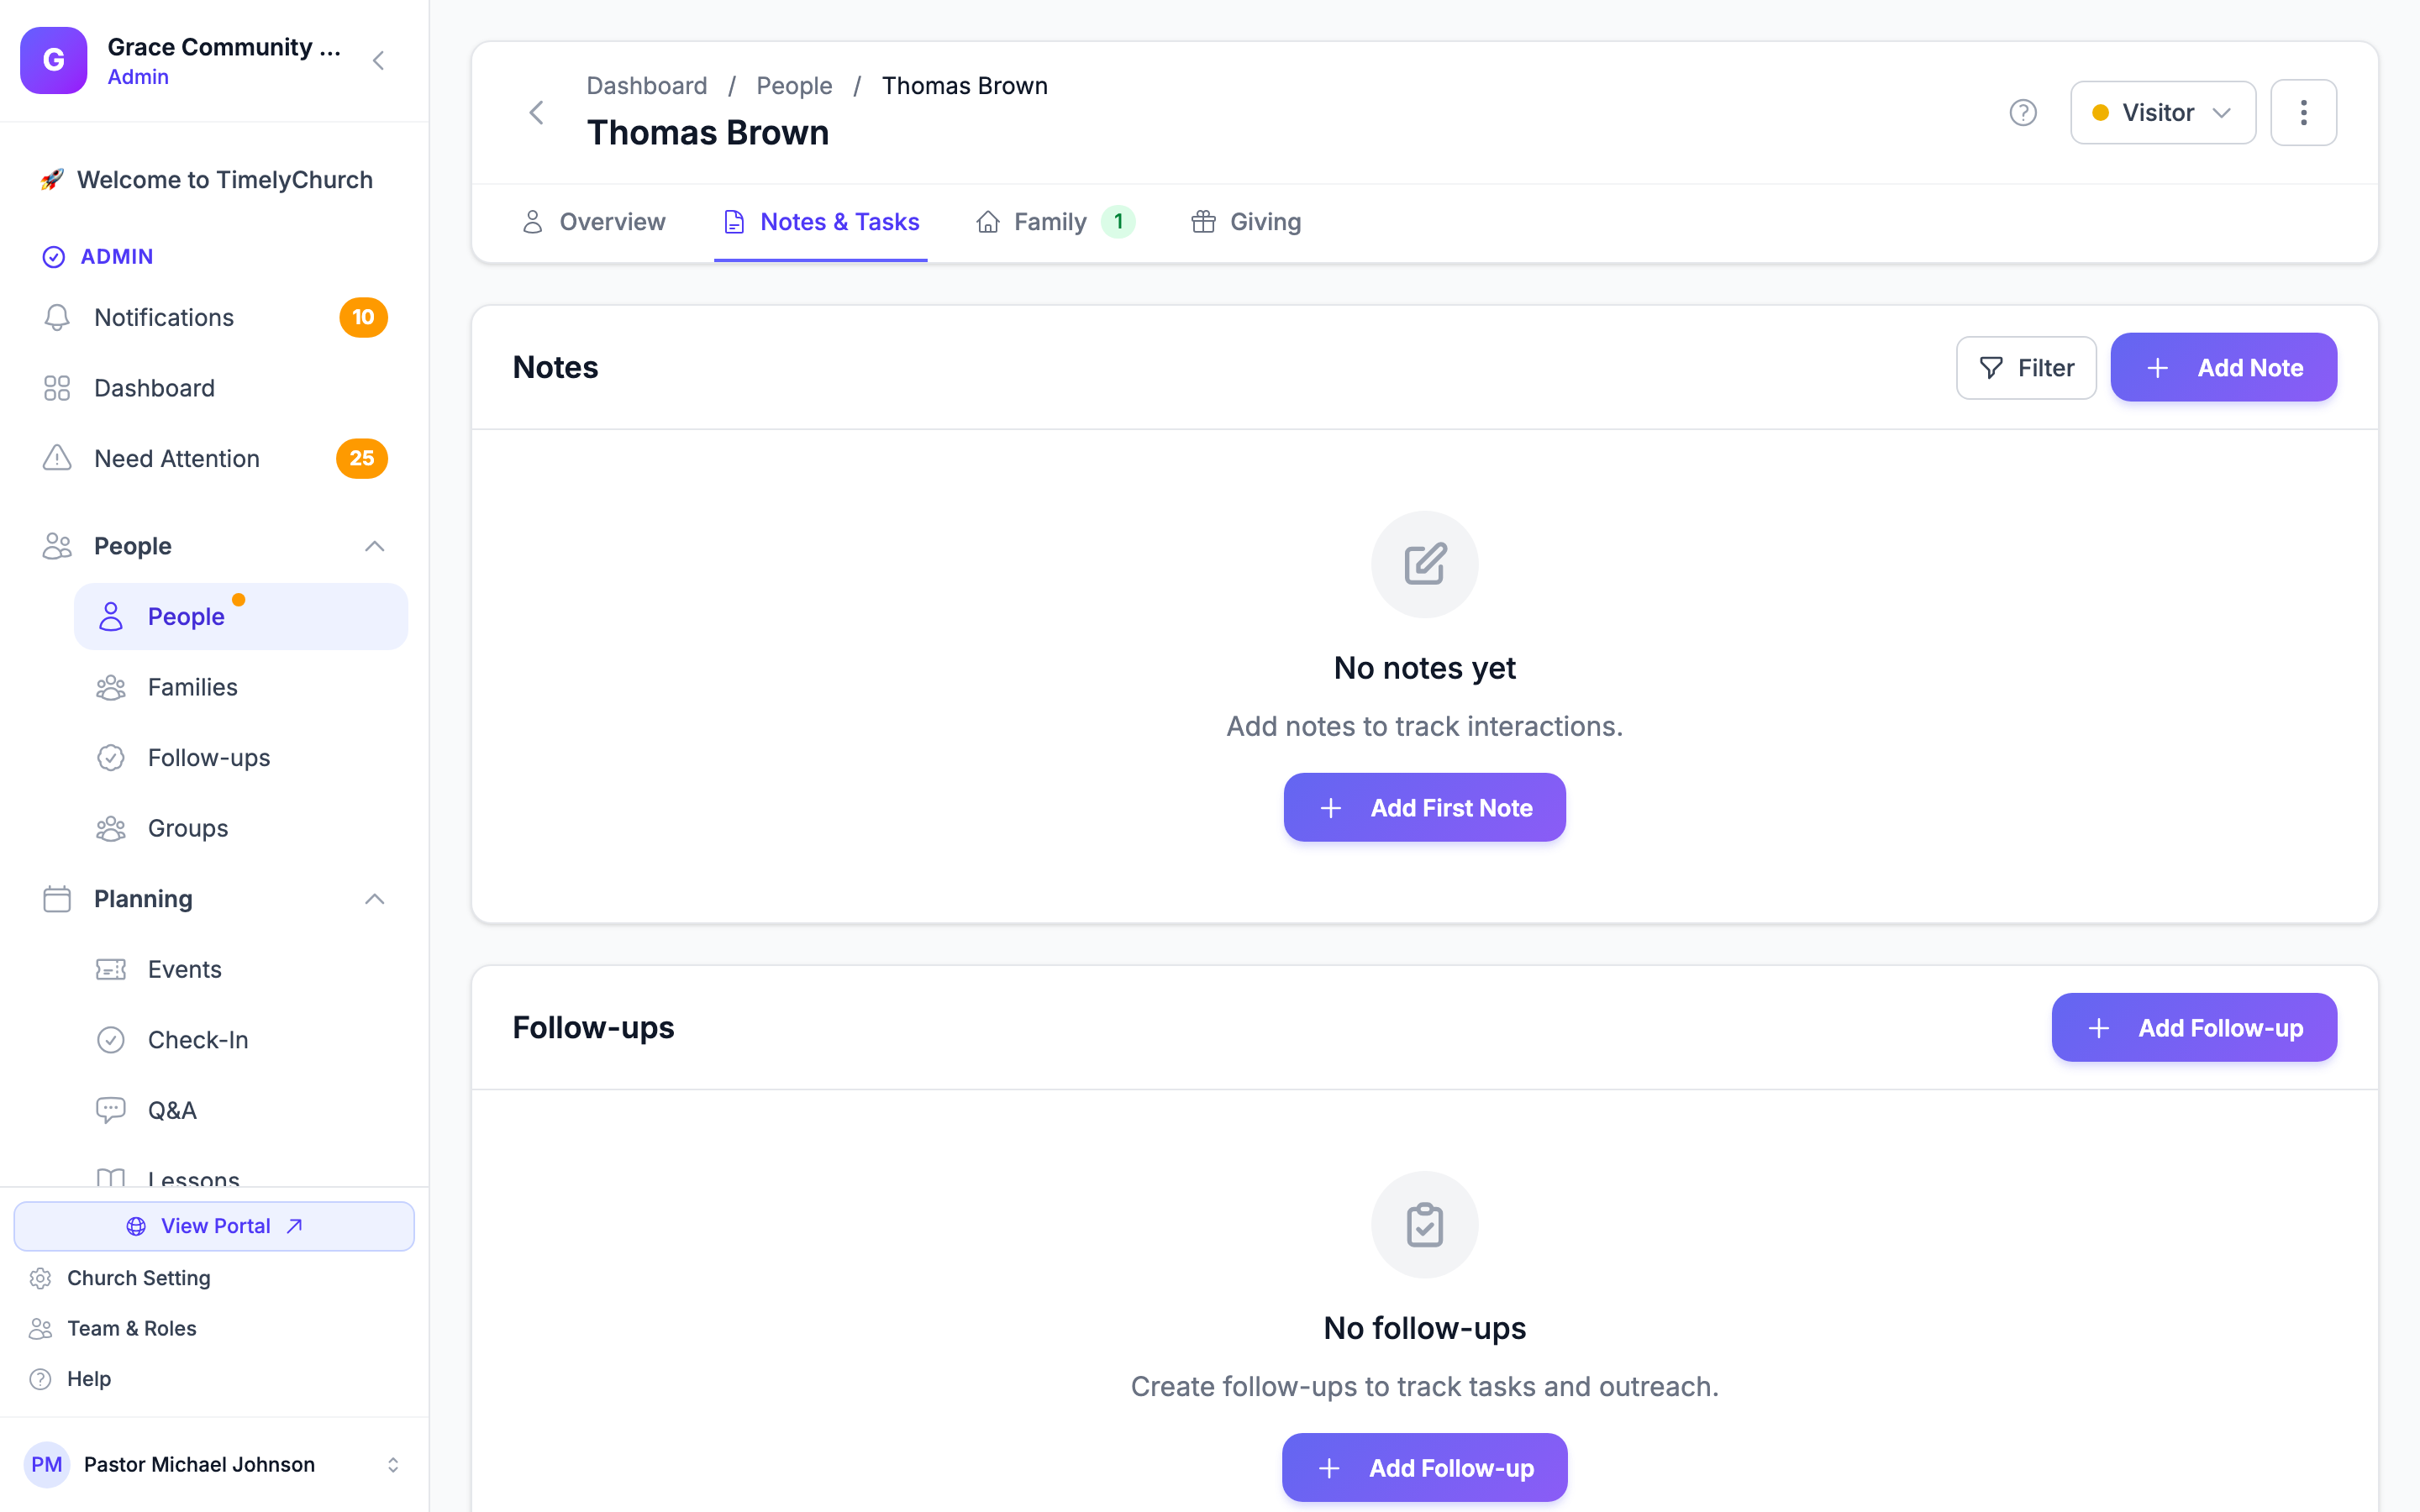
Below the notes, the Follow-ups section lists all follow-up tasks associated with this person. Click Add Follow-up to create one. Each follow-up includes:
- Category -- What kind of follow-up (General, Pastoral Care, Home Visit, Hospital Visit, First-Time Visitor, etc.)
- Method -- How to follow up (Phone Call, In-Person Visit, Message/Email, Meeting)
- Priority -- Low, Normal, High, or Urgent
- Due Date -- When it should be completed
- Assign To -- Which team member or person is responsible
- Status -- Pending, In Progress, Completed, or Cancelled
From here you can create new follow-ups, edit existing ones, mark them as complete, or delete them. For full details, see Follow-Ups.
Family Tab
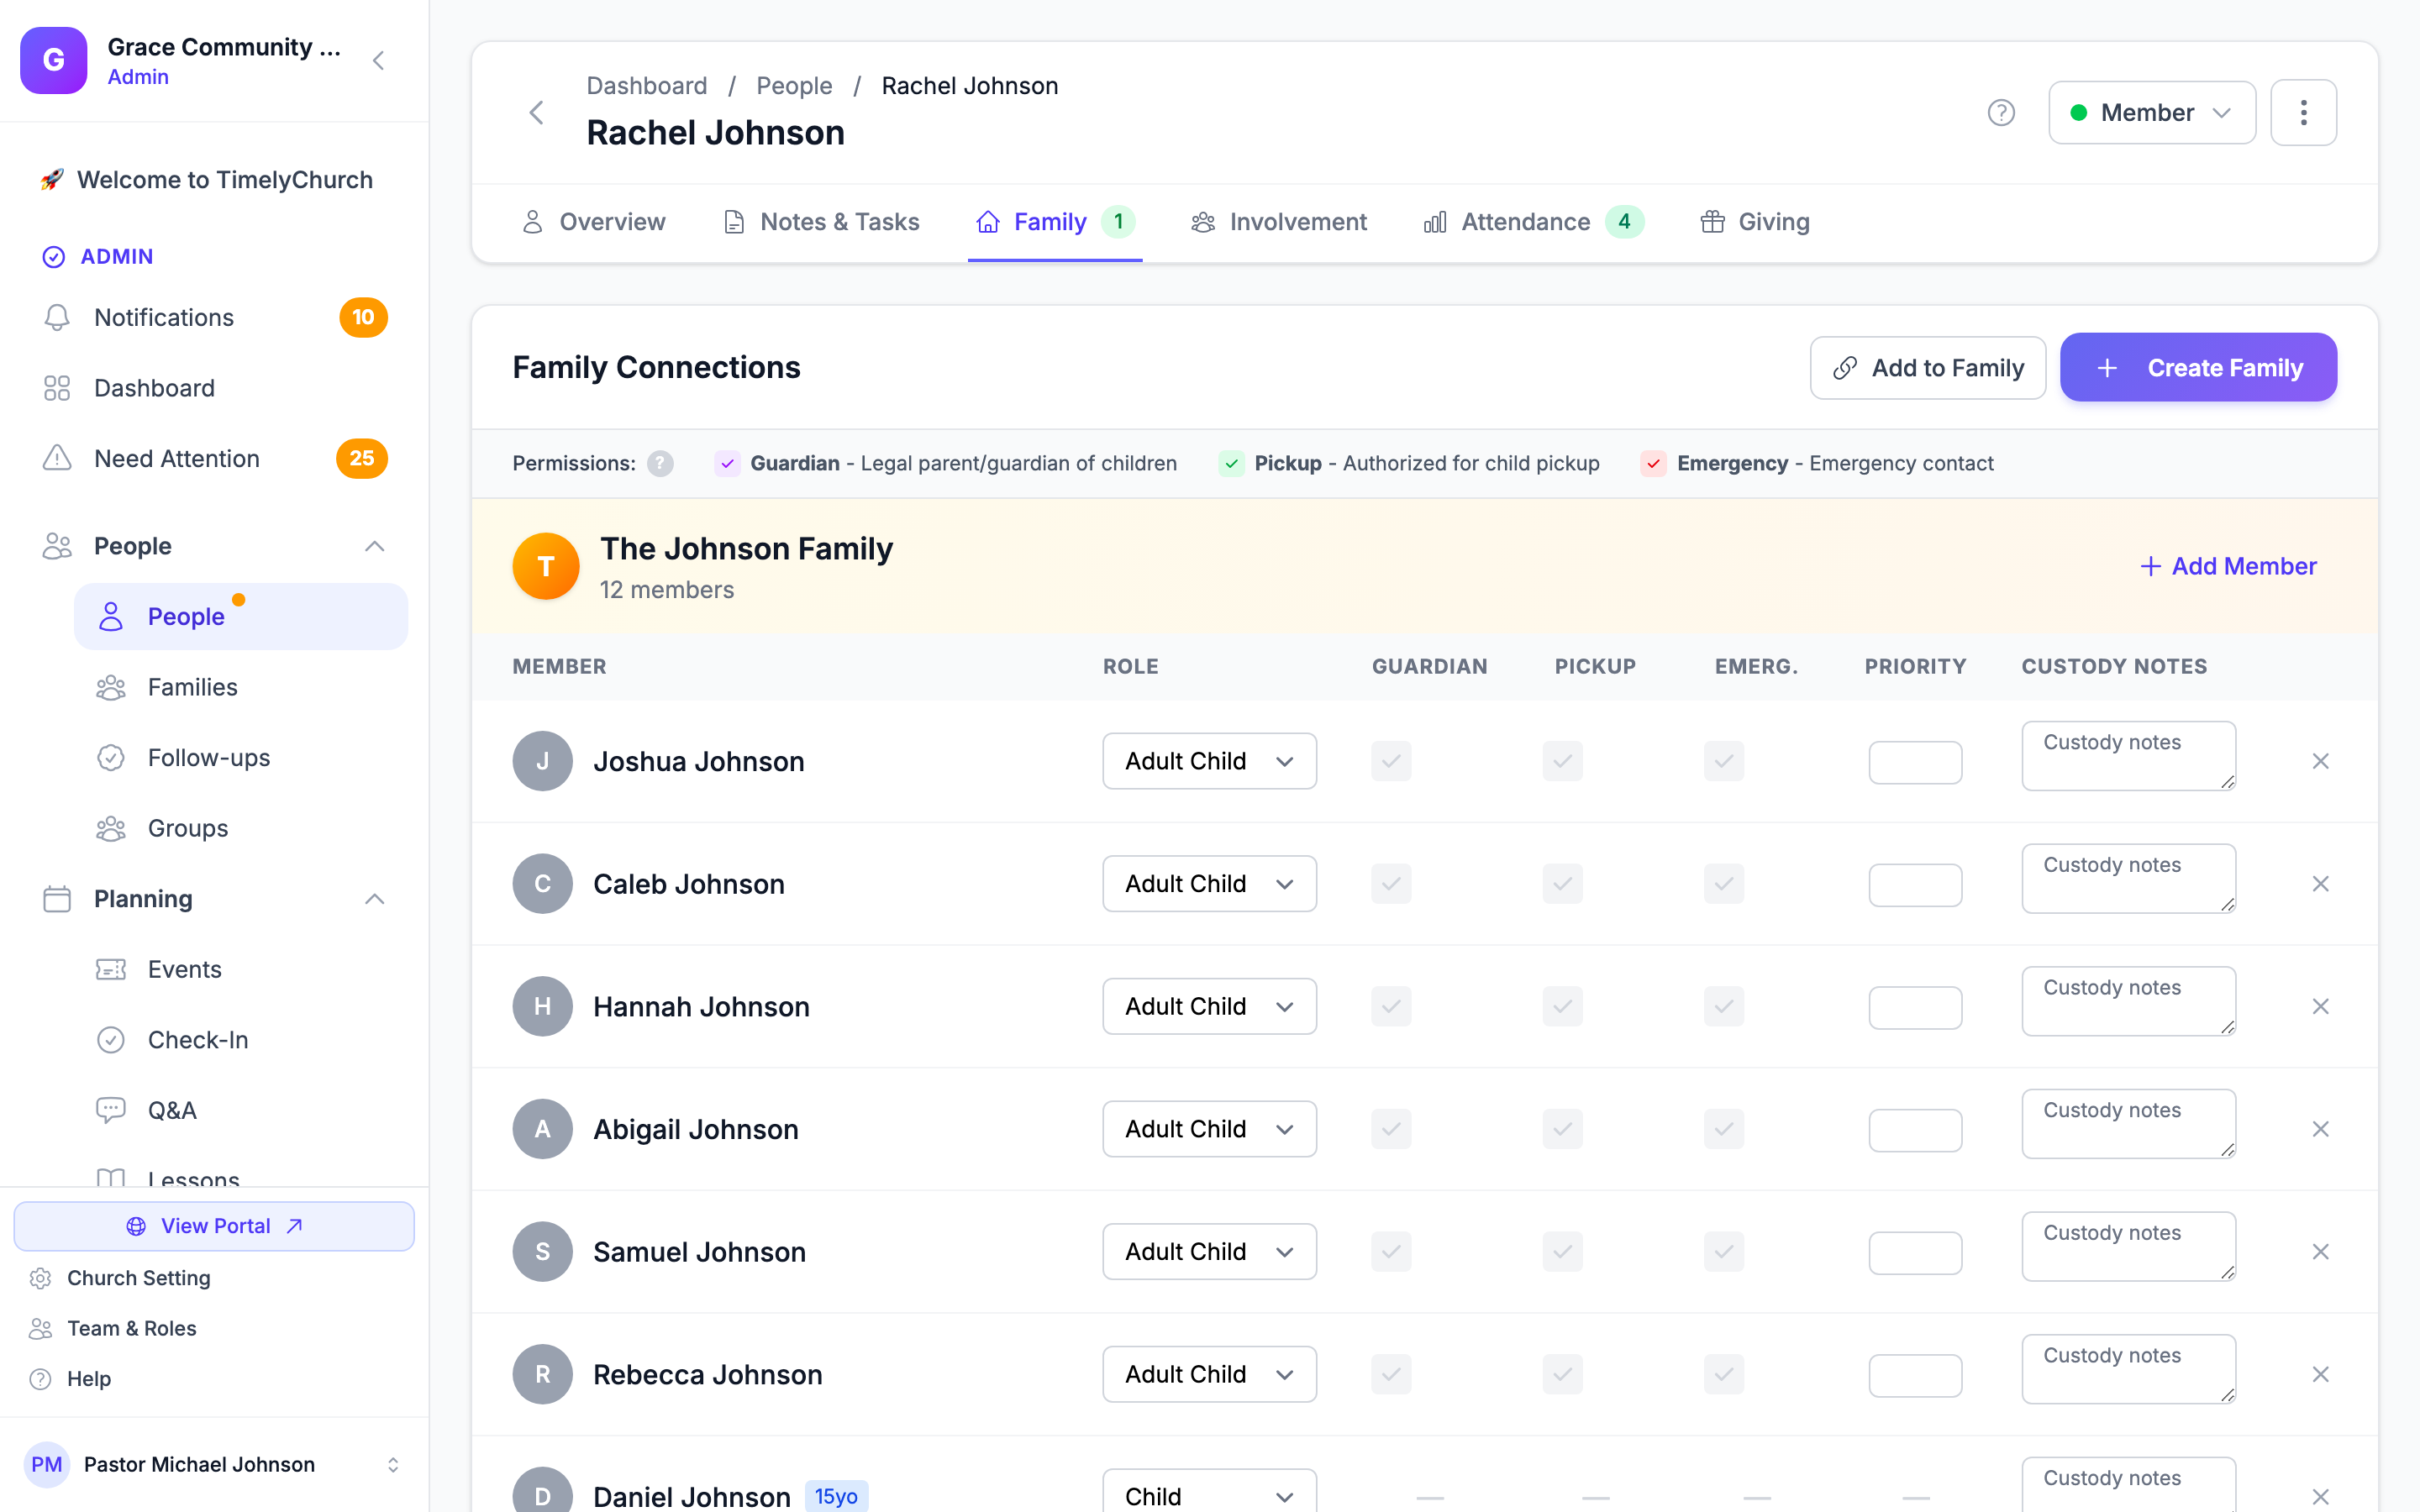
The Family tab shows which family or families this person belongs to, along with their role in each family.
What you will see here:
- Family Name -- The name of the family unit (for example, "The Smith Family")
- Role -- Head of Household, Spouse, Parent, Child, Grandparent, etc.
- Other Family Members -- Names and roles of everyone else in the family
From this tab you can:
- Add the person to an existing family (Add to Family)
- Create a new family with this person (Create Family)
- Change their role within a family
- Turn the child-safety permissions on or off for each adult -- Guardian, Pickup, Emerg. (emergency contact) and Check-in notices -- and set their Emergency Priority (1–10) and Custody Notes
- Remove them from a family (Remove from family)
For more details, see Family Management.
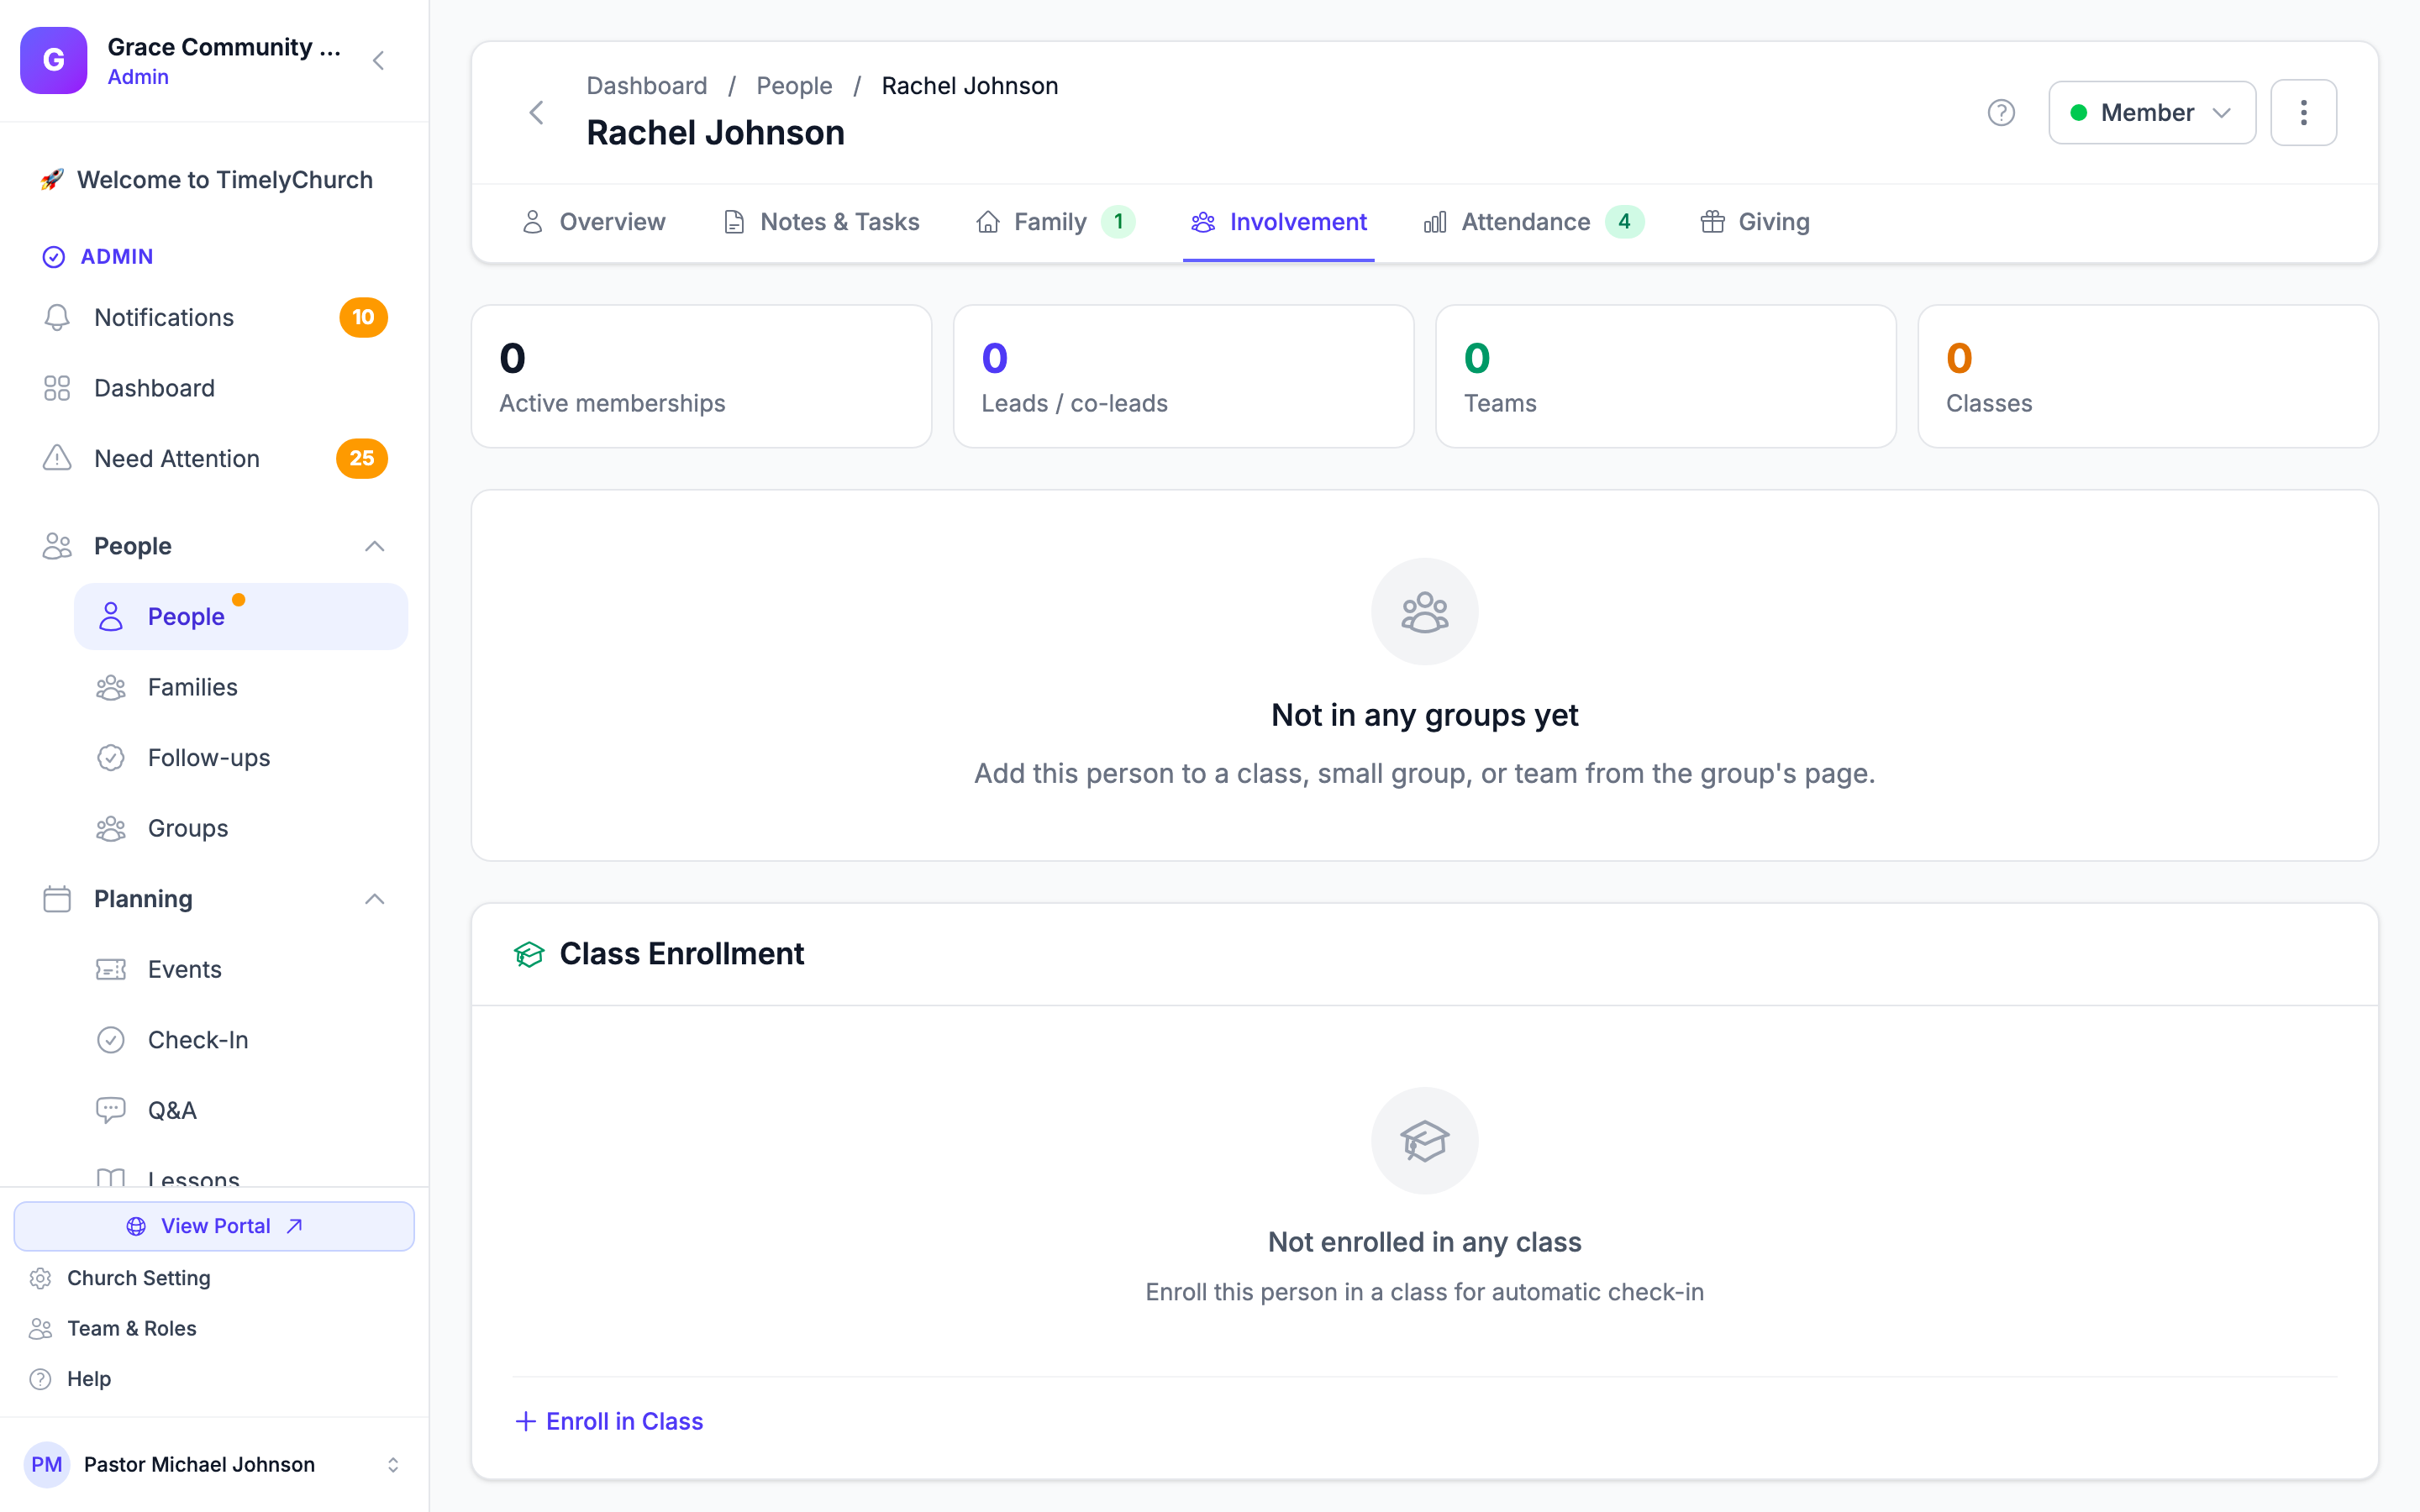
Involvement Tab
The Involvement tab shows all the groups, classes, small groups, and serving teams this person is connected to. It appears only when the person has involvement data.
Groups
- Lists every group membership, organized by type (Serving Teams, Small Groups, Ministry Groups, Other Groups)
- Each entry links to the group's page
Class Enrollment
- Shows the current class enrollment and any previous classes
- Use the Enroll in Class button (labeled Change Class when already enrolled) to pick a class and enroll the person directly from this tab
Serving
- A Background Check card showing Cleared, Expired, or Not on file, with the expiry date when there is one. Administrators can tick Background check cleared, set Expires (optional), and click Save; everyone else sees "Only administrators can record background checks." Volunteer check-in uses this record -- see Volunteer Check-In.
- Shows serving teams, upcoming and past event assignments, and any volunteer roles
Attendance Tab
The Attendance tab provides a history of this person's attendance and check-in records. It appears only when there are check-ins or attendance records.
Check-Ins
Shows the most recent 50 check-ins (newest first), including:
- Date and Time of check-in
- Group/Class they checked into
- Session details
- Check-out time or current "Checked In" status, plus the security code where applicable
Purge check-in history -- Next to the count, a red Purge check-in history link permanently deletes every check-in record for this person. The person record itself is kept. You are asked to confirm first, because this cannot be undone. You need permission to edit people.
Guardian deletion requests -- A parent or guardian can ask the church to delete a child's check-in history from the Privacy tab of their member portal profile. When a request is waiting, the child's Attendance tab shows Guardian requested check-in history deletion with the note "Respond within 45 days. Purging history keeps the person record." Click Fulfill deletion request to purge the history and close the request.
Attendance (90 days)
Shows attendance from the last 90 days, including:
- Date of each recorded attendance
- Group they attended
- Status -- Present, Absent, Late, or Excused
Tip: Attendance data helps you identify engagement patterns. If you notice someone has not attended recently, consider creating a follow-up to reach out.
Giving Tab
The Giving tab provides access to this person's financial records, including:
- Donation history
- Active pledges and pledge campaigns
- A Record Giving button for manually entering donations on behalf of this person
The giving section shows the available funds for your church and any active pledge campaigns. This tab appears only when your plan includes Giving; otherwise the tab is locked and points you to the upgrade page. It is also shown only to people whose role is at the Bookkeeper Giving level or higher, because a person's giving history shows who gave -- see Who Can See Giving and Donations.
Tip: For more information about managing donations and pledges, see the Giving section of the knowledge base.
Forms & Registrations Tab
The Forms & Registrations tab appears when this person has form submissions or event registrations. It shows two sections:
Event Registrations
- Events the person has registered for, with the event date, registration date, any amount paid, and status (Registered, Attended, Waitlist, or Cancelled)
Form Submissions
- Any forms this person has completed, such as connection cards, volunteer sign-up forms, and other custom forms you have created, along with each submission's status
Actions Available from Any Profile
The Actions menu (the three-dot button in the profile header) offers quick actions. Depending on the person's record and your role, you may see:
- Invite to Team -- For a person with an email who is not yet a portal user, start an admin/team invite pre-filled with their details
- Send Email -- Open a new email to the person's address
- Send Telegram invite -- Email the person a one-tap link to connect their Telegram to your church. Shown only when your church has an active Telegram connection and the person is not yet linked. (Once they link, a "Telegram connected" badge appears in the profile header.)
- Send sign-in link -- Email the person a one-time link that signs them straight in to the member portal. Useful when someone is standing at the welcome desk and cannot remember which email or password they used. The link works once and expires after 30 minutes. Shown only when the person has an email address and you can edit people.
- Copy Profile Update Link -- Copy a link the person can open, without signing in, to update their own profile. The link stays valid for 72 hours, then stops working on its own. Anyone who has the link can edit that one profile until it expires, so send it only to the person themselves. It cannot be switched off early, and copying a new link does not cancel older ones. For a child (under 18) this item is replaced by the note "Profile update links are turned off for minors. A parent or guardian can update this record from the family portal."
- Merge Profiles -- Combine this profile with a duplicate record (see Duplicate Detection and Merge). Needs the People & Families Delete permission.
- Deactivate / Activate -- Toggle whether the person is active in your database
- Disable Comments / Enable Comments -- Toggle the person's ability to leave comments
- Archive -- Remove the person from your directory without deleting their data (archived people can be restored)
- Restore -- Bring an archived person back (shown only for archived records)
- Delete Permanently -- Remove the person entirely
Items that change the record (status, comments, links) need permission to edit people; Archive and Delete Permanently need the Delete permission.