
Inviting Team Members
Before your team can help manage your church in TimelyChurch, you need to invite them. This guide covers all the ways to add team members and manage their access.
Accessing Team Management
- Log in to your TimelyChurch admin panel.
- Open team management in either of these ways:
- In the sidebar, expand the Administration category and click Team Members, or
- At the bottom of the sidebar, click Team & Roles.
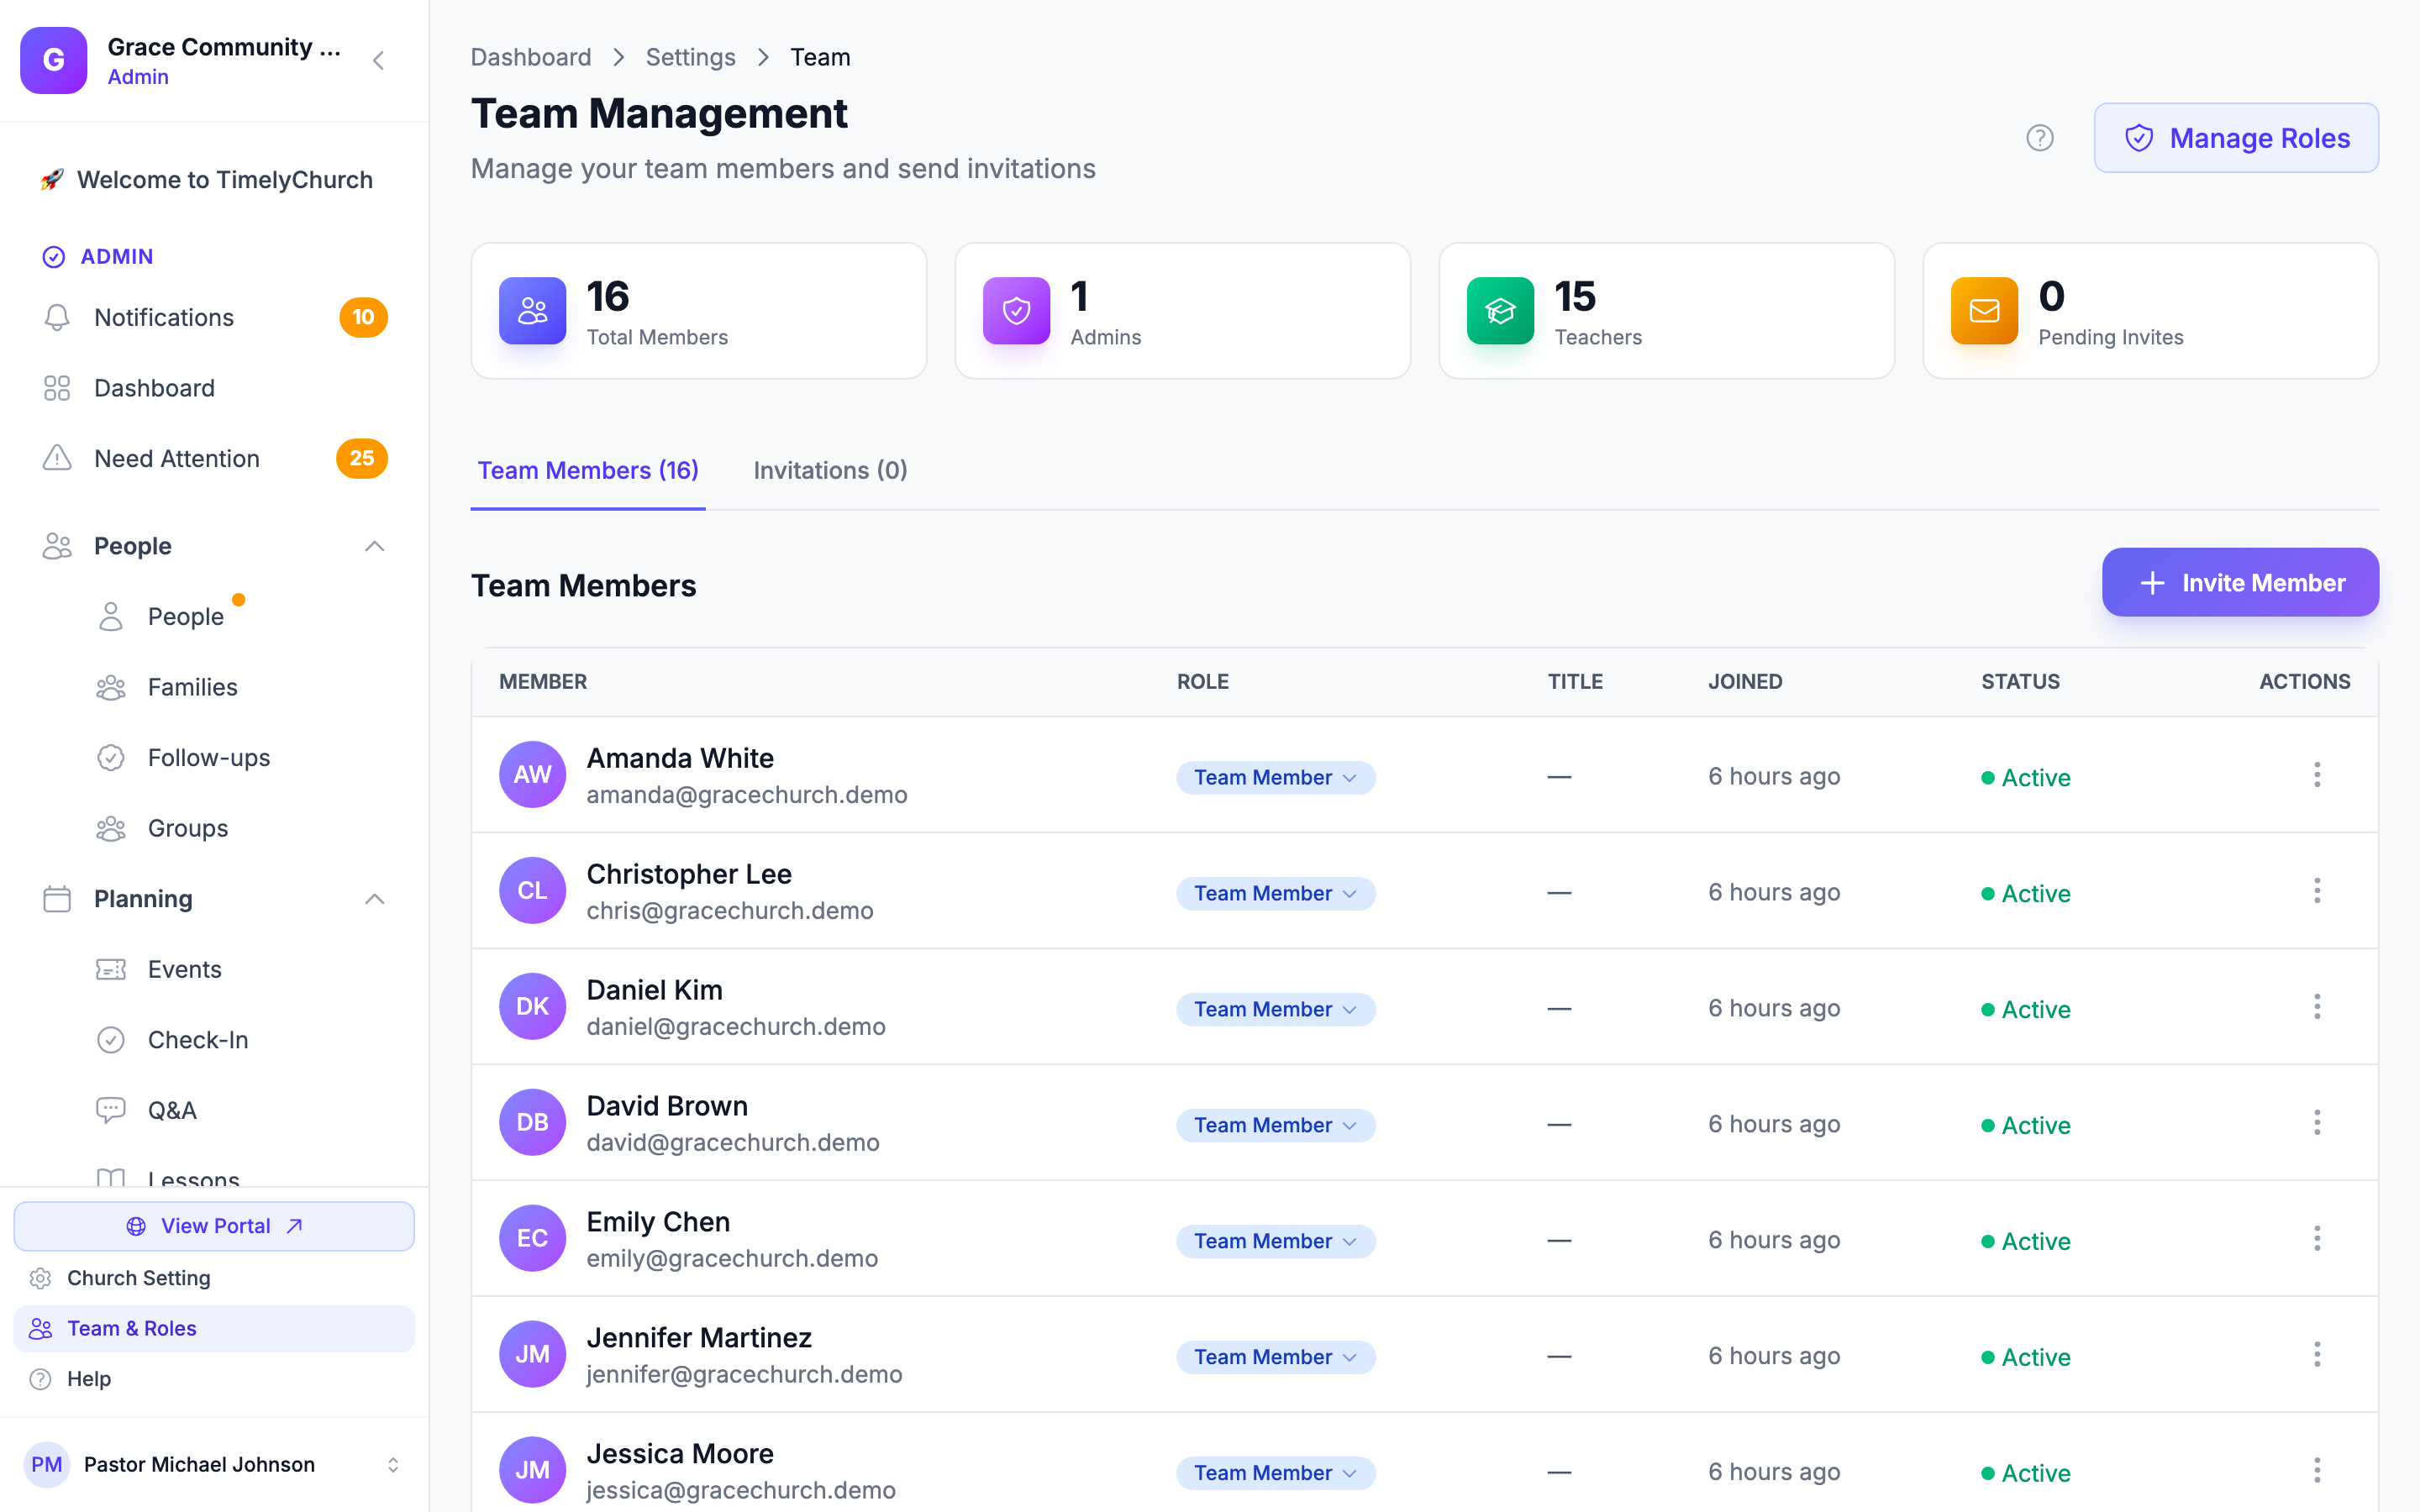
- You will land on the Team Management page, which has two tabs -- Team Members and Invitations -- plus an Invite Member button for adding new people.
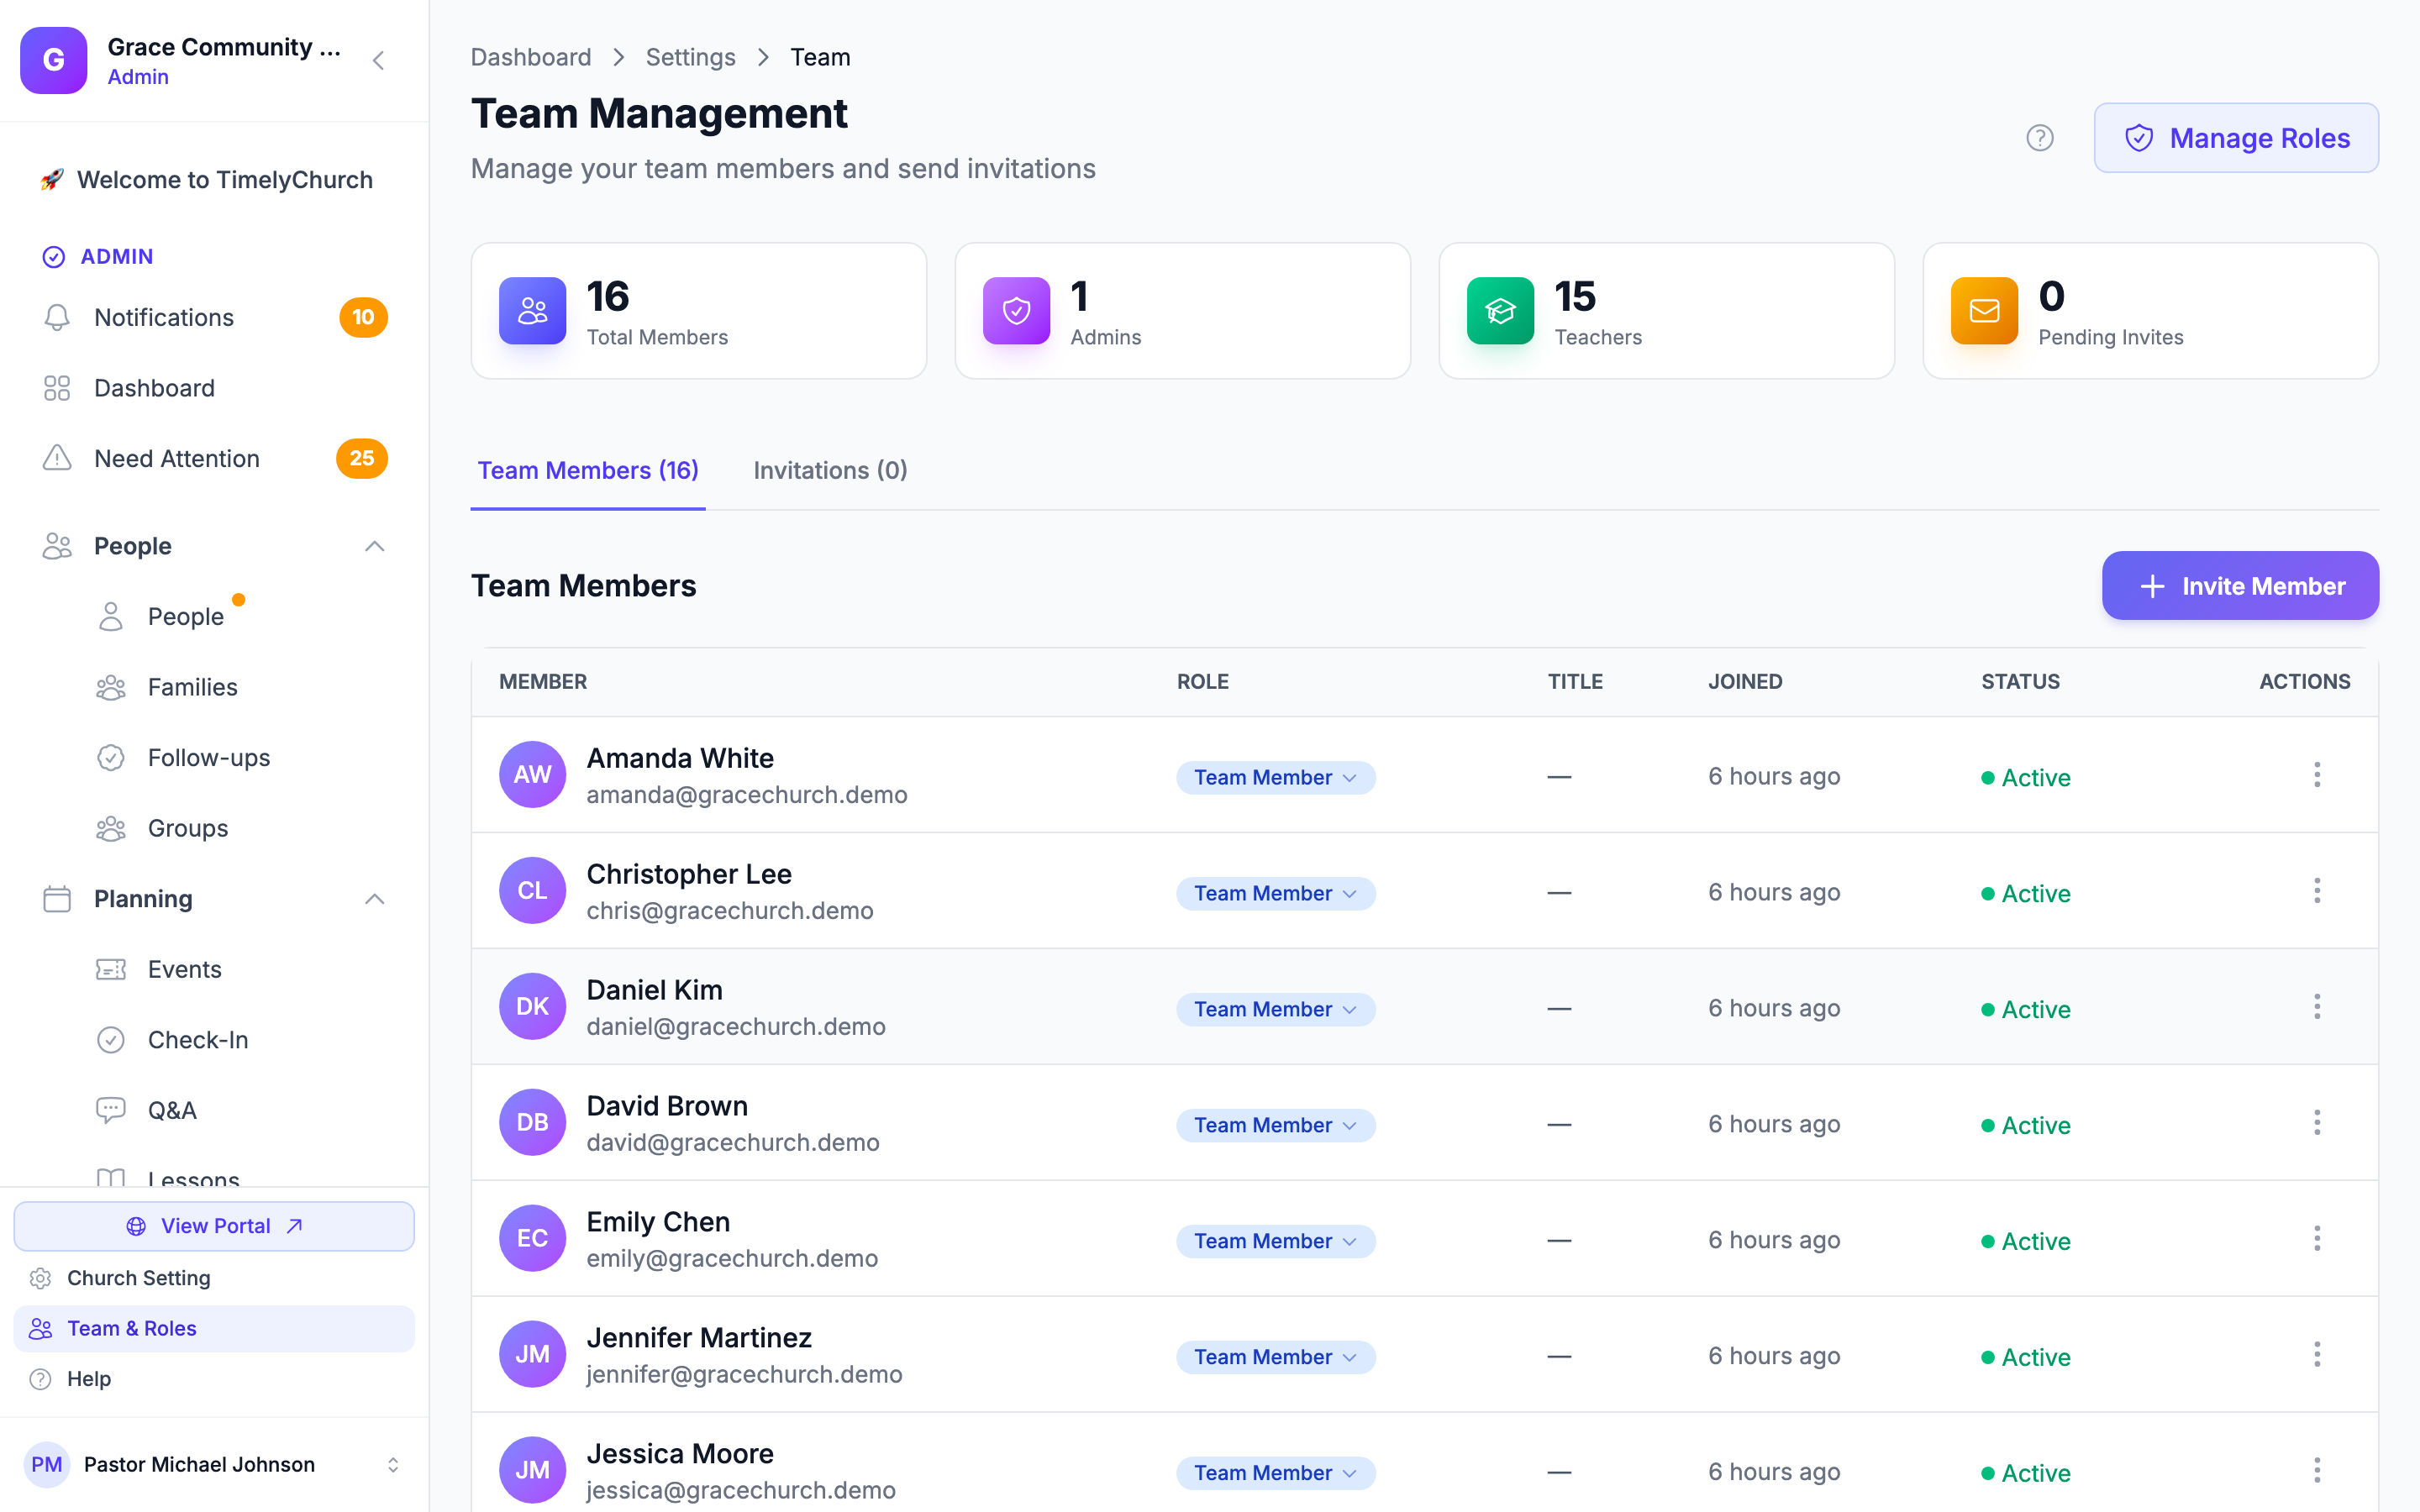
Tip: You need admin-level permissions to invite and manage team members. If you do not see Team Members under Administration (or the Team & Roles link at the bottom of the sidebar), ask your church administrator for access.
Team Overview
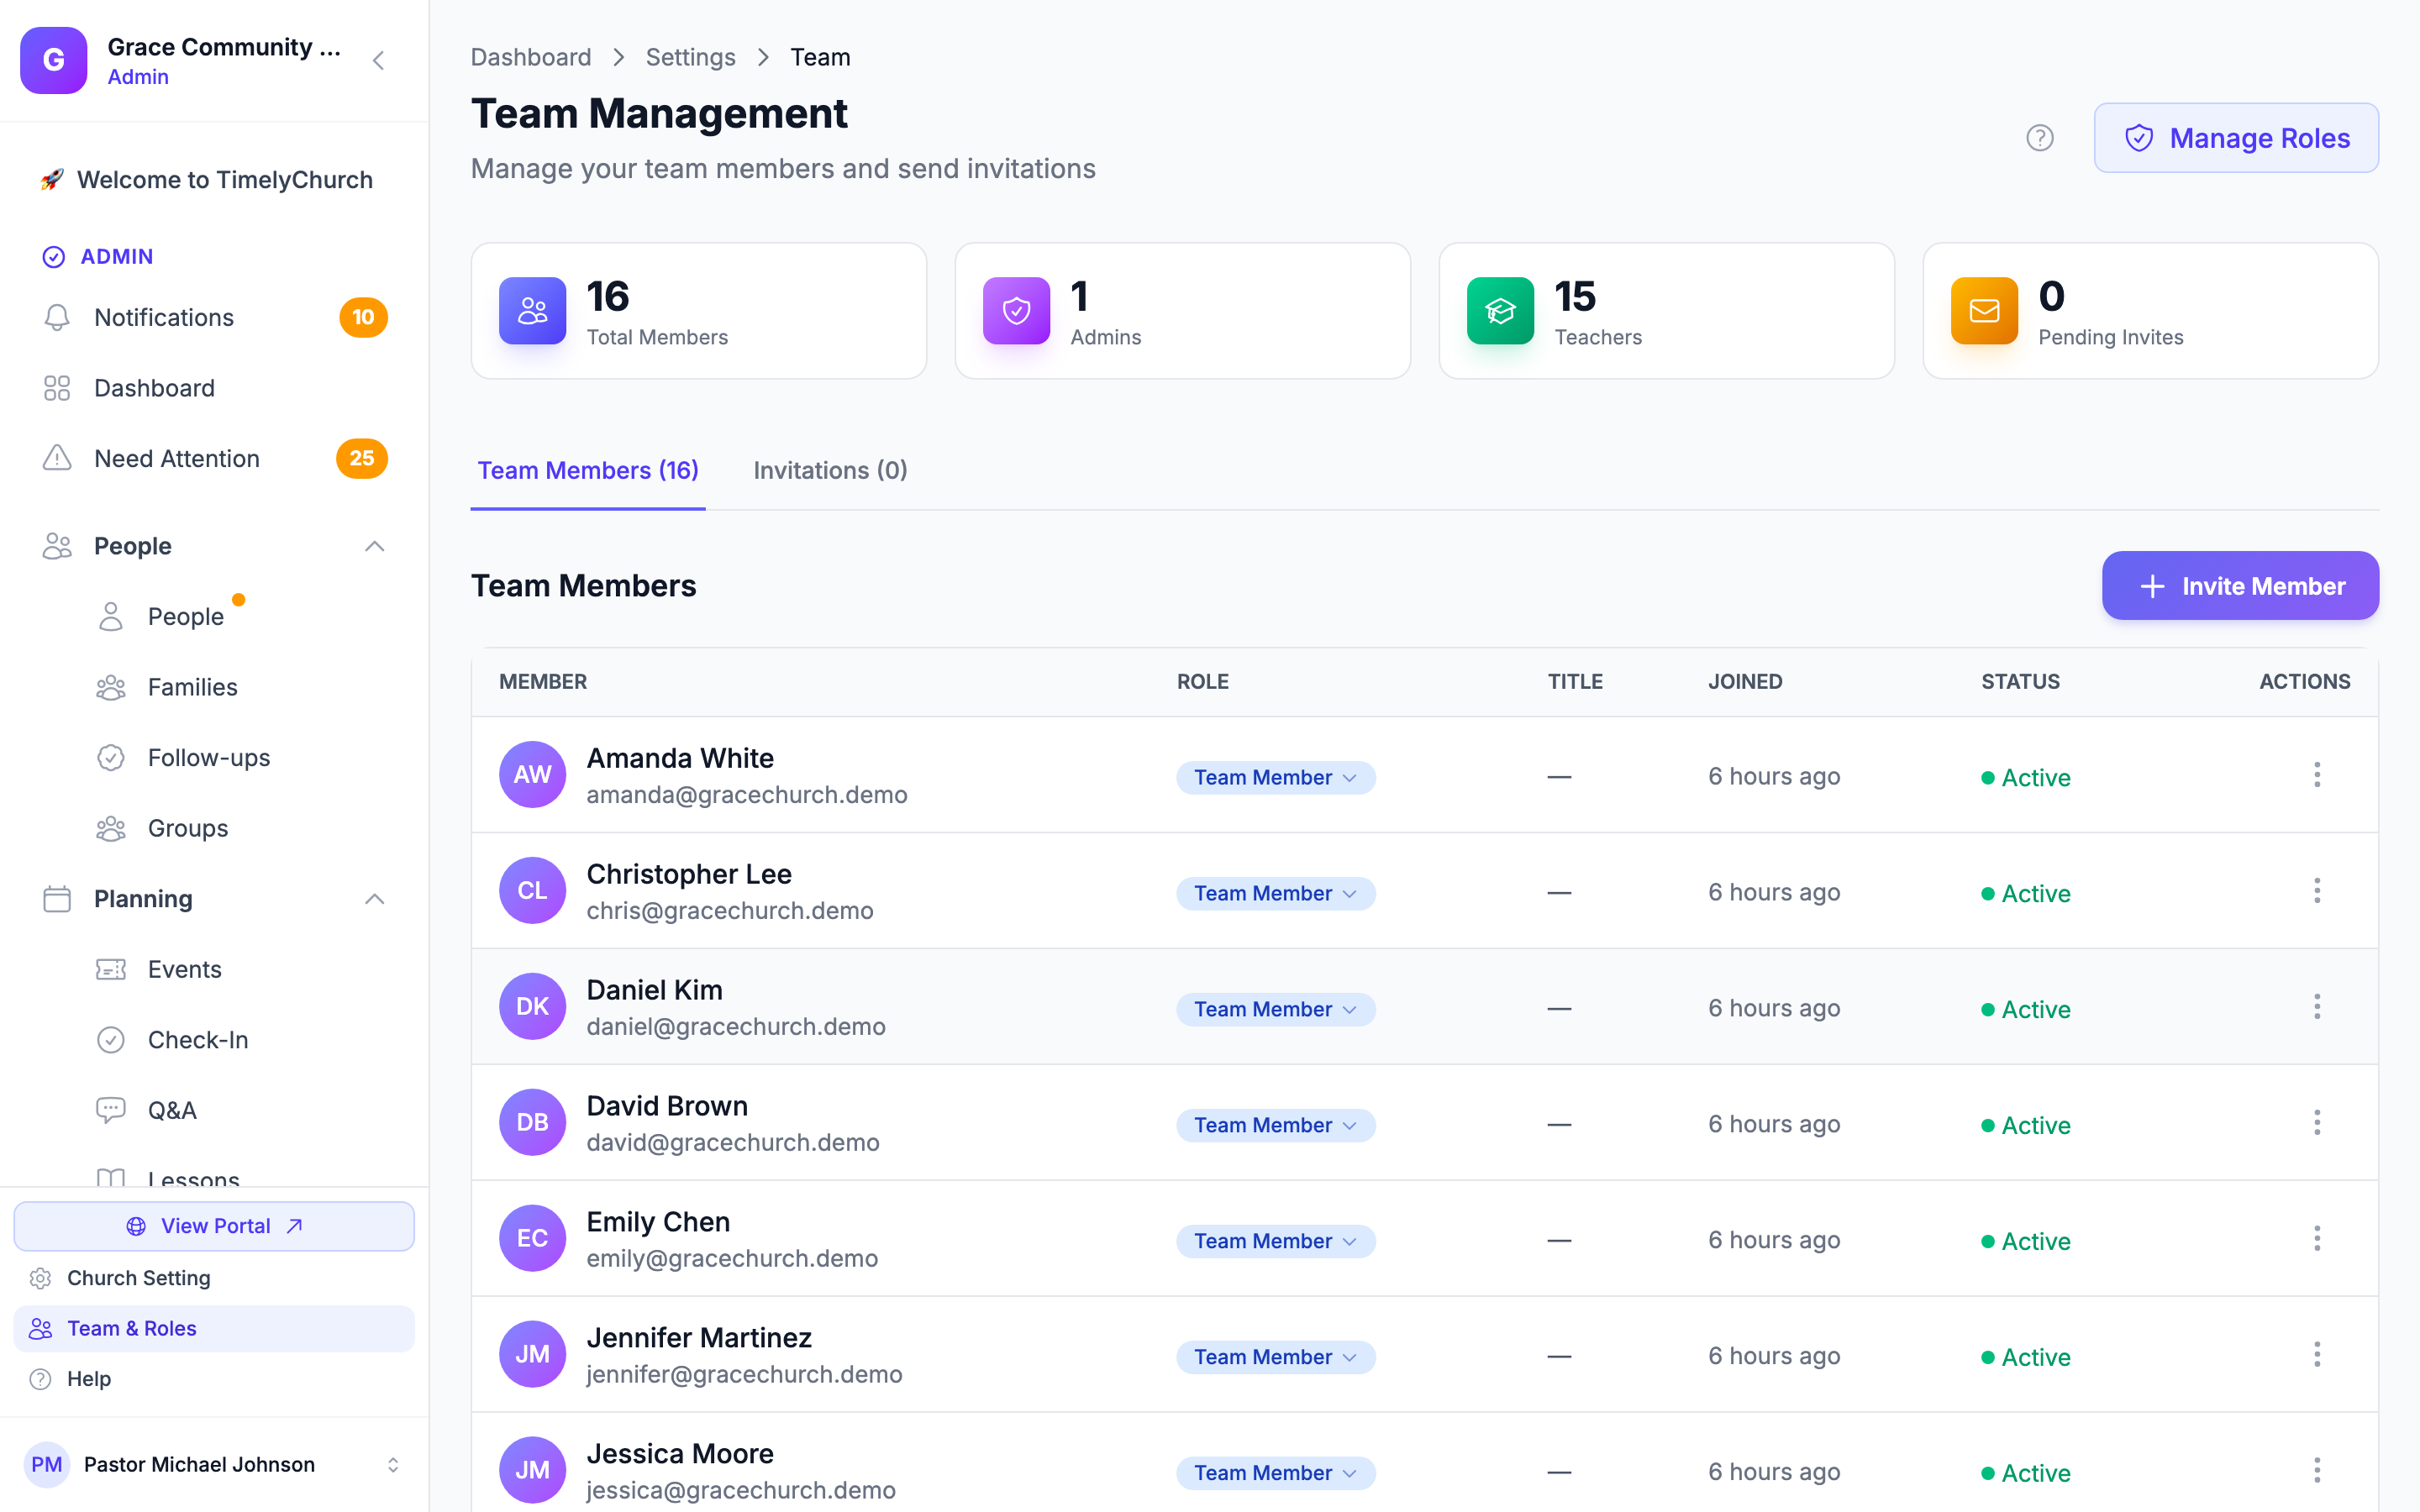
At the top of the Team Management page, you will see four summary cards:
- Total Members -- How many people currently have access.
- Admins -- The number of members with administrator-level access.
- Teachers -- Every other member (anyone who is not counted as an admin).
- Pending Invites -- How many invitations are still waiting to be accepted.
Sending an Invitation
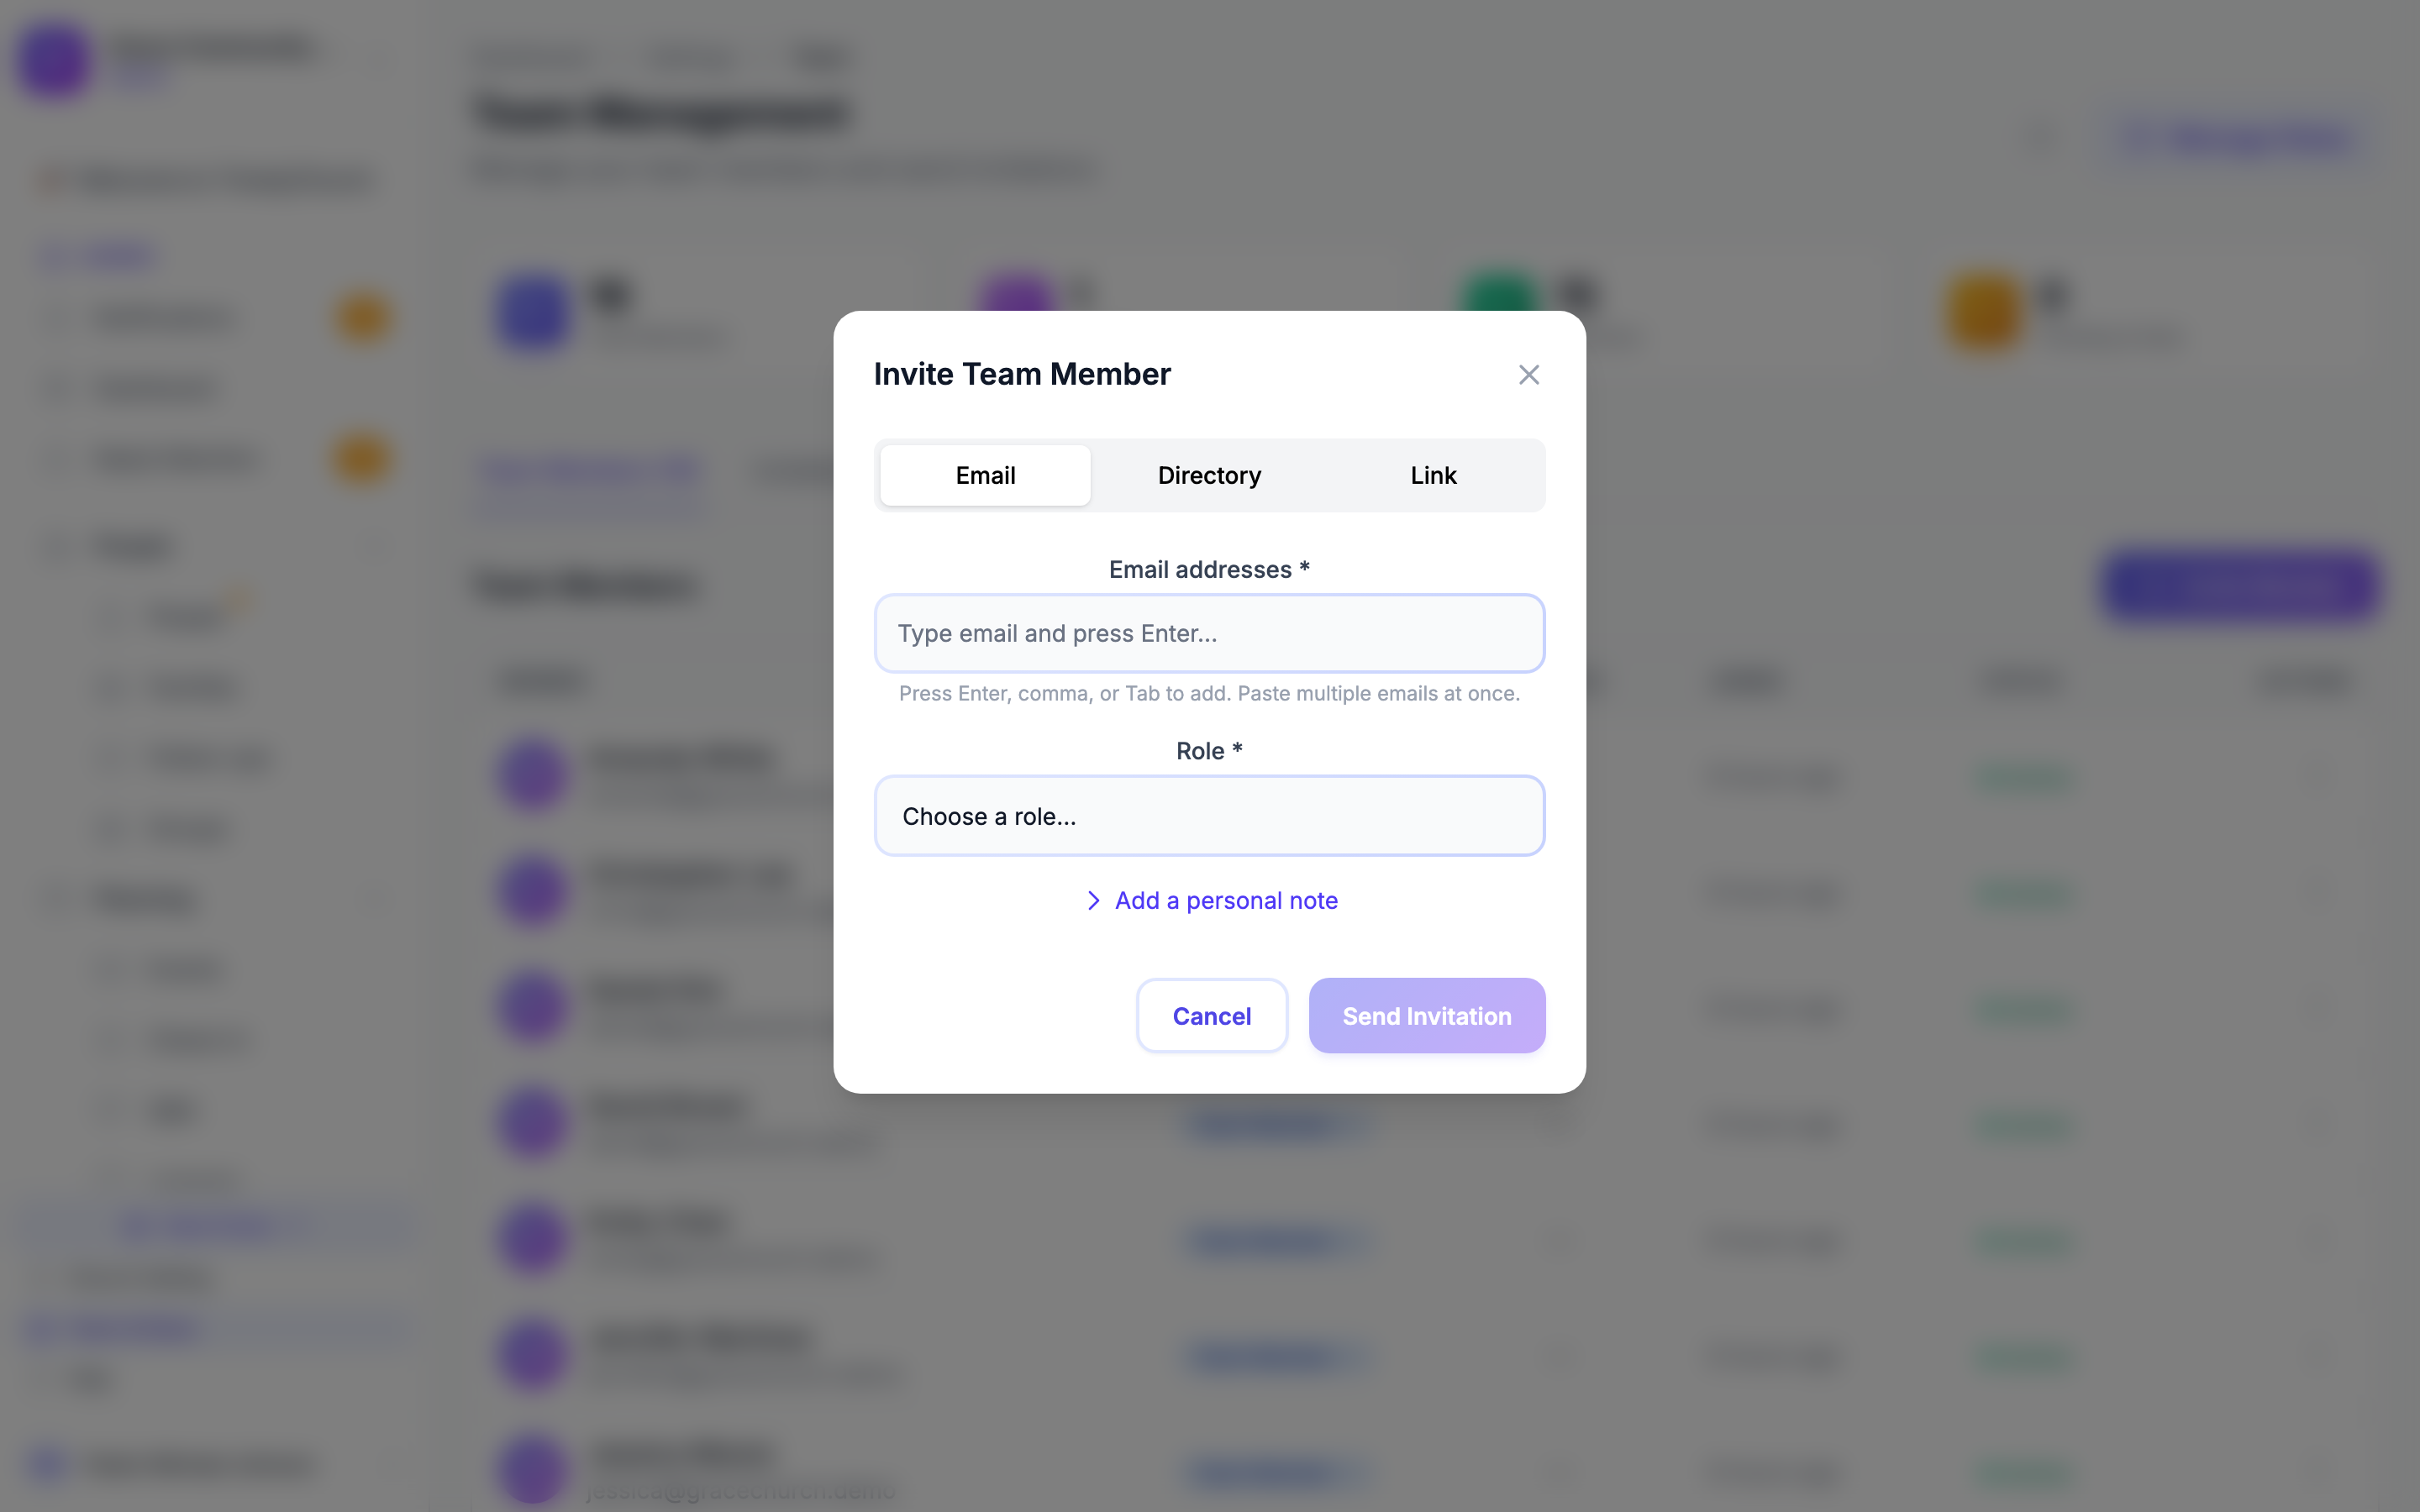
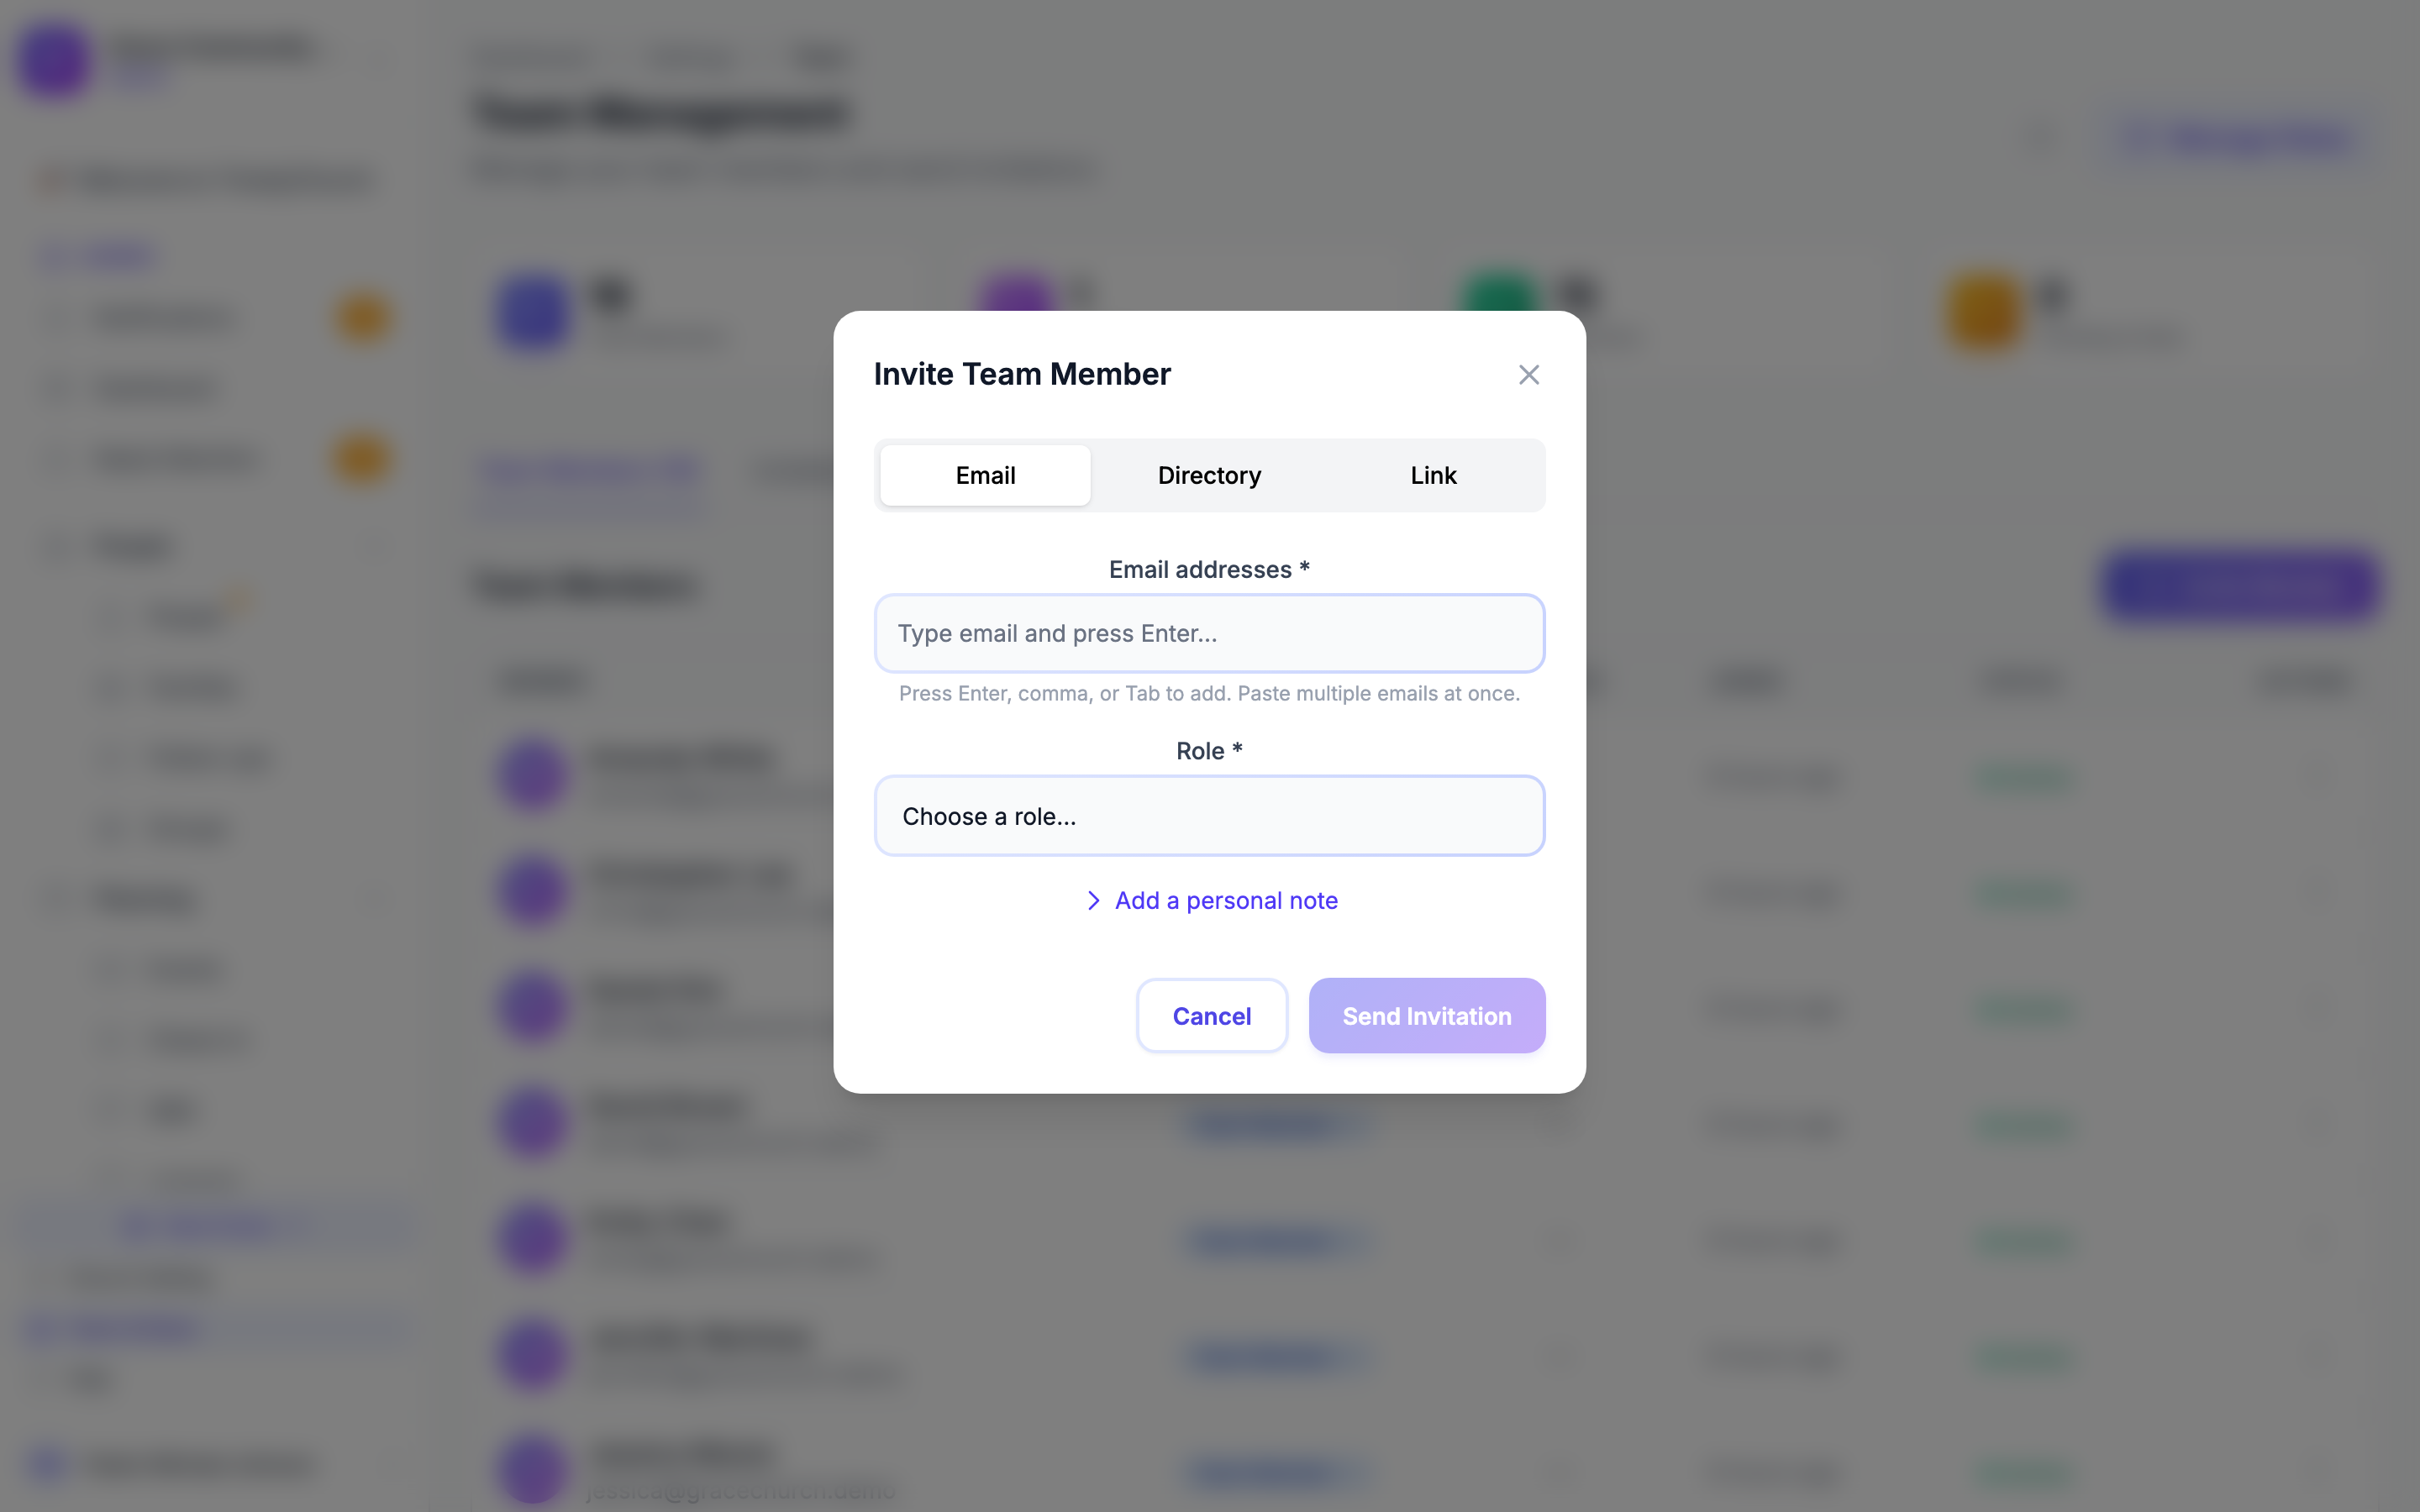
All three ways to invite people live in one place. Click the Invite Member button on the Team Management page to open the Invite Team Member window. At the top of the window you will see three tabs -- Email, Directory, and Link -- one for each method below.
Every method requires you to choose a role before you can send. The role dropdown starts on "Choose a role…" and determines what the new member can access, so there is no default -- you must pick one. (See Setting Up Roles and Permissions for details about roles.)
Method 1: Invite by Email
This is the most common way to invite someone who may or may not already be in your people directory.
- Click Invite Member, then choose the Email tab.
- Type each person's email address into the field. Press Enter, comma, or Tab to turn it into a chip -- you can add several addresses this way, or paste a whole list at once.
- Select a role from the dropdown.
- (Optional) Click Add a personal note to include a short message in the invitation email.
- Click Send Invitation (the button reads "Send N Invitations" when you have added more than one address).
Each person will receive an email with the subject "You're invited to join [Your Church Name] on TimelyChurch." They can click the link in the email to create their account or log in.
Tip: Email invitations expire after 7 days. If someone has not accepted their invitation, you can resend it (see below), which refreshes the 7-day window.
Method 2: Invite from Your People Directory
If the person you want to invite is already in your church's people directory and has an email address on file, you can invite them directly -- no need to retype their email.
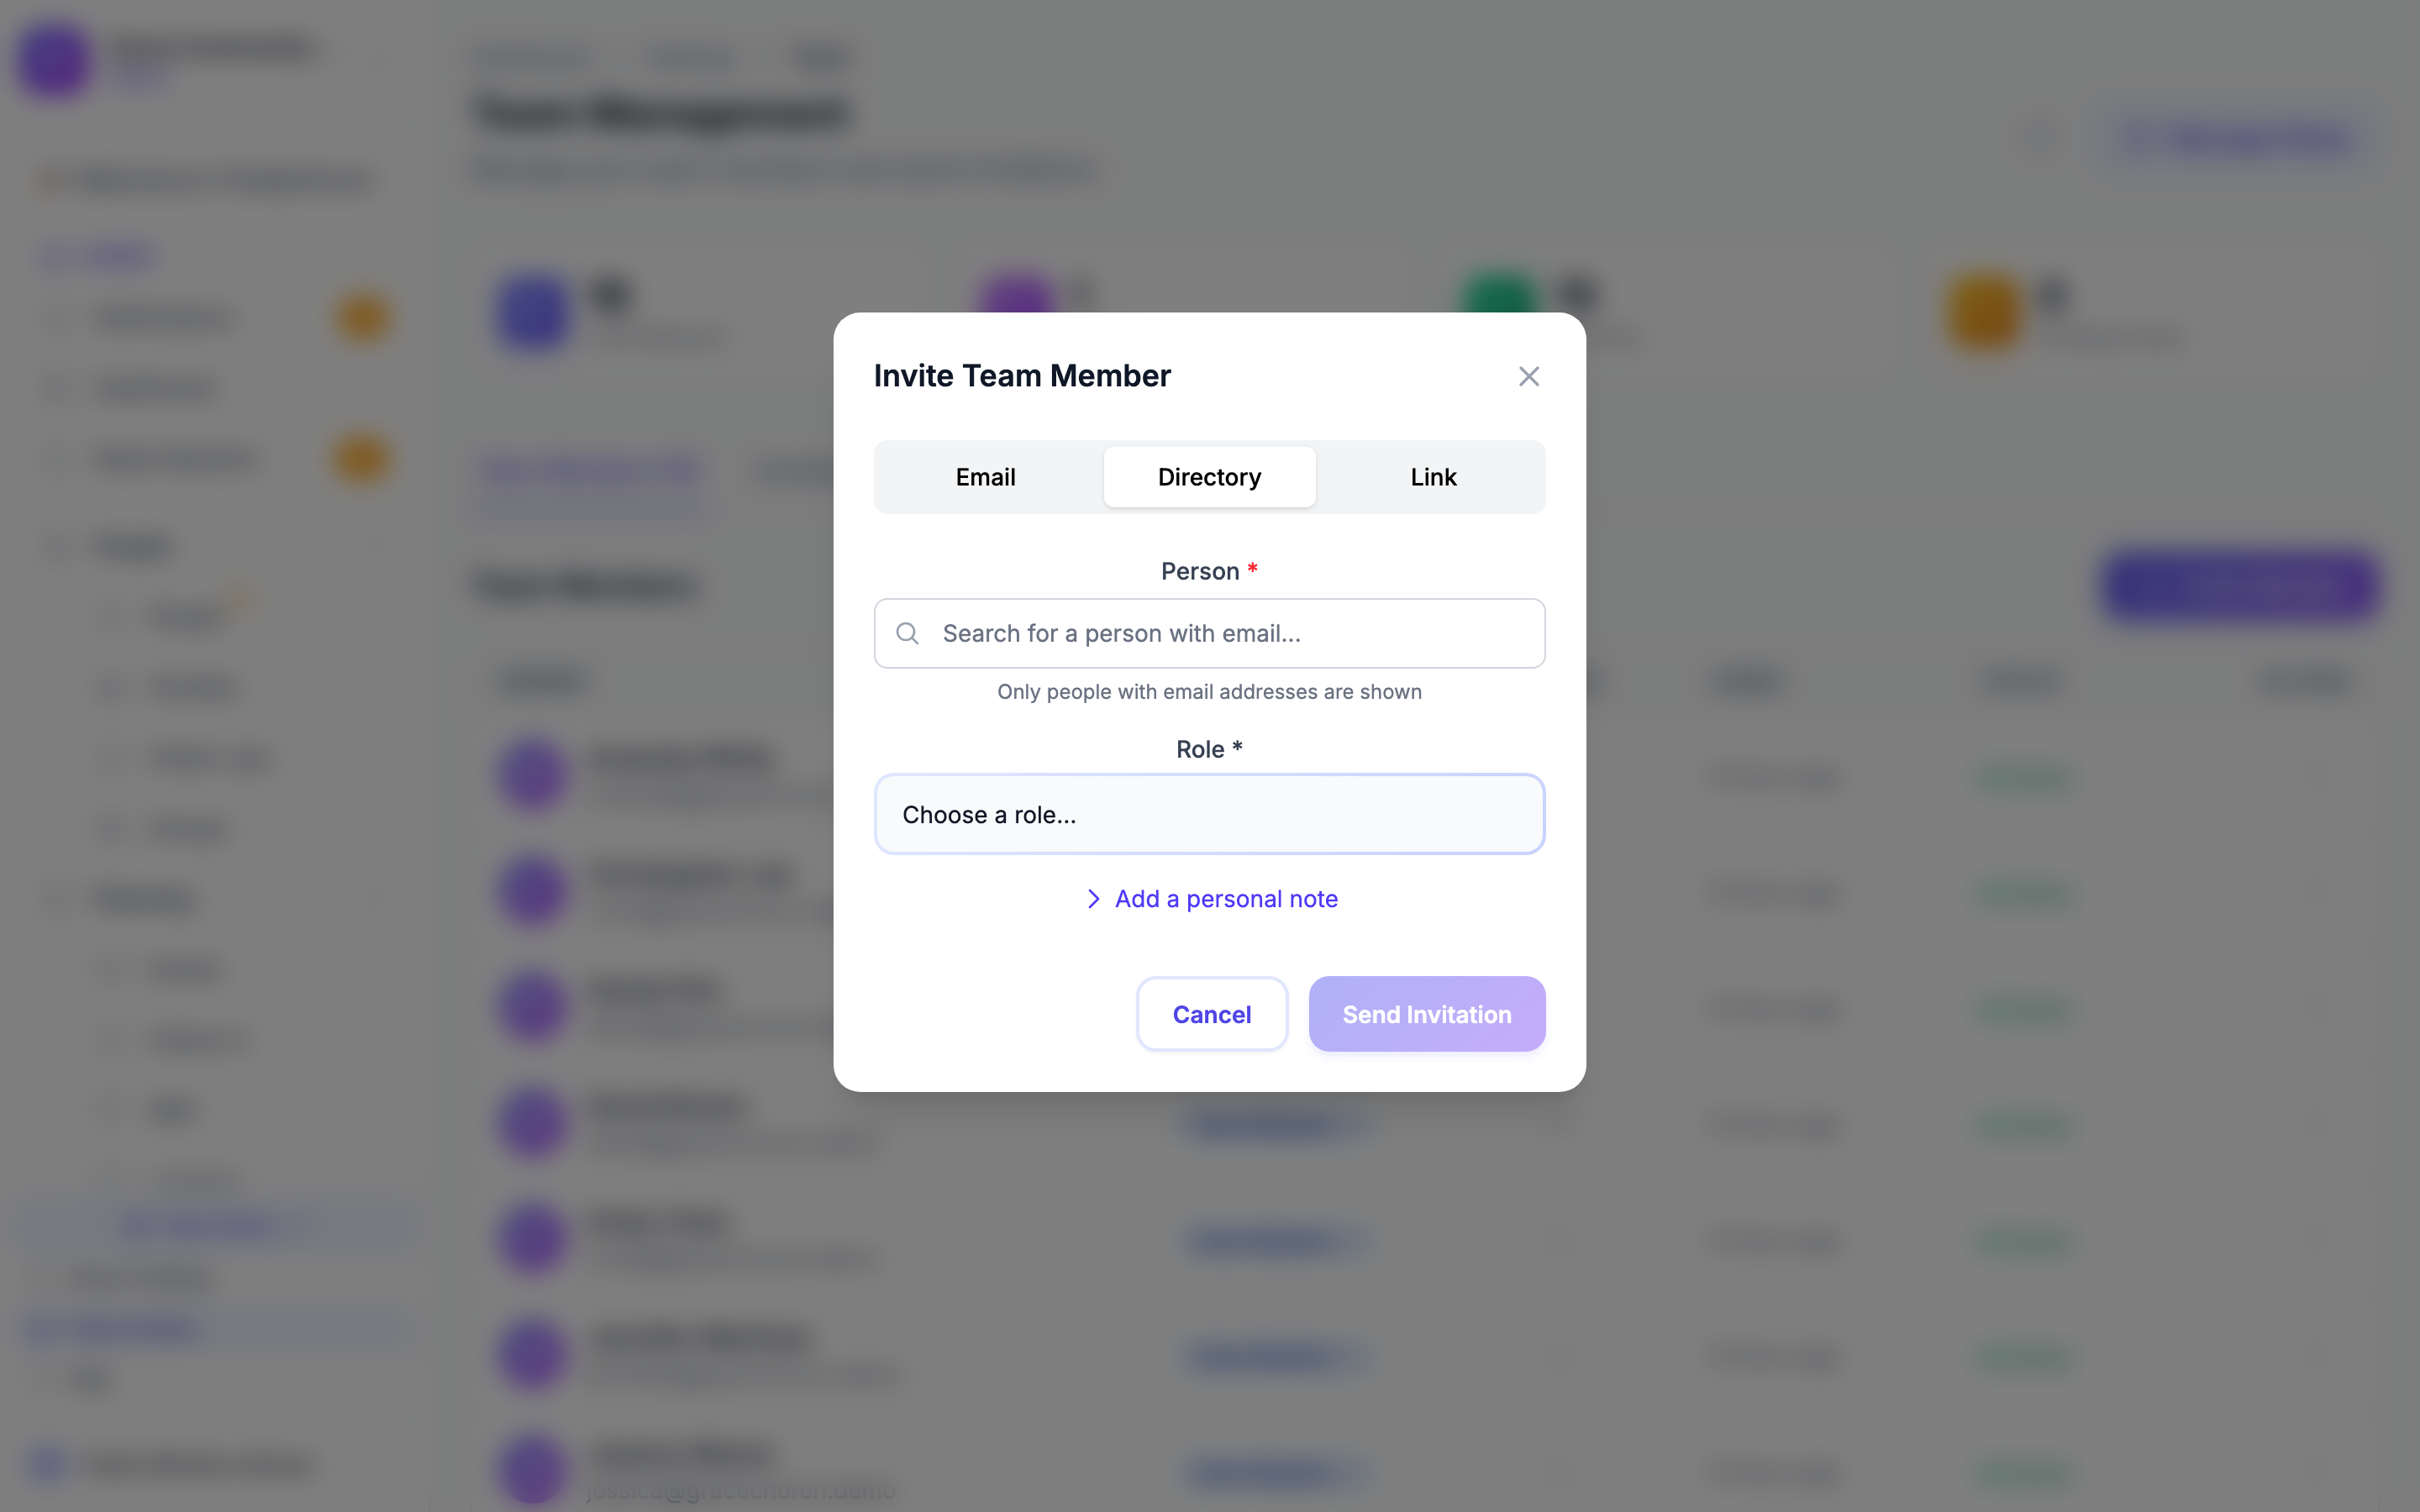
- Click Invite Member, then choose the Directory tab.
- Start typing a name in the search box and select the person from the results. Only people who have an email address on file are shown.
- Select a role for them.
- (Optional) Click Add a personal note to include a short message in the invitation email.
- Click Send Invitation.
The invitation is sent to the email address on the person's record. Like email invitations, directory invitations expire after 7 days if not accepted.
Tip: This is the fastest path for inviting an existing volunteer or staff member who you've already added to your directory. It also avoids typos -- you select them from a list rather than typing their email by hand.
Method 3: Generate an Invite Link
If you want to invite multiple people without entering each email individually, you can create a shareable invite link.
- Click Invite Member, then choose the Link tab.
- Select the role that anyone using this link will be assigned.
- (Optional) Set Max Uses (for example, limit it to 10 people). Leave it blank for unlimited uses.
- Set Expires (days). The default is 30 days, and you can choose anywhere between 1 and 365 days.
- Click Generate Link.
- The Invite Link Ready window appears with the link and a QR code. Click Copy to grab the link, or have members scan the QR code with their phone camera. Share it via text message, email, group chat, or a printed bulletin.
Tip: Invite links are great for onboarding an entire volunteer team at once. Just share the link (or QR code) in a group chat or email and everyone can sign up with the same role.
Managing Pending Invitations
After sending invitations, open the Invitations tab on the Team Management page to manage them. Each invitation has a small row of action icons on the right.
Copy the Invite Link
To grab an invitation's link again (for any type), click the copy icon on its row. The link is copied to your clipboard so you can paste it wherever you like.
Resend an Invitation
If someone has not accepted their email invitation, you can send them a reminder:
- Find the invitation in the Invitations tab.
- Click the resend icon on its row.
- They will receive a new email with the subject "Reminder: You're invited to join [Your Church Name] on TimelyChurch," and the 7-day expiry is refreshed.
Revoke an Invitation
If you need to cancel an invitation (for example, you sent it to the wrong email):
- Find the invitation in the Invitations tab.
- Click the revoke (✕) icon on its row.
- Confirm in the window that appears. The invitation link will no longer work, and the person will not be able to use it to join.
Managing Existing Team Members
Once someone has accepted their invitation and joined your team, you can manage their access from the Team Members tab. Each member's row has an actions menu (the ⋮ icon on the right) with the options below.
Change a Team Member's Role
- Find the team member in the list.
- Click their role badge, or open the ⋮ menu and choose Change Role.
- Pick a new role from the list that appears. The change saves right away.
Deactivate a Team Member
If someone is taking a break or should temporarily lose access without being fully removed:
- Find the team member in the list.
- Open the ⋮ menu and click Deactivate.
- Their account is deactivated and they will not be able to log in until reactivated.
- To restore access, open the same menu and click Activate.
Remove a Team Member
To permanently remove someone from your team:
- Find the team member in the list.
- Open the ⋮ menu and click Remove from Team.
- Confirm the removal in the window that appears.
The person will immediately lose access to your church's admin panel. Their people record (if any) will remain in your directory.
Tip: You cannot remove yourself if you are the only admin-capable member. Make sure at least one other person has admin access before trying to remove your own account.
What Happens When Someone Accepts an Invitation?
When a person clicks the invitation link in their email:
- If they already have a TimelyChurch account, they log in and are immediately added to your church's team.
- If they are new, they create an account with their name, email, and a password.
- They are assigned the role you selected when sending the invitation.
- They can now access the admin panel features their role allows.