
Tutorial: Need Attention Sub-Invite Walkthrough
Audience: Church admin or team leader filling a serving slot after a volunteer drops out Time needed: About 5 minutes (in real life, on a real Saturday night) You'll need: Permission to edit events — if your role covers only your own teams, you can do this on the teams you lead
Which tool is this? When someone on a serving team (worship, sound, greeters, kids check-in...) drops out, you fill the spot from the event's Serving tab with a fill request — that's what this walkthrough covers. The Open Sub Requests list on the Need Attention page is for class teachers who need a substitute; see Substitute Teacher Requests for that flow.
What You'll Learn
By the end of this walkthrough, you will know how to:
- Recognize the notification you get when a volunteer declines
- Check whether the system already found a replacement
- Send one fill request to several teammates at once -- the first to claim the spot gets it
- Follow the request, cancel it, or fill the spot another way
This is the tutorial you'll thank yourself for reading the first Saturday night you get an "I can't make it tomorrow" text. Five minutes start to finish.
Step 1: Spot the Decline
Time: 30 seconds
When a volunteer declines, every leader of that team gets a notification titled Serving Decline · [team], for example:
"Sarah Miller declined Vocalist for Sunday Worship on August 11, 2026 at 10:00 AM (Family emergency)."
It appears under the bell (Notifications) in your admin panel, and on Telegram if you've connected it (otherwise by email). If the team has no leaders, the church's administrators get it instead.
Tip: The reason in parentheses is whatever the volunteer typed when they declined. No reason? They left the box empty.
Step 2: Open the Event's Serving Tab
Time: 1 minute
- In the sidebar, expand Planning and click Events, then open the event.
- Click the Serving tab.
- The summary at the top shows how many positions are filled (for example, 7/8 positions filled) with counts of confirmed, pending, declined, and open spots. A yellow bar underneath says how many positions still need volunteers.
- Find the position that's short, under its team.
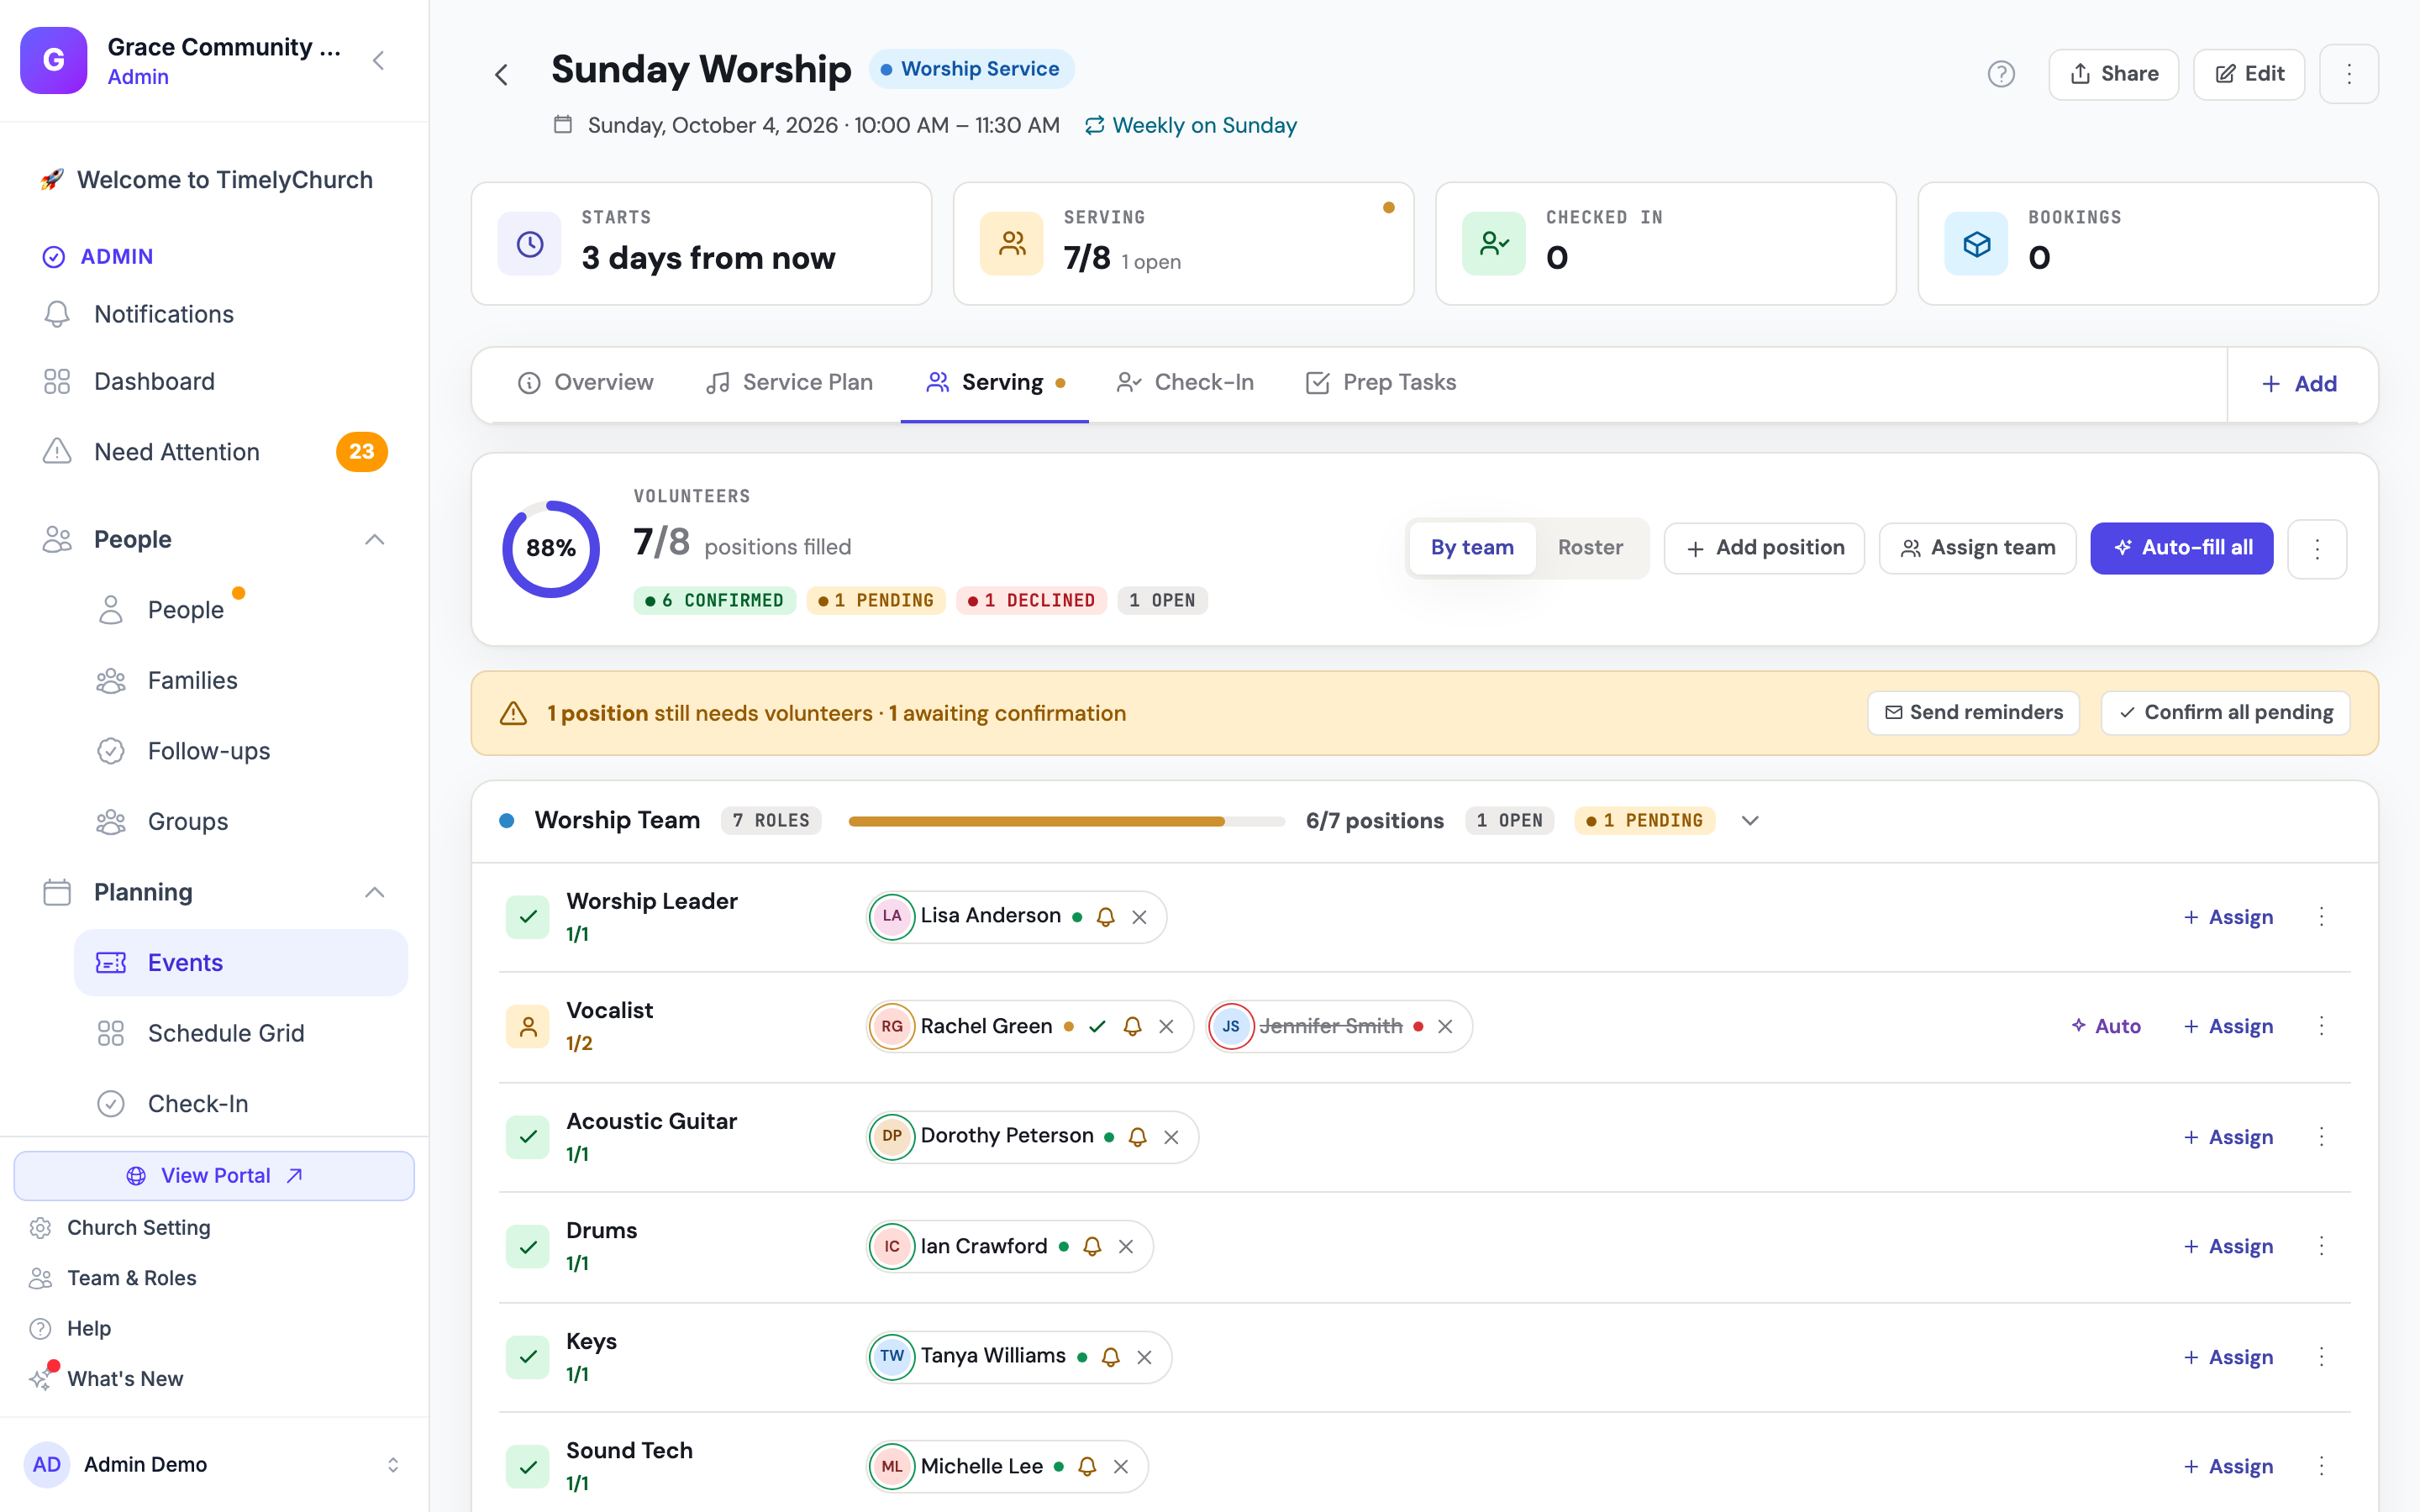
Already handled? If the team has Auto-pick replacement when someone declines turned on, the system may already have assigned the next person in rotation — you'll see them on that position as pending. If so, there's nothing more to do unless they decline too. (After three tries, auto-pick stops and the spot waits for you.)
Step 3: Send a Fill Request
Time: 1 minute
A fill request asks several teammates at once. Each gets a personal link; the first to claim the spot is scheduled, and everyone else is told it's filled.
- On the position that's short, click the ⋮ (Edit position) menu.
- Choose Send fill request. (It's there when the position has an open spot and its team has members.)
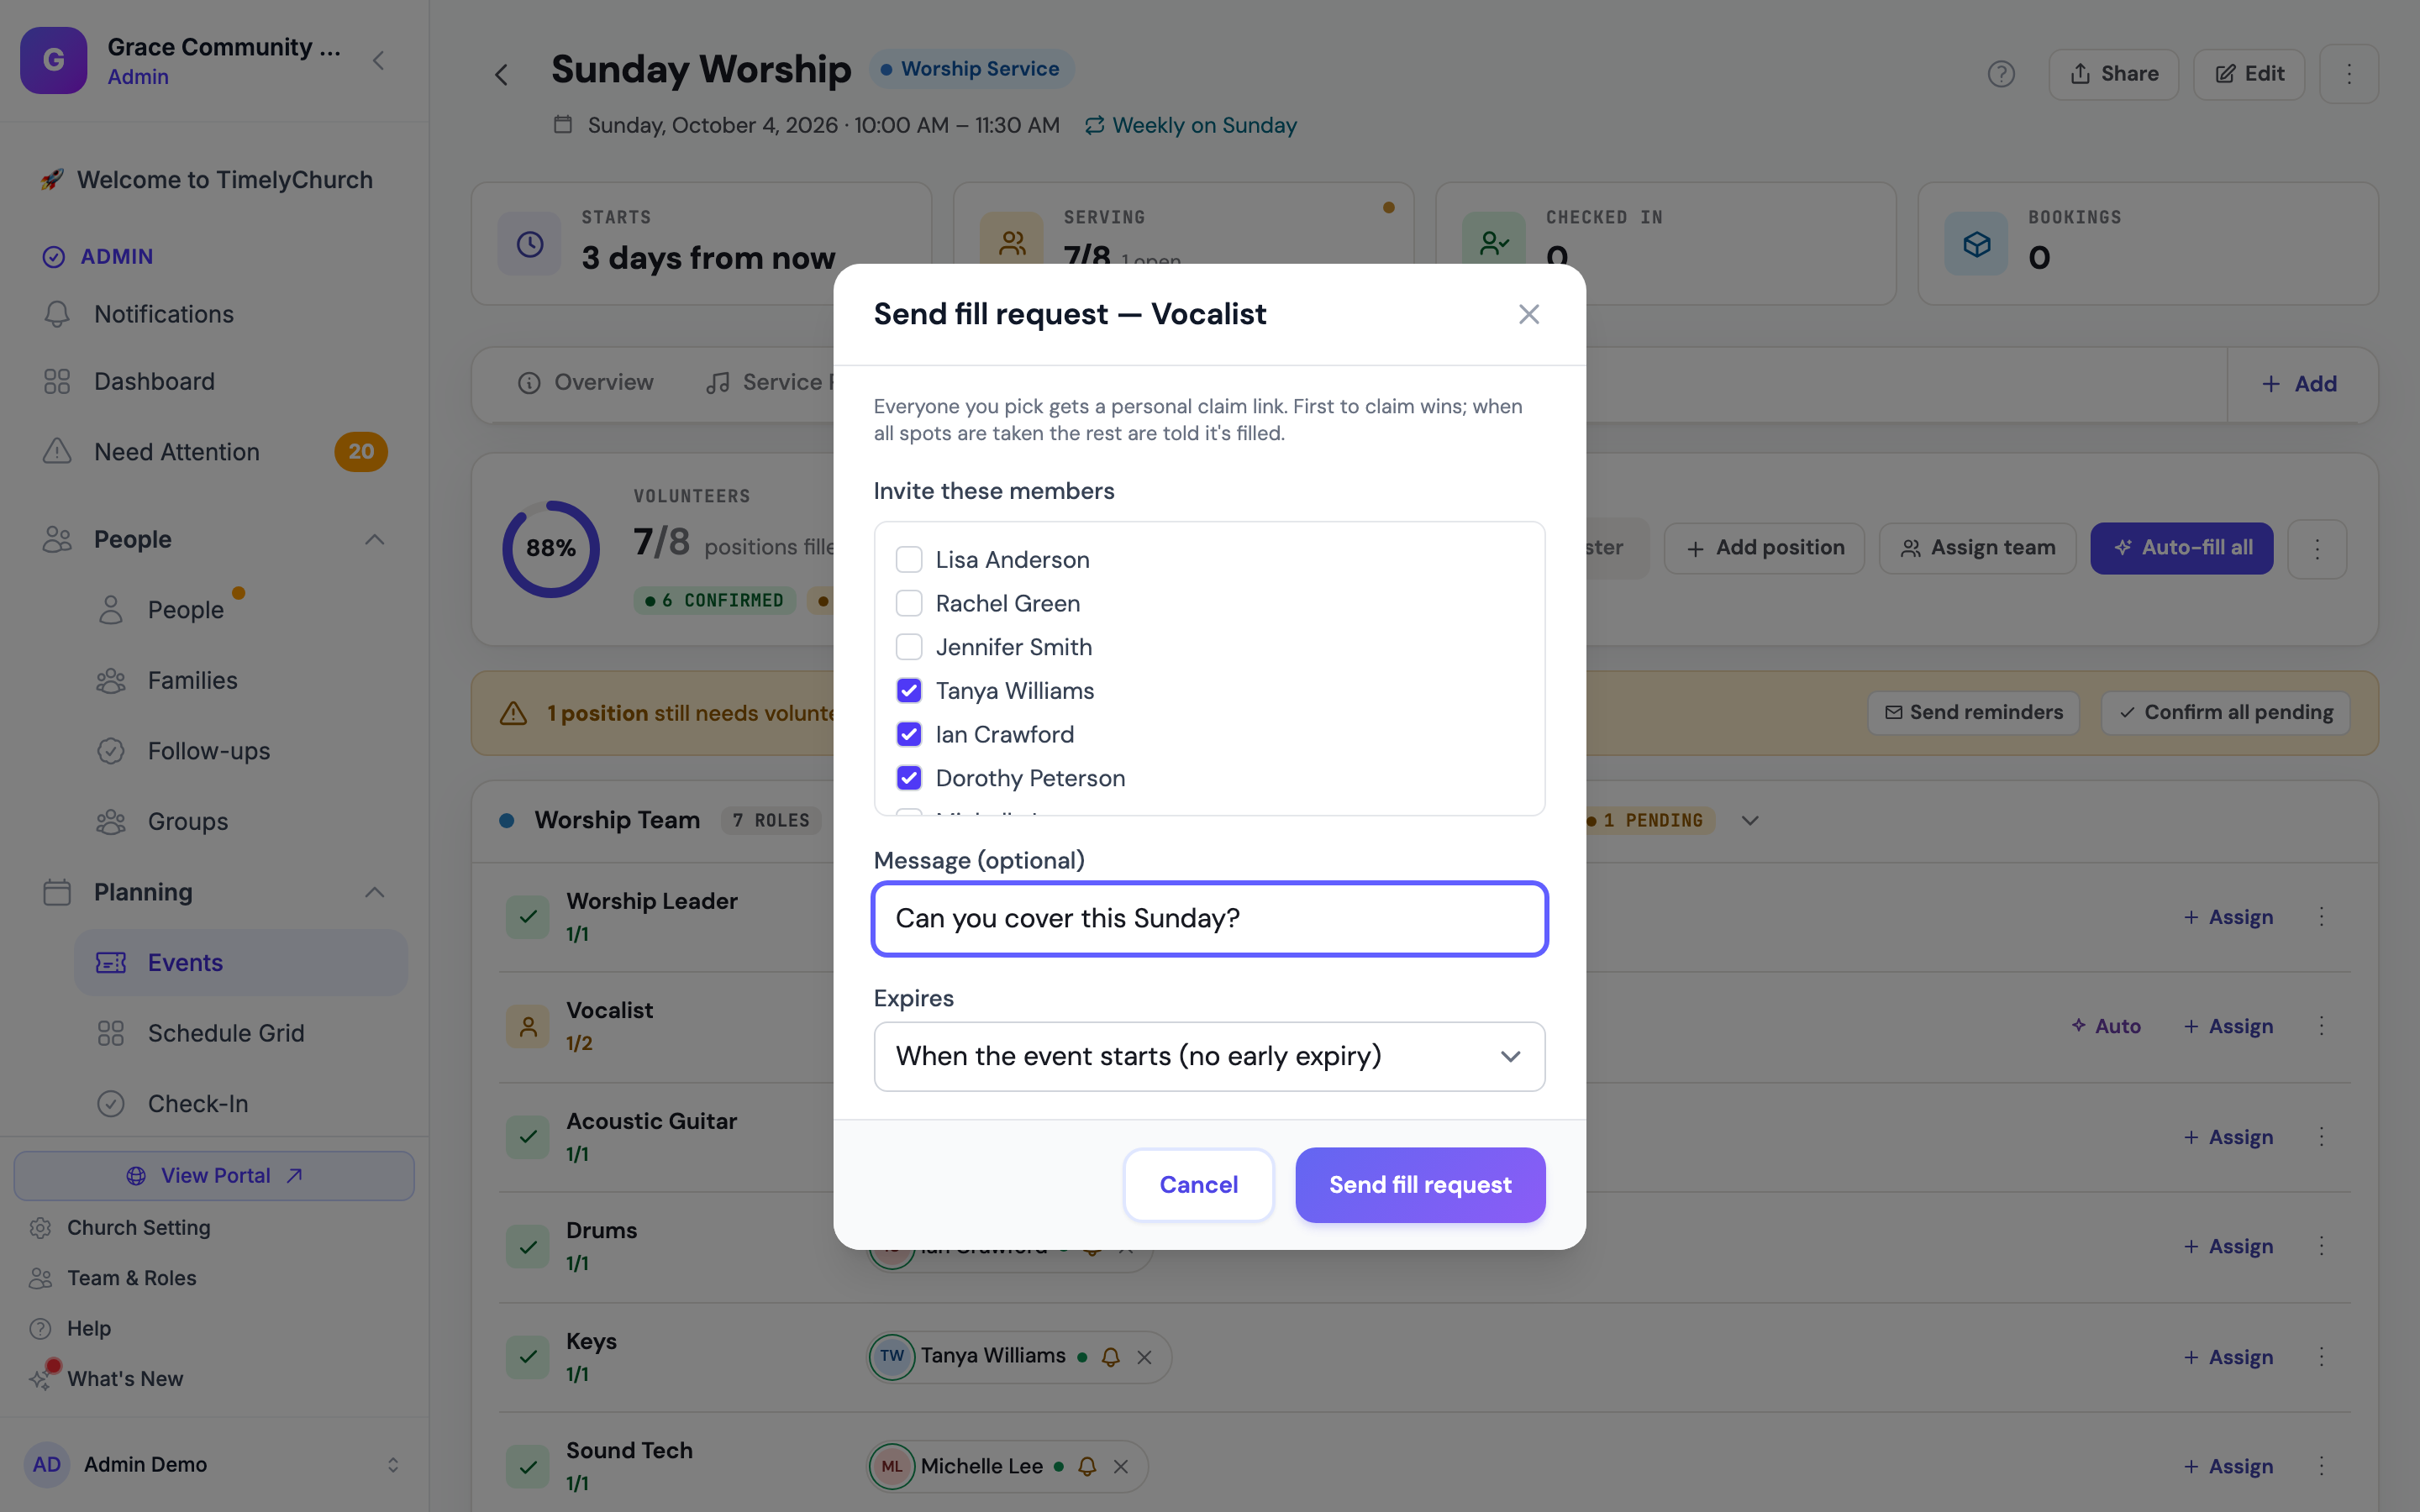
- The Send fill request dialog opens with the position's name. Under Invite these members, check each teammate you want to ask. You can pick more than one.
- Optionally add a Message (optional) -- one or two sentences works well: "Sarah's out tomorrow -- can anyone cover vocals at 10? First yes wins. Thanks!"
- Leave Expires on When the event starts (no early expiry) for a last-minute request, or pick After 1 day, After 2 days, After 3 days, or After 1 week.
- Click Send fill request.
Tip: Selecting 2-3 people is the sweet spot. Selecting only 1 risks them not seeing it in time. Selecting 8 makes everyone's phone buzz unnecessarily.
Note: The Invite these members list shows everyone on the team — it doesn't leave out people who are away or already serving elsewhere that day. Glance at the On Leave badges on the team's Members tab, or at the Schedule Grid, before you pick.
Step 4: What Your Teammates Receive
Time: 30 seconds
- Teammates who've connected Telegram get a message asking whether they can take the position, with a one-tap ✋ I can take it button.
- Everyone else gets an email with their own claim link — no login needed.
- The first person to claim is scheduled right away as Confirmed. Anyone who taps after the spot is taken sees that all spots are filled.
- When the last spot fills, the request closes by itself, everyone else who was asked hears that it's filled, and the team's leaders get a message saying who took it.
For the full picture, see Fill Requests: Offer Open Spots, First to Claim Wins.
Step 5: Follow Up — or Cancel
Time: Varies
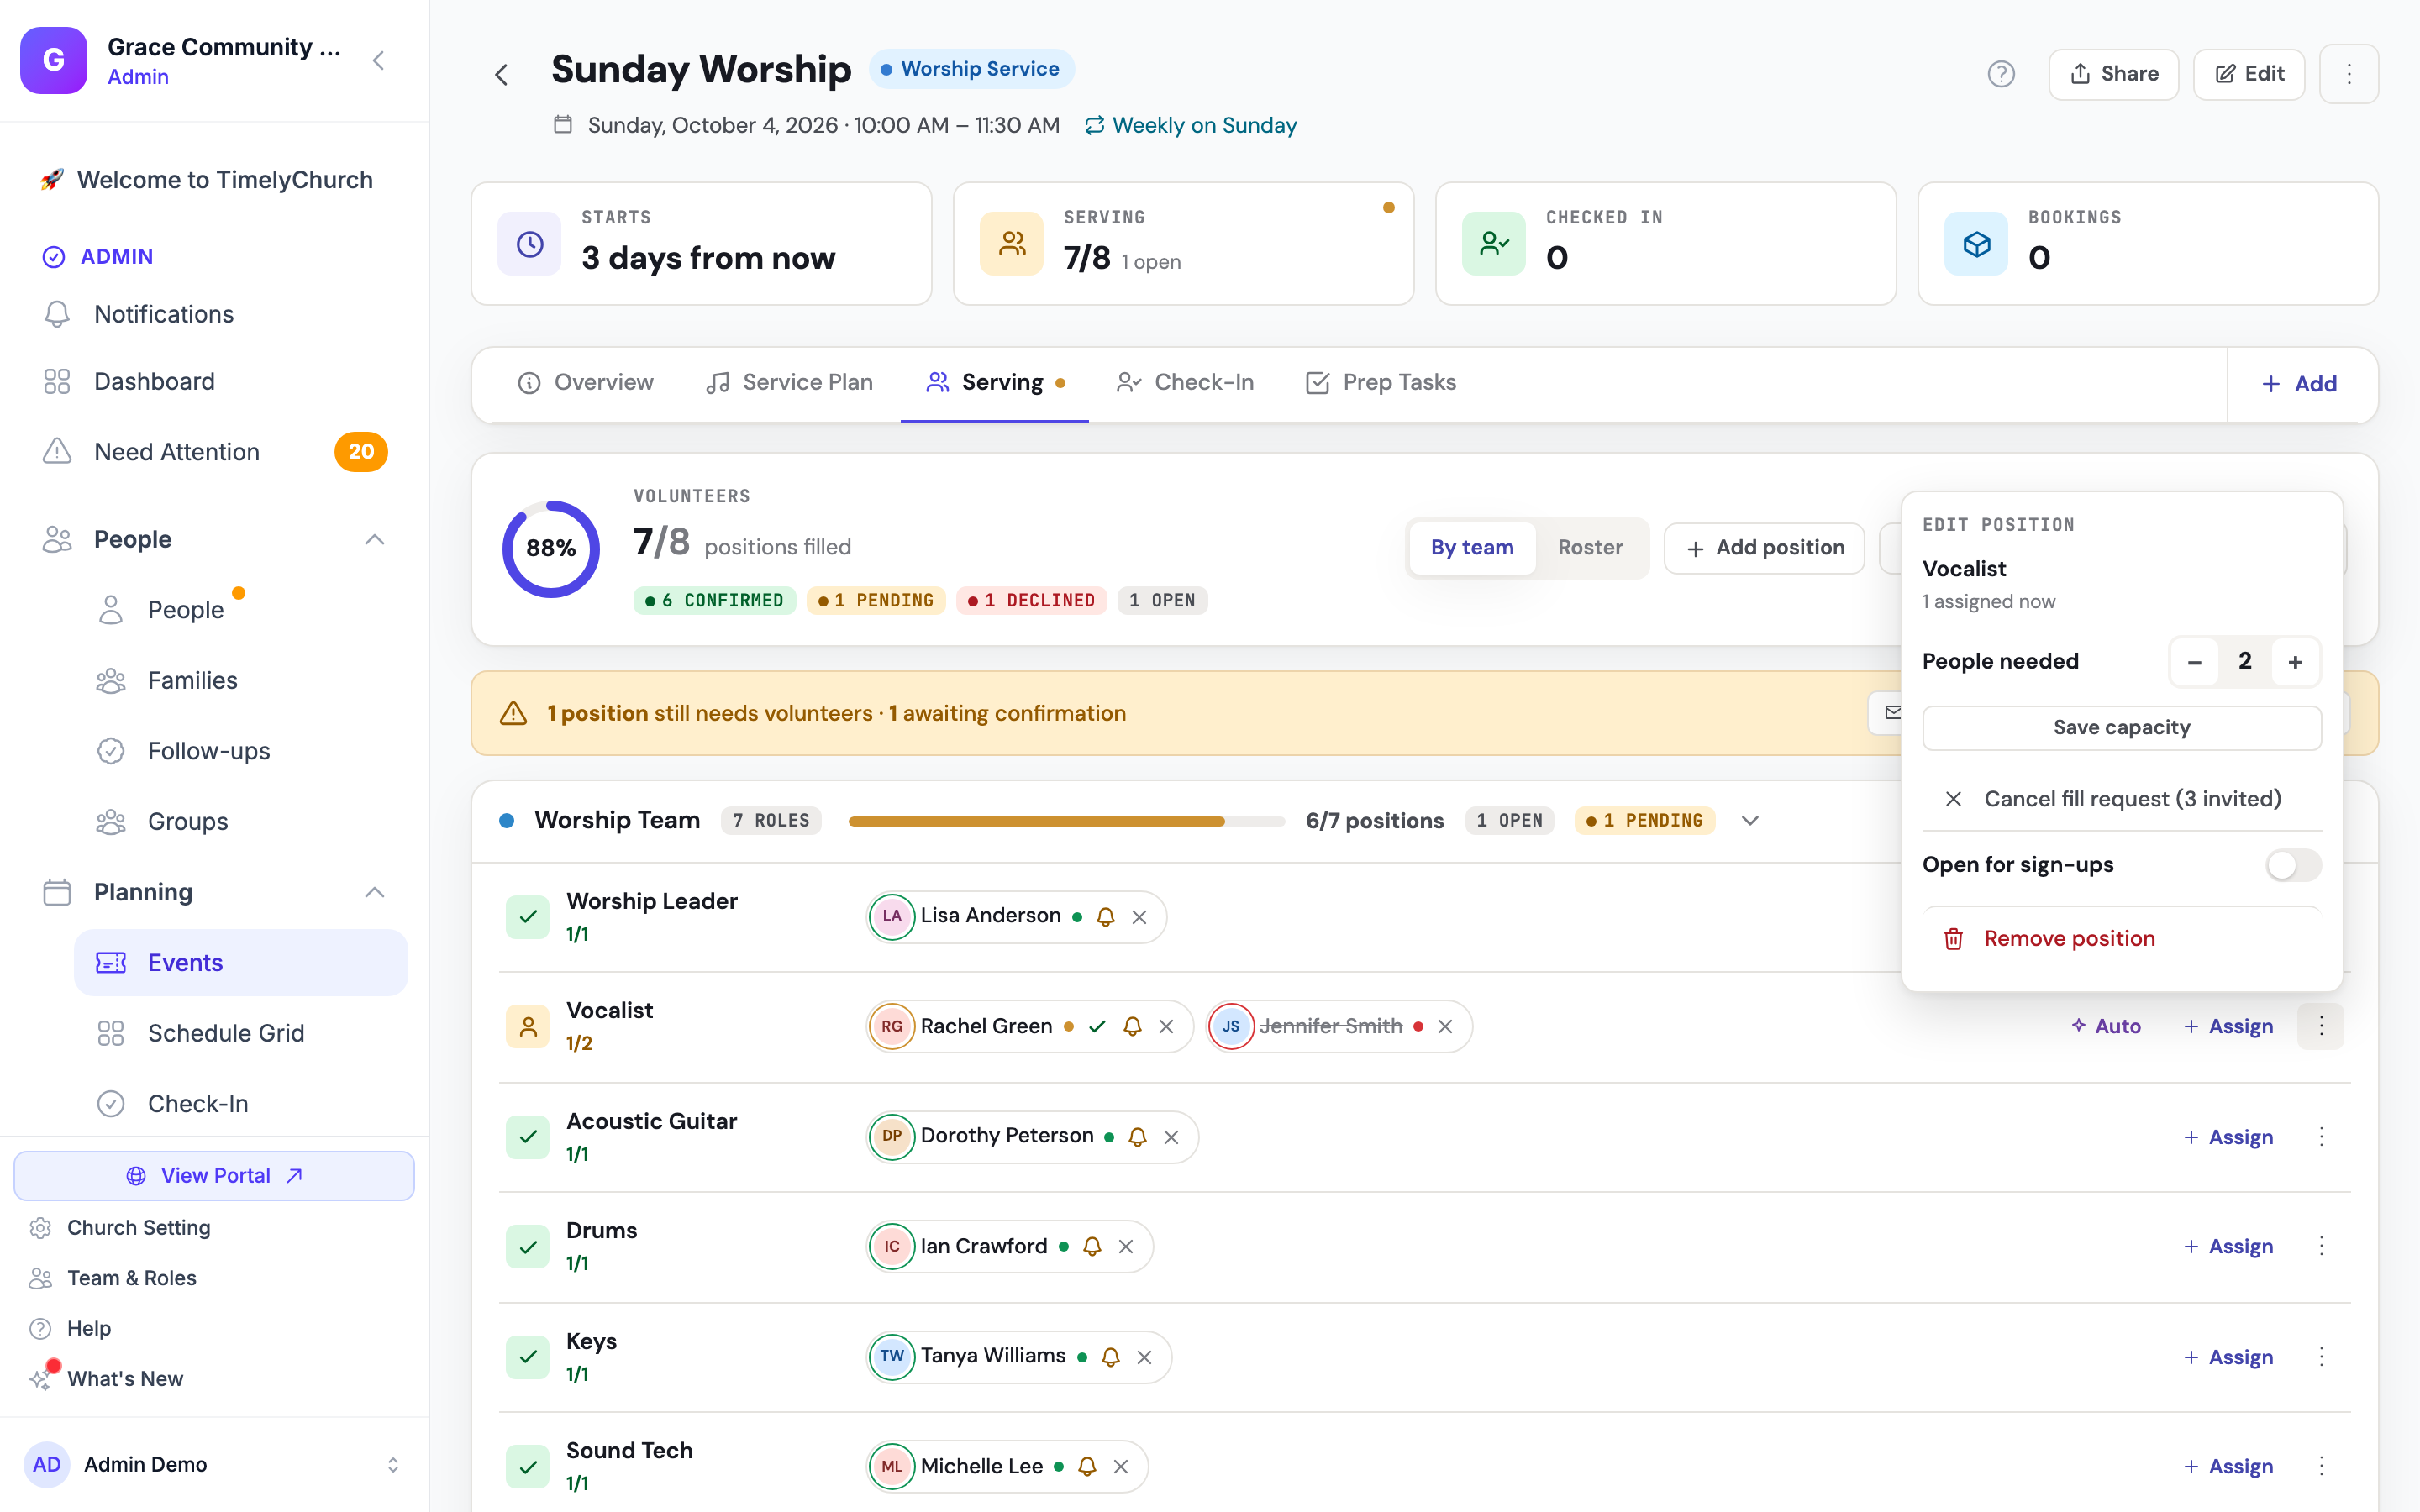
While a fill request is out, the position's ⋮ menu shows Cancel fill request (N invited) instead of Send fill request — a position can have only one open fill request at a time.
If nobody bites, you have options:
- Widen the net. Click Cancel fill request (N invited), then Send fill request again and pick a few more people.
- Ask someone directly. Call a likely candidate. Once they agree, click Assign on the position and choose them in the Find Volunteers panel.
- Let the system pick. Click Auto on the position to assign the best available teammate from your rotation.
- Open it up. Turn on Open for sign-ups in the position's ⋮ menu so anyone on the team can take the spot from their portal.
If you set an expiry and nobody claims before it passes, the request closes and the team's leaders are told "Nobody claimed your fill request before it expired — the spot is still open."
If the position genuinely can't be filled this week, lower People needed in the ⋮ menu and click Save capacity (you can't go below the number of people already assigned), or use Remove position if the event can run without it.
What to Do Next
- Walk your team leaders through this tutorial too -- they can send fill requests on the teams they lead. (Tutorial 02: Manage Your Team)
- Make sure every volunteer has set their availability so the On Leave badges and auto-pick have something to work with. (Tutorial 03: Set Your Availability)
- Read Cascade Auto-Fill, Sub Invites, and Out-of-Office Badges for how declines are handled automatically.
- Configure Auto-pick replacement when someone declines on each team so most declines are filled by the system before you ever have to step in. (Tutorial 01, Step 4)
The dream is a Saturday night with no notifications at all. Now you know how to get there.