
Custom Fields for People
Custom fields let you track any information about your people that is not covered by the standard fields. Whether you need to record t-shirt sizes, spiritual gifts, medical allergies, volunteer certifications, or anything else unique to your church, custom fields make it possible.
Why Use Custom Fields?
Every church is different. While TimelyChurch provides a comprehensive set of standard fields (name, contact info, membership status, etc.), your church may need to track additional information. Custom fields let you:
- Capture church-specific data -- Track baptism class completion, small group preferences, ministry interests, dietary restrictions, or anything else.
- Filter your directory -- Custom fields appear as filter options on the People page, so you can quickly find everyone with a specific attribute.
- Include data in the directory -- Optionally show custom fields in your member-facing directory.
- Organize into categories -- Group related fields under Custom, Spiritual, Volunteer, Medical, or Other.
- Control access -- Choose whether members can see a field on their own profile and whether they can change it.
Accessing Custom Fields Settings
- Click Church Setting at the bottom of the left sidebar.
- Click the Fields tab.
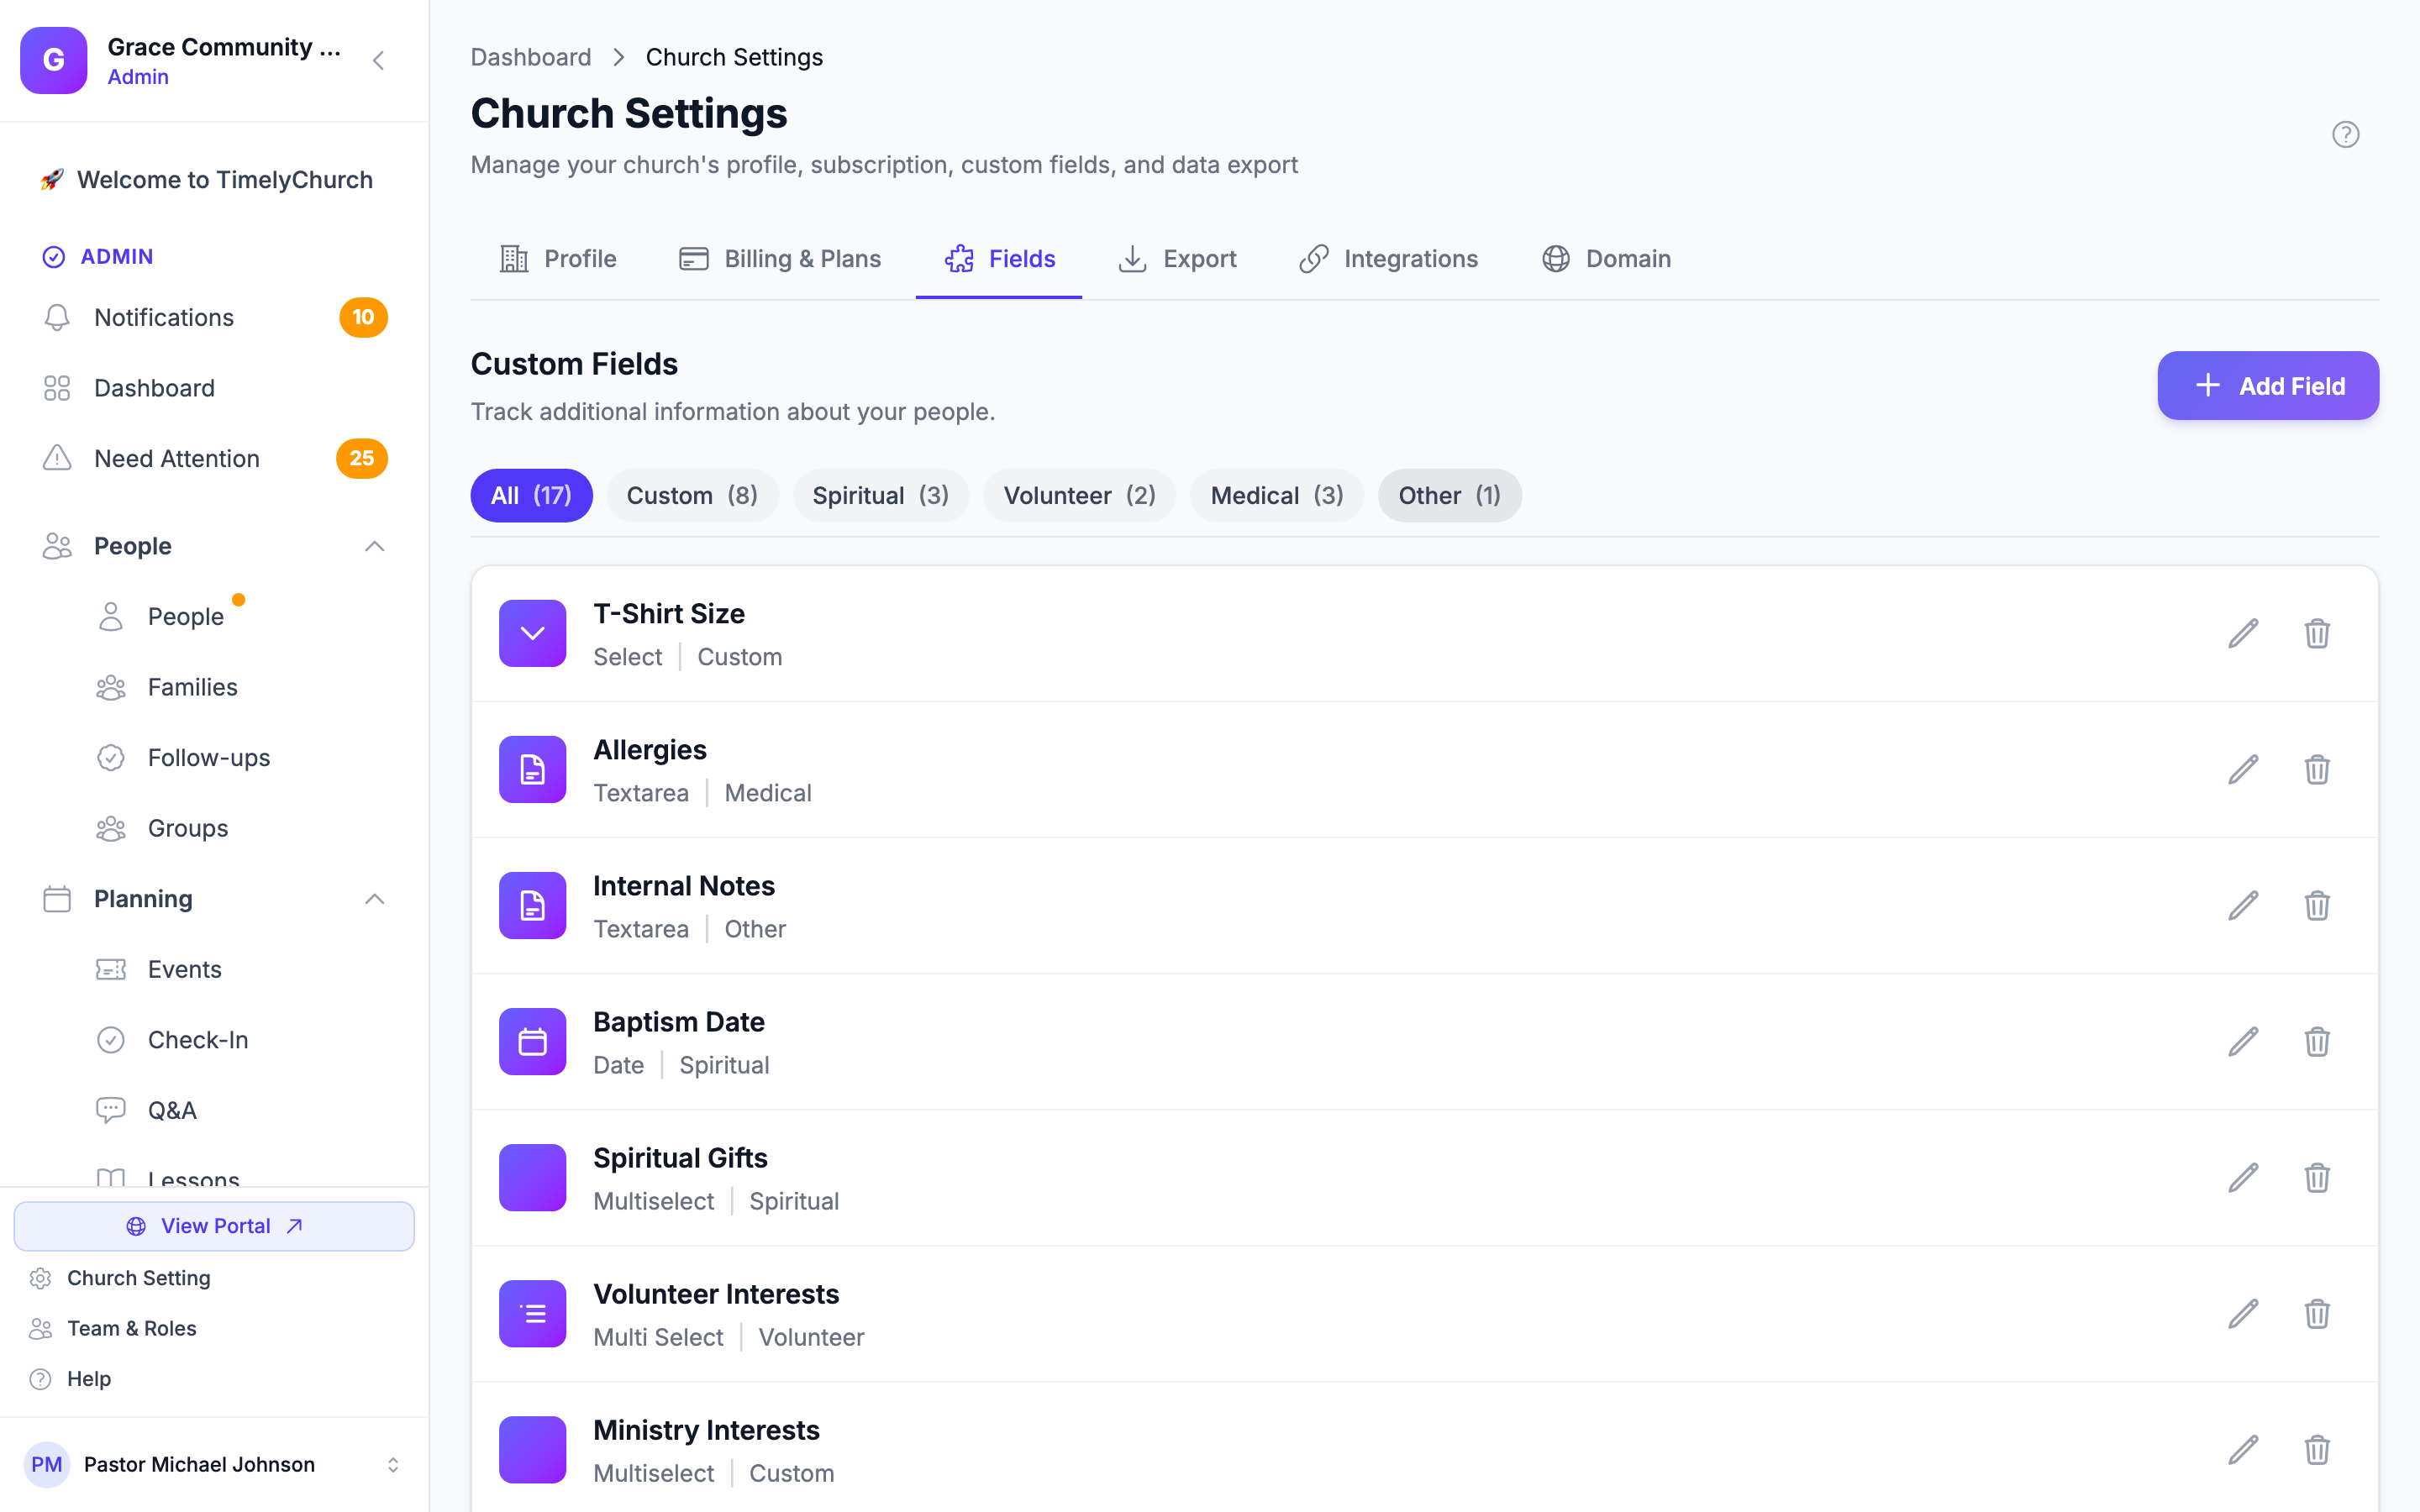
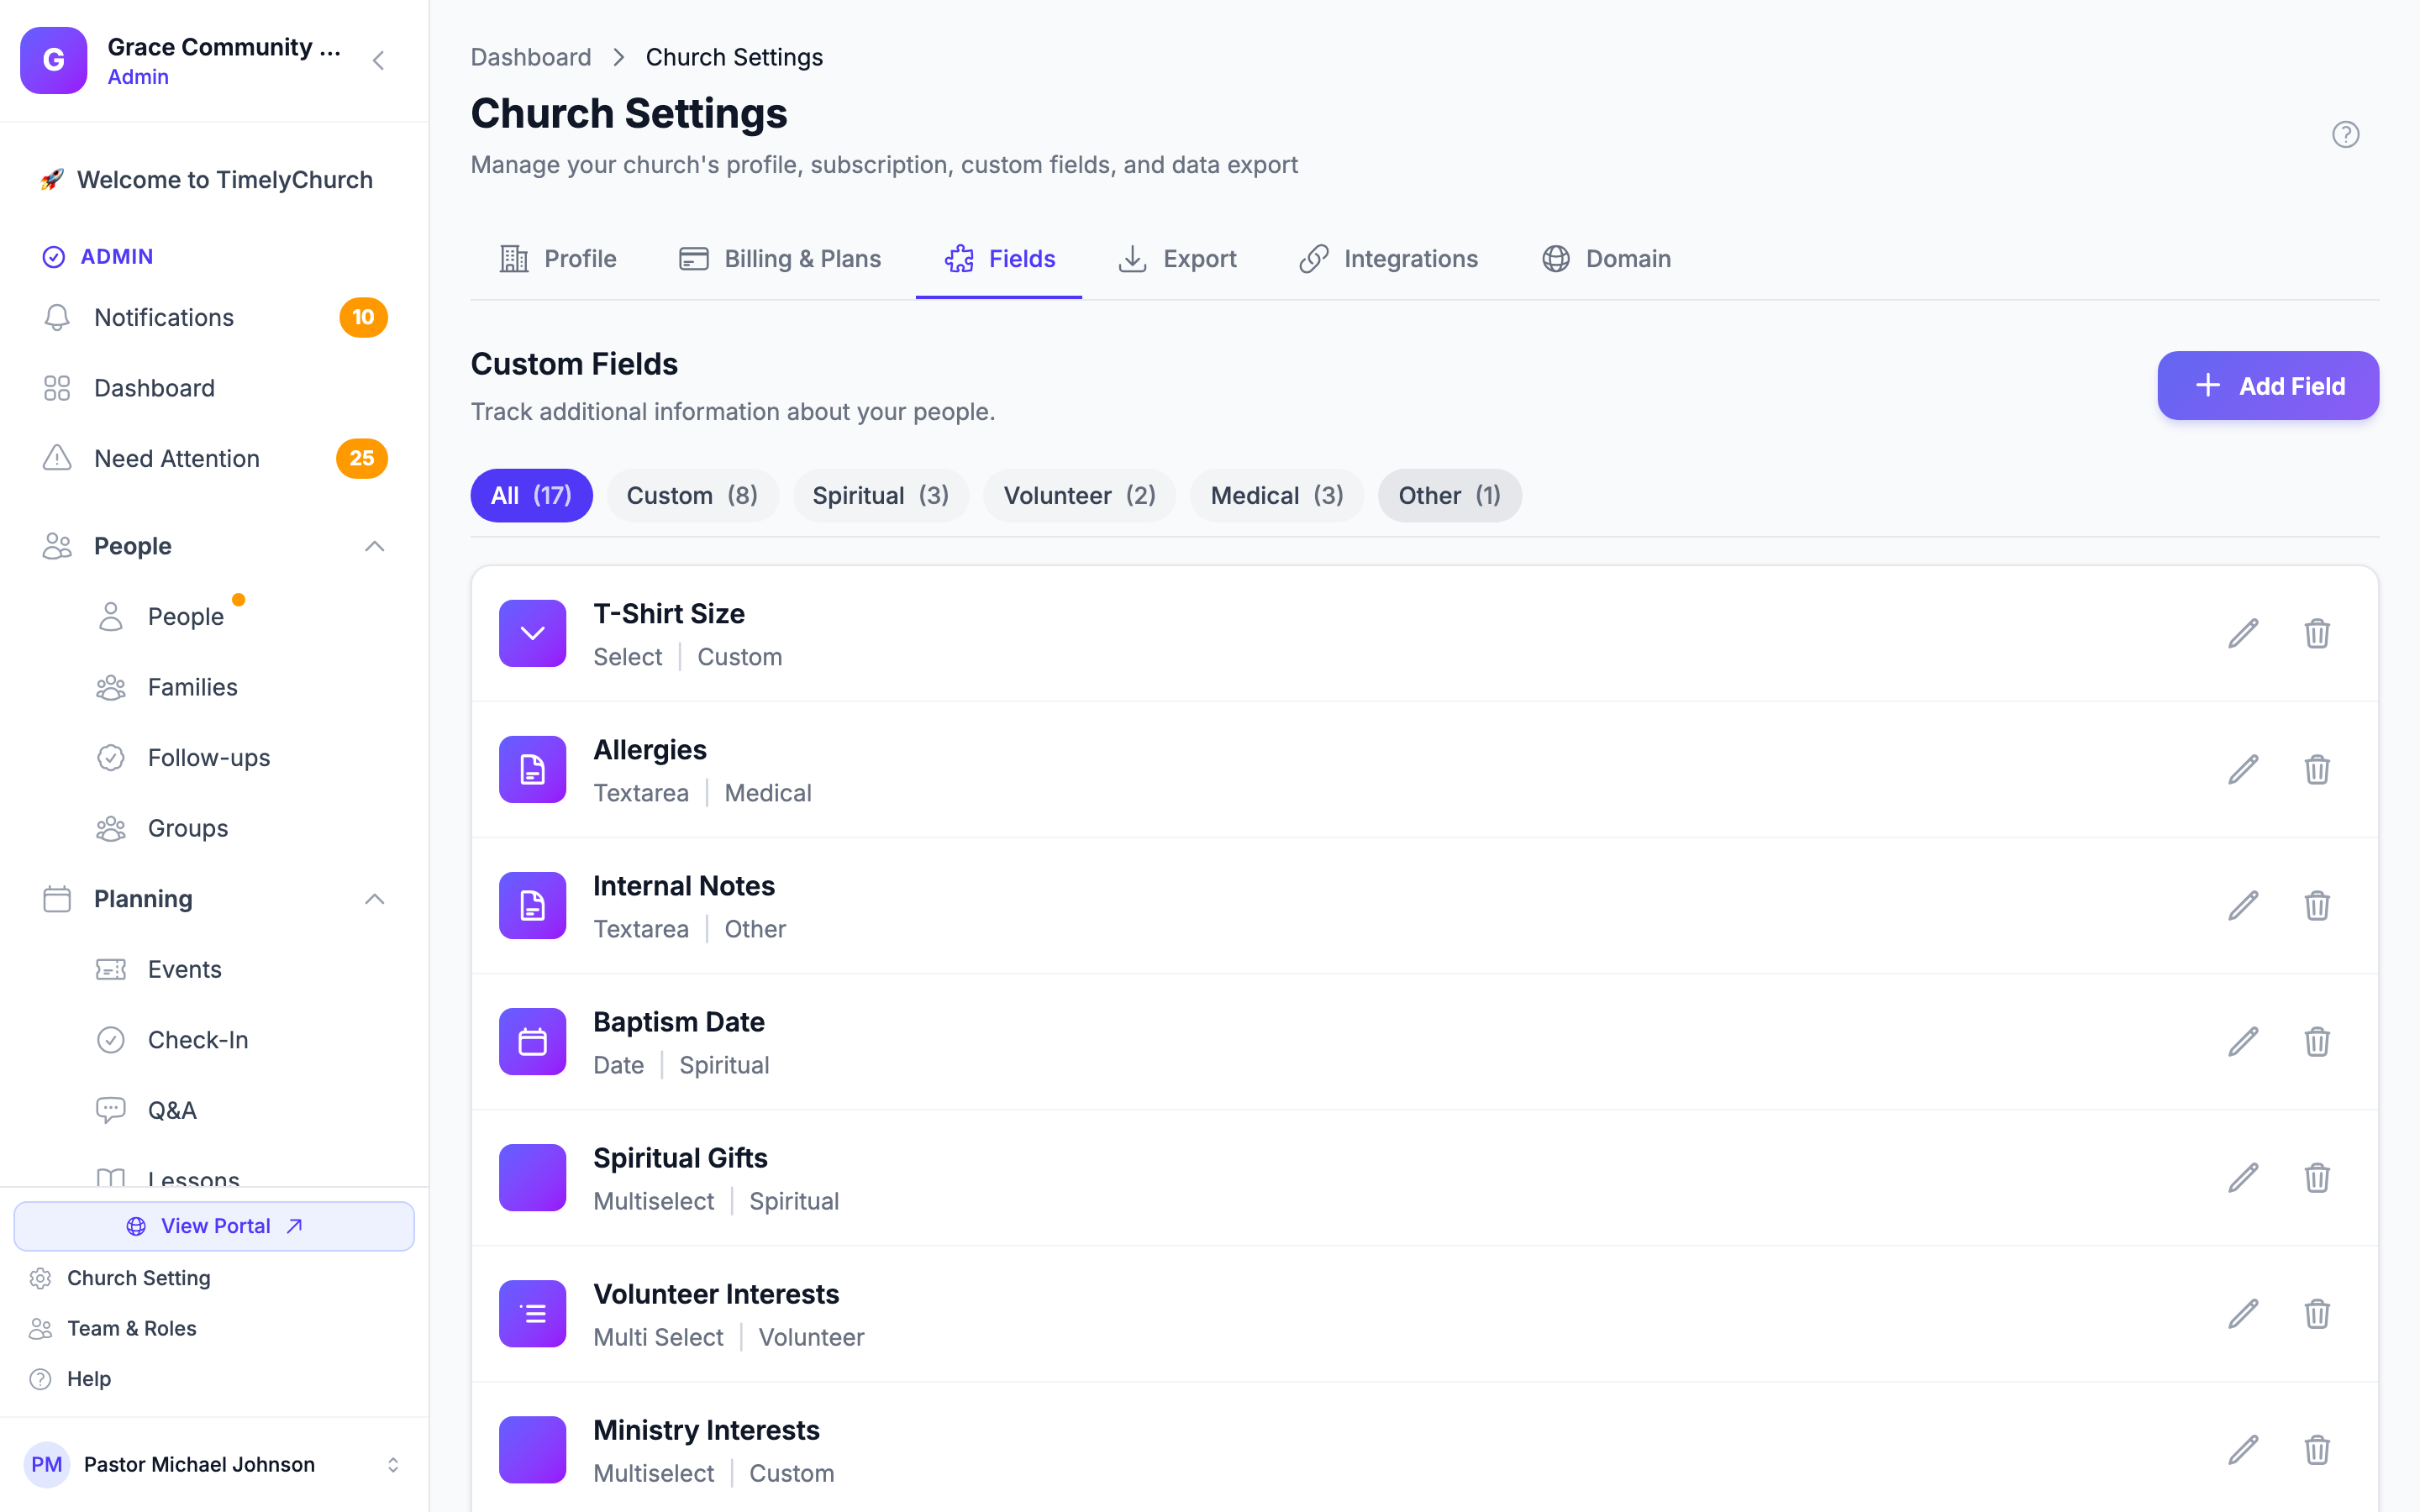
- You will see all the custom fields you have created. Use the category buttons (All, Custom, Spiritual, Volunteer, Medical, Other) to narrow the list.
Shortcut: On the People page, click the Custom Fields button at the top of the page.
You need access to Settings to open this page.
Fields Your Church Starts With
A new TimelyChurch account comes with a few ready-made fields you can use, rename, or delete: Baptism Date, Salvation Date, and Spiritual Gifts (Spiritual); Volunteer Interests and Background Check Date (Volunteer); Allergies, Medical Conditions, and Emergency Contact (Medical); and Internal Notes (Other).
Check-in uses the medical fields. Children's check-in reads the Allergies and Medical Conditions fields (and a Dietary Restrictions field, if you create one) to show allergy and medical alerts and to print them on security labels. You can rename these fields and they keep working. If you delete one, create a new field with exactly the original name to bring it back. See Who Can See Children's Medical and Allergy Information.
Plan Limits
The number of custom fields you can create depends on your plan (see Church Setting → Billing & Plans). When you reach it, TimelyChurch shows a message asking you to upgrade before you can add another field.
Creating a Custom Field
- On the Fields tab, click Add Field and pick the kind of field you want (see types below). A new field card appears in the list, marked New.
- Click the field's Edit button to open the Edit Field dialog and fill in the details:
Field Details
| Setting | Description |
|---|---|
| Field Name | The label shown on the person's profile (e.g., "T-Shirt Size") |
| Category | Which group the field belongs to: Custom Fields, Spiritual, Volunteer, Medical, or Other |
| Placeholder | Optional hint text shown inside the empty field (text, number, email, phone, and URL fields) |
| Help Text | Optional description shown below the field to guide data entry |
| Options | For Dropdown and Multi-Select fields: one value per row. Click + Add Option for another. |
Field Types
| Type | Best For | Example |
|---|---|---|
| Text | Short answers | Employer name, school name |
| Long Text | Longer text | Special needs notes, testimony |
| Number | Numeric values | Years of membership, number of children |
| Date | Dates | Salvation date, background check date |
| Yes/No | Yes/No questions | Background check completed? Baptized? |
| Dropdown | Pick one option from a list | T-shirt size (S, M, L, XL) |
| Multi-Select | Pick multiple options from a list | Spiritual gifts (Teaching, Mercy, Leadership...) |
| Email addresses | Work email, alternate email | |
| Phone | Phone numbers | Work phone, secondary contact |
| URL | Web links | Personal website, social media profile |
Visibility and Access Settings
| Setting | What It Controls |
|---|---|
| Required | Whether this field must be filled in |
| Show on Profile | Whether the member sees this field on their own profile in the member portal |
| Show in Directory | Whether this field appears in the member-facing directory listing |
| Member Editable | Whether members can change this field themselves in the member portal. If Show on Profile is on but this is off, members see the value as view only. |
- Click Save Field to close the dialog.
- A "You have unsaved changes" bar appears at the bottom of the page. Click Save Changes to save your new fields, or Discard to throw the changes away.
Tip: Think carefully about which fields members should see. For example, a "Background Check Status" field should stay staff-only (leave Show on Profile off), while a "Spiritual Gifts" field might be something members can update themselves.
Editing a Custom Field
- Open Church Setting → Fields.
- Find the field you want to edit.
- Click its Edit button.
- Update any of the settings described above. The field type cannot be changed after creation (to protect existing data), but you can change everything else.
- Click Save Field, then Save Changes in the bar at the bottom of the page.
Reordering Custom Fields
The order of custom fields determines the order they appear on person profiles.
- Open Church Setting → Fields.
- Drag a field by its handle to its new position.
- Click Save Changes in the bar at the bottom of the page.
Deleting a Custom Field
If you want to permanently remove a custom field and all its data:
- Open Church Setting → Fields.
- Find the field.
- Click its Delete button.
- Confirm in the Delete Field? dialog.
Tip: Deleting a custom field permanently removes all values that have been entered for every person in your directory. This cannot be undone, so export your people first if you might need the data later.
Using Custom Fields on Person Profiles
On a person's profile, custom fields appear on the Overview tab under Additional Information. In view mode only the fields that have a value are listed.
To fill in a custom field value:
- Open a person's profile.
- On the Overview tab, click Edit Profile.
- Open the Additional Information (Custom Fields) section.
- Enter or select the value.
- Click Save Changes.
For a child (under 18), allergy and medical fields can be saved only once a parent or guardian has given consent -- see Person Profile Overview.
In the member portal, the category decides where a field appears. For example, when a parent edits a child's information from My Family, the fields in the Medical category are grouped under their own heading.
Filtering by Custom Fields
Custom fields automatically become filter options on the People page:
- Go to People.
- Open the Filters panel.
- Expand Custom Field Filters below the standard filters.
- Select or enter a value to filter by. Dropdown and Multi-Select fields offer their options, Yes/No fields offer Yes or No, Date fields match a single date, Text and Long Text fields match any part of the value, and the other types must match exactly.
- Click Apply. The people list updates to show only those matching your criteria.
For example, if you created a "Spiritual Gifts" multi-select field, you could filter to see everyone who selected "Teaching."
Tip: Combining custom field filters with standard filters is very powerful. For example, you could filter for Members who have "Spiritual Gift: Teaching" and "Background Check: Yes" to find qualified Sunday School teachers -- then click Save as List to keep that view. See Saved Lists (Smart Lists).