
Custom Fields for People
Audience: This article is for church administrators.
Custom Fields let you track additional information about your people beyond the standard name, email, phone, and address fields. Whether you need to record allergies, t-shirt sizes, spiritual gifts, volunteer certifications, or any other data specific to your ministry, custom fields give you the flexibility to capture it all.
Plan requirement: Creating, editing and deleting custom fields is part of the Pro plan (included during your trial).
Accessing Custom Fields
- At the bottom of the left sidebar, click Church Setting.
- Click the Fields tab.
The tab shows your fields as cards, with filter buttons along the top -- All, Custom, Spiritual, Volunteer, Medical, and Other -- to show one category at a time. New churches start with a set of ready-made fields (such as T-Shirt Size, Dietary Restrictions, Baptism Date, Spiritual Gifts, Allergies, Medical Conditions and Emergency Contact) that you can edit or delete.
Field Types
TimelyChurch supports ten different field types to accommodate various kinds of data:
| Type | Description | Example Use |
|---|---|---|
| Text | Single-line text input | Employer name, license plate number |
| Long Text | Multi-line text area | Ministry notes, prayer requests, special instructions |
| Number | Numeric input | Years in ministry, number of children |
| Date | Date picker | Baptism date, membership anniversary, background check expiration |
| Yes/No | Toggle switch (boolean) | Background check cleared, CPR certified, has key to building |
| Dropdown | Single selection from a list of options | T-shirt size (S, M, L, XL), campus location |
| Multi-Select | Multiple selections from a list of options | Spiritual gifts, ministry interests, language fluency |
| Email address input | Secondary email, work email | |
| Phone | Phone number input | Emergency contact number, work phone |
| URL | Website URL input | Personal blog, LinkedIn profile |
Field Categories
Each custom field belongs to a Category, which decides the section of the person's profile it appears in:
| Category | Intended Use |
|---|---|
| Custom | General-purpose fields that do not fit the other categories |
| Spiritual | Spiritual gifts, baptism date, salvation date, faith journey notes |
| Volunteer | Volunteer interests, certifications, availability, background check status |
| Medical | Allergies, dietary restrictions, medical conditions, emergency contact |
| Other | Anything else you want to track |
When a staff member views a person's profile, these categories organize the custom field data into logical sections.
Creating a Custom Field
-
Go to Church Settings → Fields.
-
Click Add Field and pick a field type from the list.
-
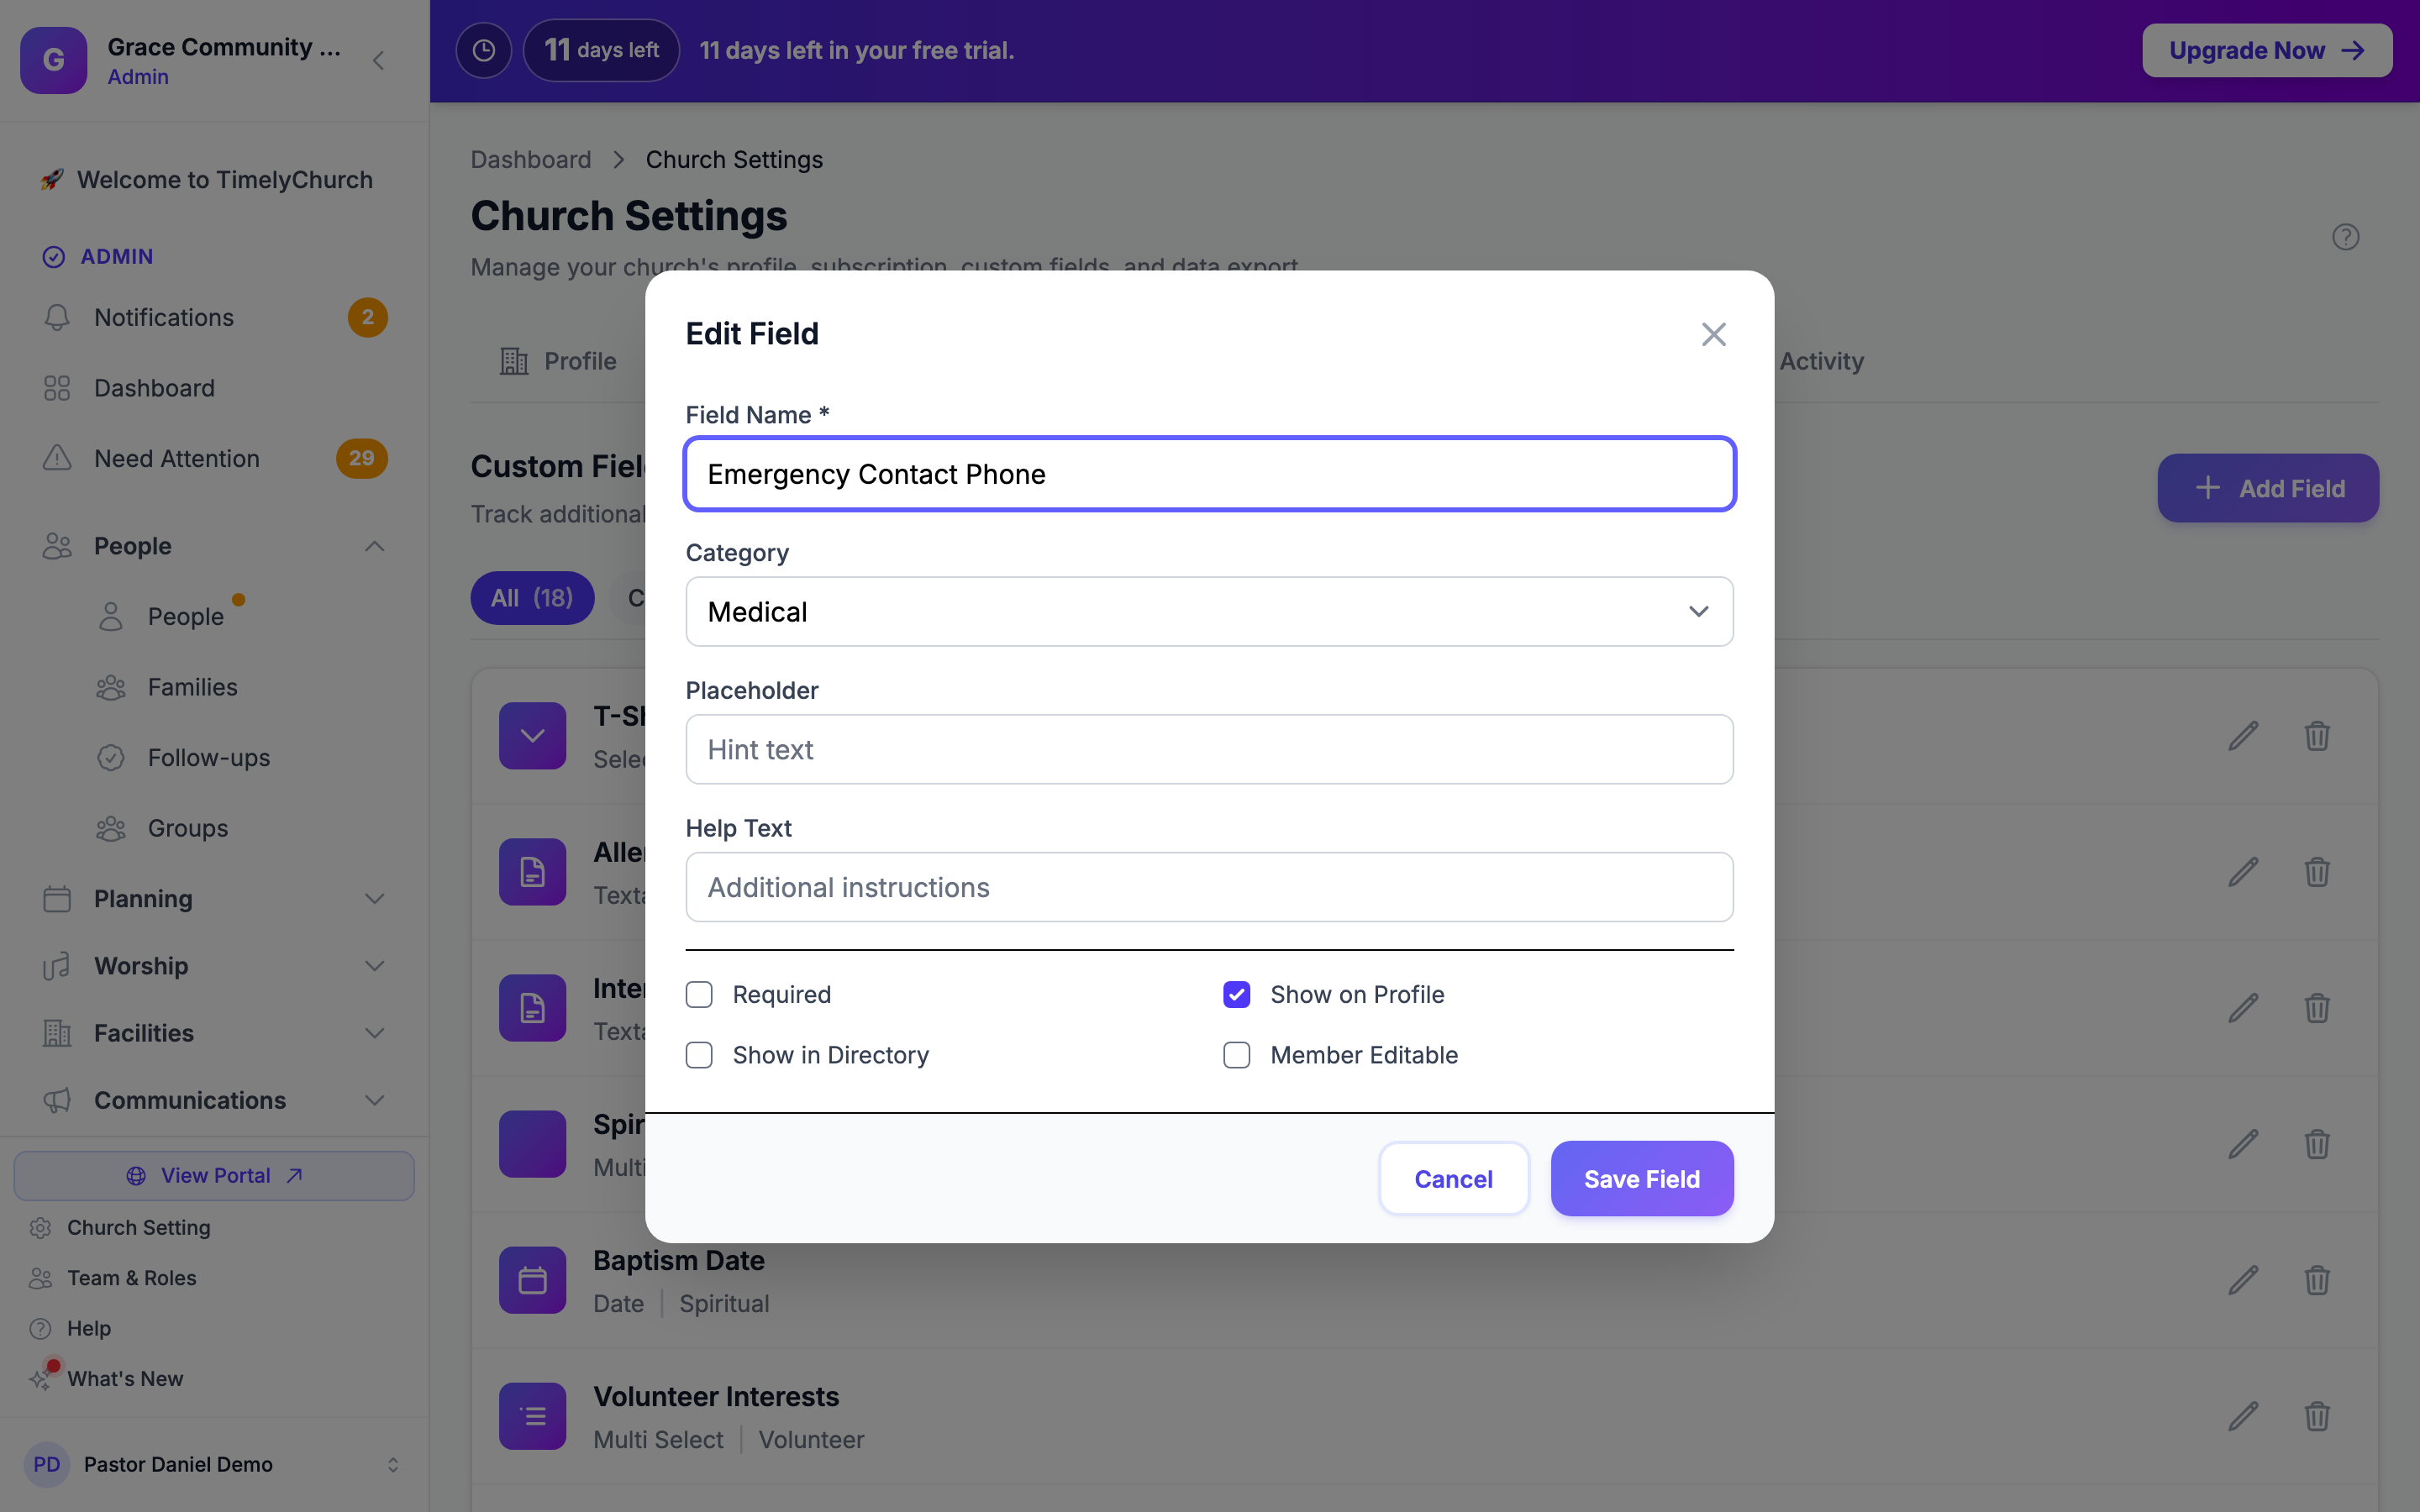
The Edit Field window opens. Fill in:
- Field Name (required) -- The label that will appear on the person's profile (e.g., "T-Shirt Size," "Allergies," "Spiritual Gifts")
- Category -- Which section this field belongs to (Custom, Spiritual, Volunteer, Medical, or Other)
- Placeholder -- Hint text shown inside the empty field (for text, number, email, phone and URL fields)
- Help Text -- Additional instructions shown with the field to guide data entry
- Options -- For Dropdown and Multi-Select fields, the list of choices; click + Add Option for each one
-
Tick the settings you want:
- Required -- The field must be filled in when editing a person's profile
- Show on Profile -- The field appears on the person's profile (on by default)
- Show in Directory -- The field's value appears in the people directory list
- Member Editable -- The person can edit this field themselves in the member portal
-
Click Save Field.
Tip: For sensitive information like medical conditions or background check results, leave Member Editable and Show in Directory off, and make sure only the right roles can see people's profiles (see Roles & Permissions).
Managing Existing Fields
Editing a Field
- Find the field on the Fields tab (use the category buttons to narrow the list).
- Click the Edit (pencil) button on the field card.
- Update the name, category, placeholder, help text, options or settings.
- Click Save Field.
Field cards show small badges: Required for required fields, New for a field you've added but not saved yet, and Modified for unsaved edits. When you have unsaved changes, a bar at the bottom of the page says You have unsaved changes -- click Save Changes to keep them, or Discard to throw them away.
Note: You cannot change a field's type after creation. If you need a different type, create a new field and move the data manually.
Deleting a Field
If you permanently no longer need a field:
- Find the field on the Fields tab.
- Click the Delete (trash) button on the field card.
- Confirm in the Delete Field? window.
Warning: Deleting a field permanently deletes the field "and all its values. This cannot be undone." -- every person's data in that field is removed.
Practical Examples
Tracking Allergies (Medical Category)
- Field Name: Allergies
- Type: Long Text
- Category: Medical
- Help Text: "List any known allergies (food, medication, environmental)"
- Member Editable: Yes
T-Shirt Size (Volunteer Category)
- Field Name: T-Shirt Size
- Type: Dropdown
- Category: Volunteer
- Options: XS, S, M, L, XL, 2XL, 3XL
- Member Editable: Yes
Spiritual Gifts (Spiritual Category)
- Field Name: Spiritual Gifts
- Type: Multi-Select
- Category: Spiritual
- Options: Teaching, Leadership, Administration, Mercy, Giving, Hospitality, Encouragement, Serving, Wisdom, Faith, Discernment, Prophecy, Evangelism, Shepherding
- Show in Directory: Yes
Background Check Date (Volunteer Category)
- Field Name: Background Check Date
- Type: Date
- Category: Volunteer
- Help Text: "Date the most recent background check was completed"
Emergency Contact Phone (Medical Category)
- Field Name: Emergency Contact Phone
- Type: Phone
- Category: Medical
- Member Editable: Yes
- Help Text: "Phone number for their emergency contact"
Frequently Asked Questions
Q: Is there a limit on how many custom fields I can create? A: Custom fields are a Pro feature, and Pro has no limit on the number of fields.
Q: Can members fill in their own custom field data? A: Yes, if you tick Member Editable on the field. Members will see editable fields in their profile within the member portal.
Q: Can I use custom fields for family records? A: Custom fields are attached to individual person records. To track family-level information, you can add the field to the primary family contact's profile.
Q: What happens to custom field data when I export people? A: The people CSV on the Export tab of Church Settings includes only the built-in columns (ID, name, contact info, address, membership status, family, classes, notes, created date). Custom field values are not included in the export; they are visible on each person's profile.