
Split Transactions
What Is a Split Transaction?
A split transaction is a single transaction whose amount is divided across two or more categories. Instead of one line that says "Office Depot, $250, Office Supplies," you might split that same $250 receipt into "$180 Office Supplies + $70 Ministry Supplies."
This keeps the transaction count low (one entry per receipt, check, or deposit) while still giving you accurate category-level reporting.
When to Use a Split
Common scenarios:
- Mixed receipts -- A single Costco run buys office supplies, ministry supplies, and refreshments. Split by category instead of creating three separate transactions or guessing one catch-all category.
- Combined deposits -- A single deposit slip combines tithes, designated gifts, and a fundraiser. Split the deposit by income category (or by fund).
- Allocated expenses -- A monthly insurance bill that should be split between facility expense and vehicle expense.
- Reimbursements with multiple line items -- A staff expense report covering several different category buckets.
Splits vs. Other Options
| Use this | When |
|---|---|
| Split transaction | One real-world money movement, multiple categories. The total comes from a single deposit, check, or transfer. |
| Two separate transactions | Two genuinely separate money movements, even if they happened the same day. |
| Journal entry (journal entries) | A manual double-entry posting -- a different, accountant-oriented tool. Use it to correct or reclassify a previously-recorded transaction, not to break a single deposit into categories. A split is one money movement across many categories; a journal entry is a balanced debit/credit posting. |
Note: Journal Entries are an Advanced-mode feature. If your accounting is set to Simple mode you will not see them, and that is fine -- splits cover the everyday "one payment, several categories" need on their own.
Creating a Split
You create splits while recording an income or expense transaction.
- On the Transactions page (called Money In / Out in Simple mode), click the New Transaction button in the top-right corner.
- From the menu, choose New Expense or New Income. Both open the Record Transaction form. (Splits are not available for New Transfer -- a transfer just moves money between two accounts.)
- Fill in the top-level fields as usual: amount, date, account, category, payee/description.
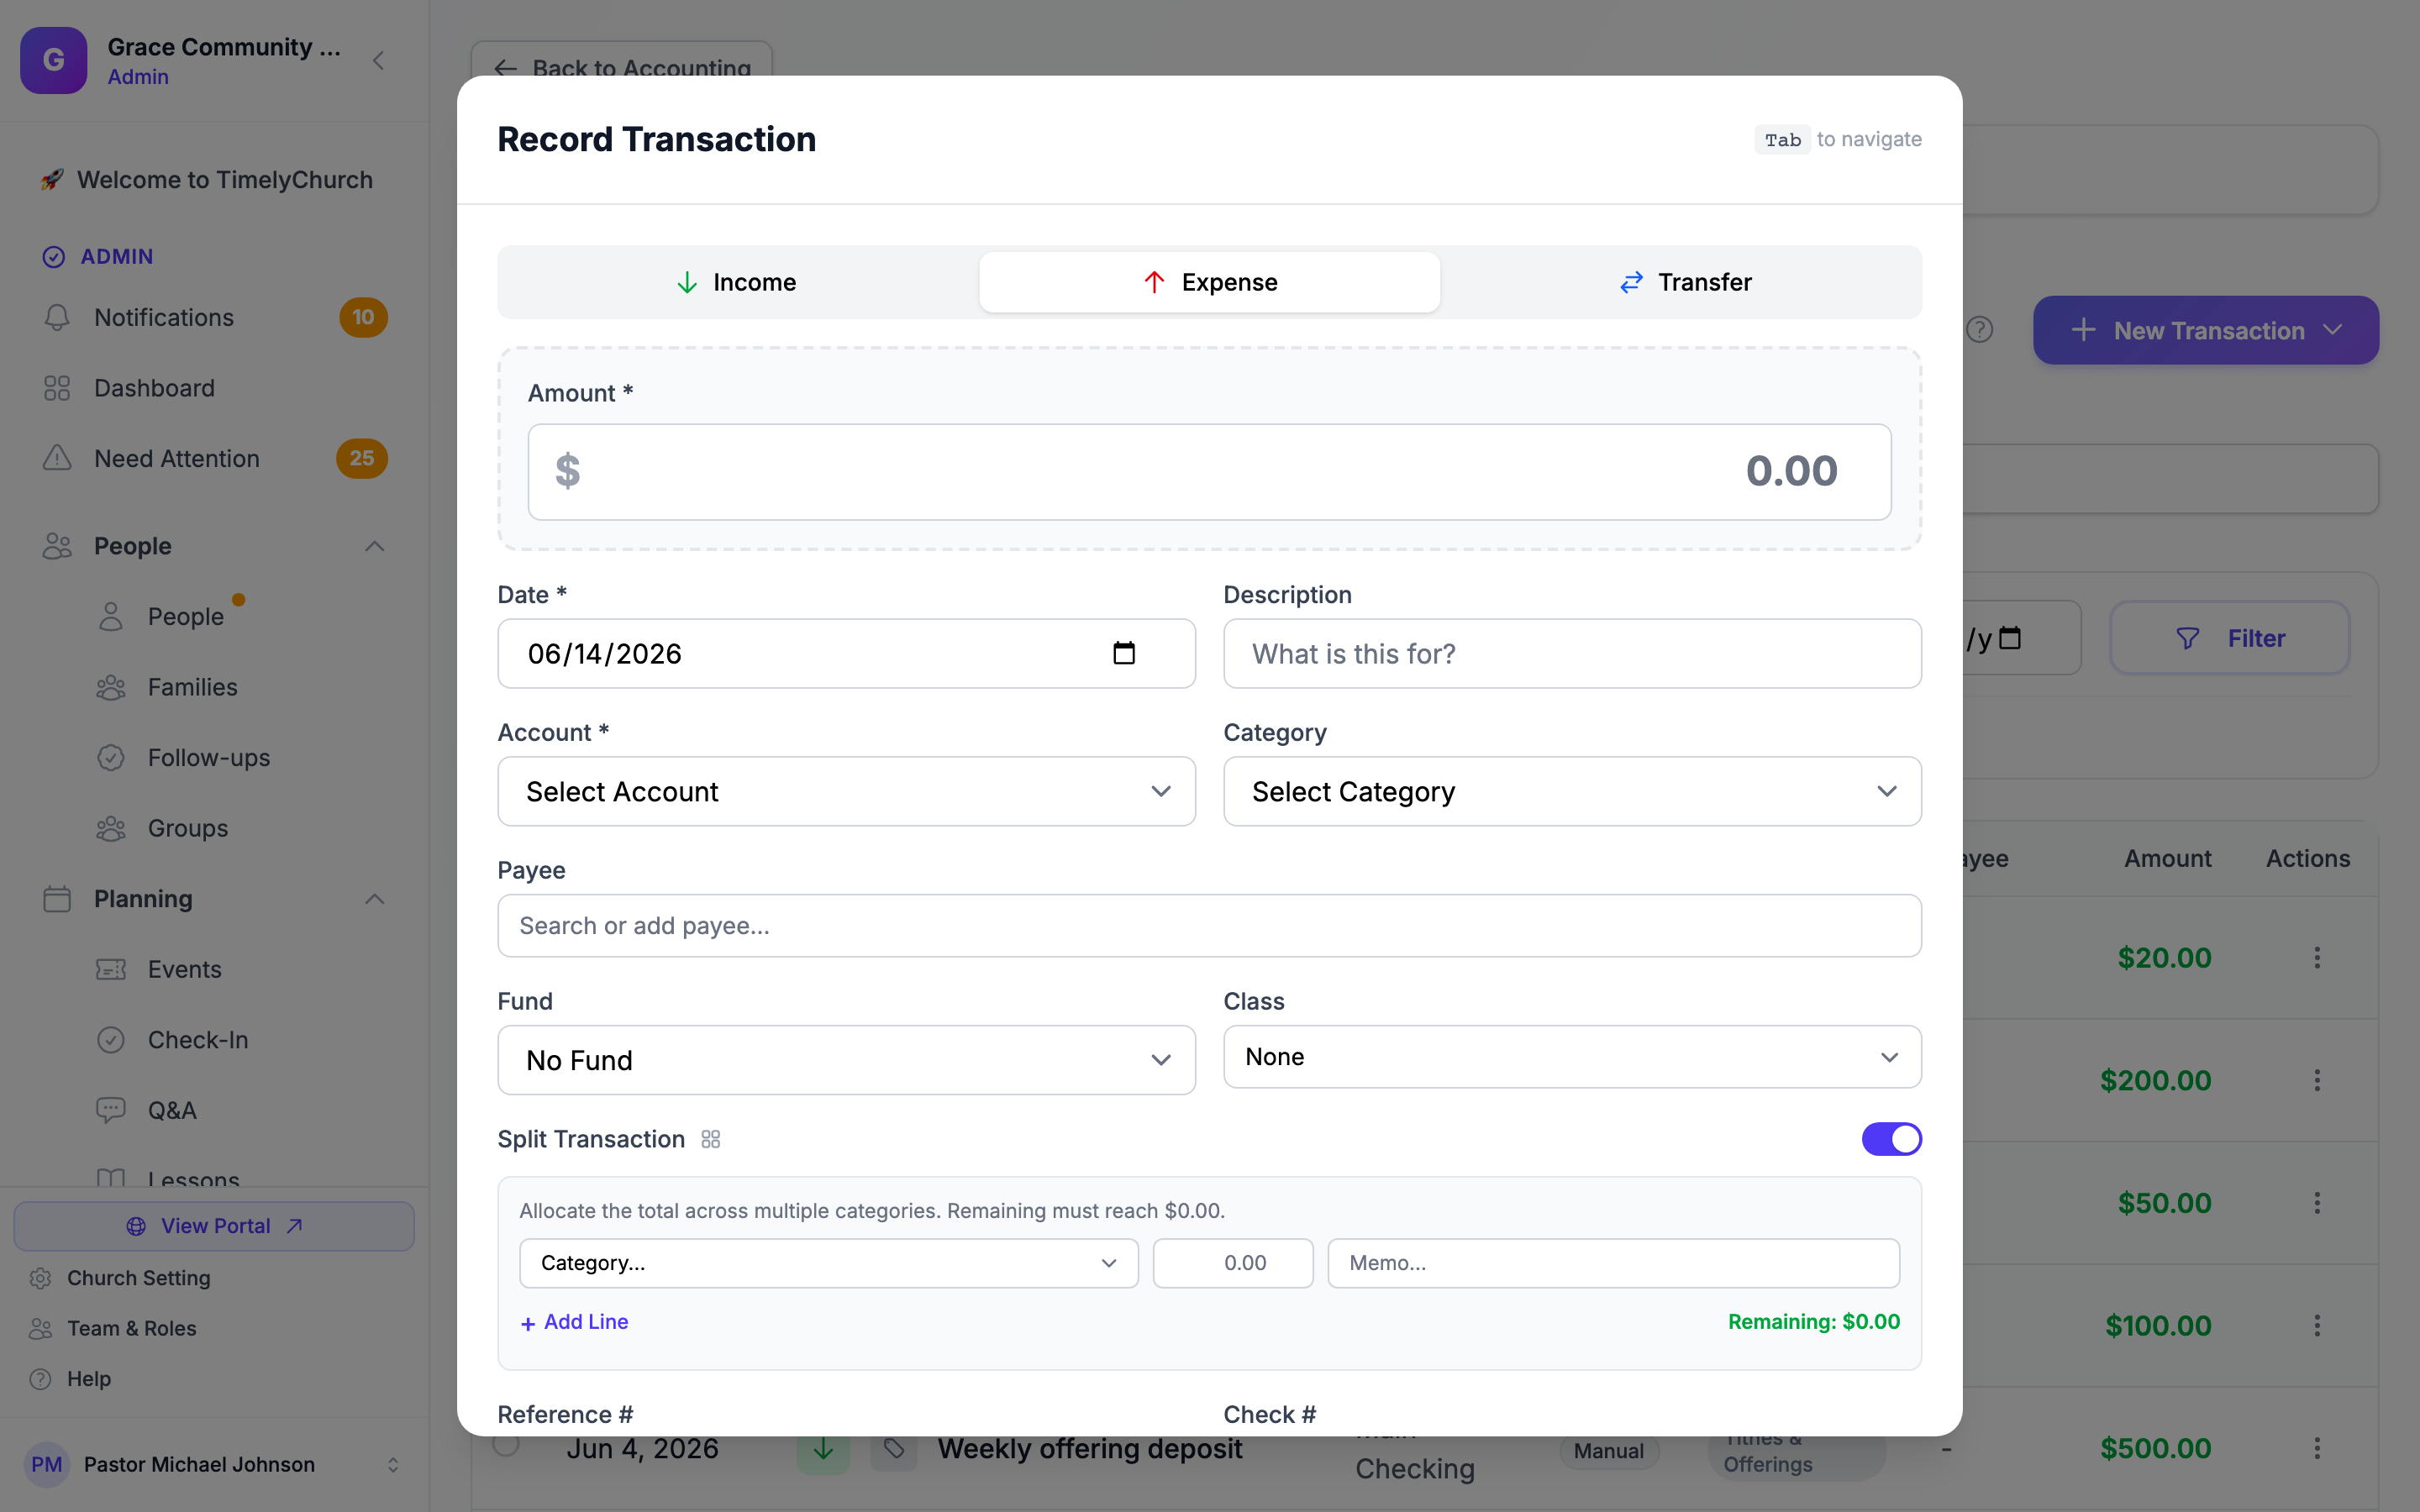
- Turn on the Split Transaction toggle. The split panel appears below.
- The panel starts with one split line. For each line, set:
- Category -- The income or expense category for that portion.
- Amount -- The dollar amount for that portion.
- Memo -- Optional, for a short note about what this portion was for.
- Click + Add Line to add another split row. Use the × beside a row to remove it (you must keep at least one row).
- Watch the Remaining figure under the rows. It shows how much of the total is still unallocated, and turns green once it reaches $0.00.
- Click Save.
The "Splits Must Equal Total" Rule
The form continuously checks that the sum of all split rows equals the transaction's top-level amount. The Remaining indicator shows the unallocated balance -- it stays red until the splits add up exactly, then turns green at Remaining: $0.00.
If you try to save while the splits do not balance, the form stops you with a message: "Split amounts must equal the transaction total." The server enforces the same rule, so a split can never post out of balance. Adjust the amounts so they add up to the total before saving.
Editing or Removing a Split
Open the transaction from the Transactions page and click its row to see the receipt-style detail view, which lists the split lines underneath the transaction. You can edit the top-level fields (date, amount, account, payee, description, notes, and so on) from the Edit button on any transaction.
Editing the Split Breakdown
You can now change the split breakdown itself -- different categories or different amounts per row -- directly from the Edit form, without deleting and re-creating the transaction (previously the only option). When you open a split transaction for editing, the Split Transaction panel opens already switched on and pre-filled with the transaction's current split lines. Adjust the categories or amounts, add or remove lines, and watch the Remaining figure -- the splits must still add up to the transaction total (Remaining: $0.00) before you can save.
To turn a split back into a plain single-category transaction, open it for editing, switch the Split Transaction toggle off, and choose a single category instead.
Note: The split breakdown of a reconciled transaction is locked to protect the completed reconciliation -- un-reconcile it first if you need to re-split it.
Reporting on Splits
The Income Statement (shown as Money In vs Money Out in Simple mode) and category-level reports treat each split row as if it were its own transaction for category totaling purposes. Total Income and Total Expense lines remain accurate because the splits always sum to the transaction's gross amount.
Tracking classes (see Tracking Classes) are attached at the transaction level, not the split level, so all rows in a single split share the same tracking class. If you need a different class per row, you need separate transactions instead of splits.
Best Practices
Use splits liberally for receipts, sparingly for everything else. Receipts that cover multiple categories are the textbook case for splits. Everywhere else, two clean transactions are usually easier to read and reconcile.
Document the split in the description. Use the top-level description to summarize ("Costco run, supplies + ministry") and the per-row memo for the per-category detail.
Reconcile splits as a single transaction. When you reconcile against a bank statement (Reconciliation lives under the Setup ▾ menu in Advanced mode, or More ▾ in Simple mode), the split is one line on the bank statement and one cleared row in TimelyChurch -- the split rows live underneath, not at the reconciliation level.