
Managing the Lesson Library
Your lesson library lives in Drive -- one place for lessons, the files that go with them, and the folders you organize them into. This article covers how to browse and search Drive, act on several items at once, manage individual lessons, and recover things from the Trash.
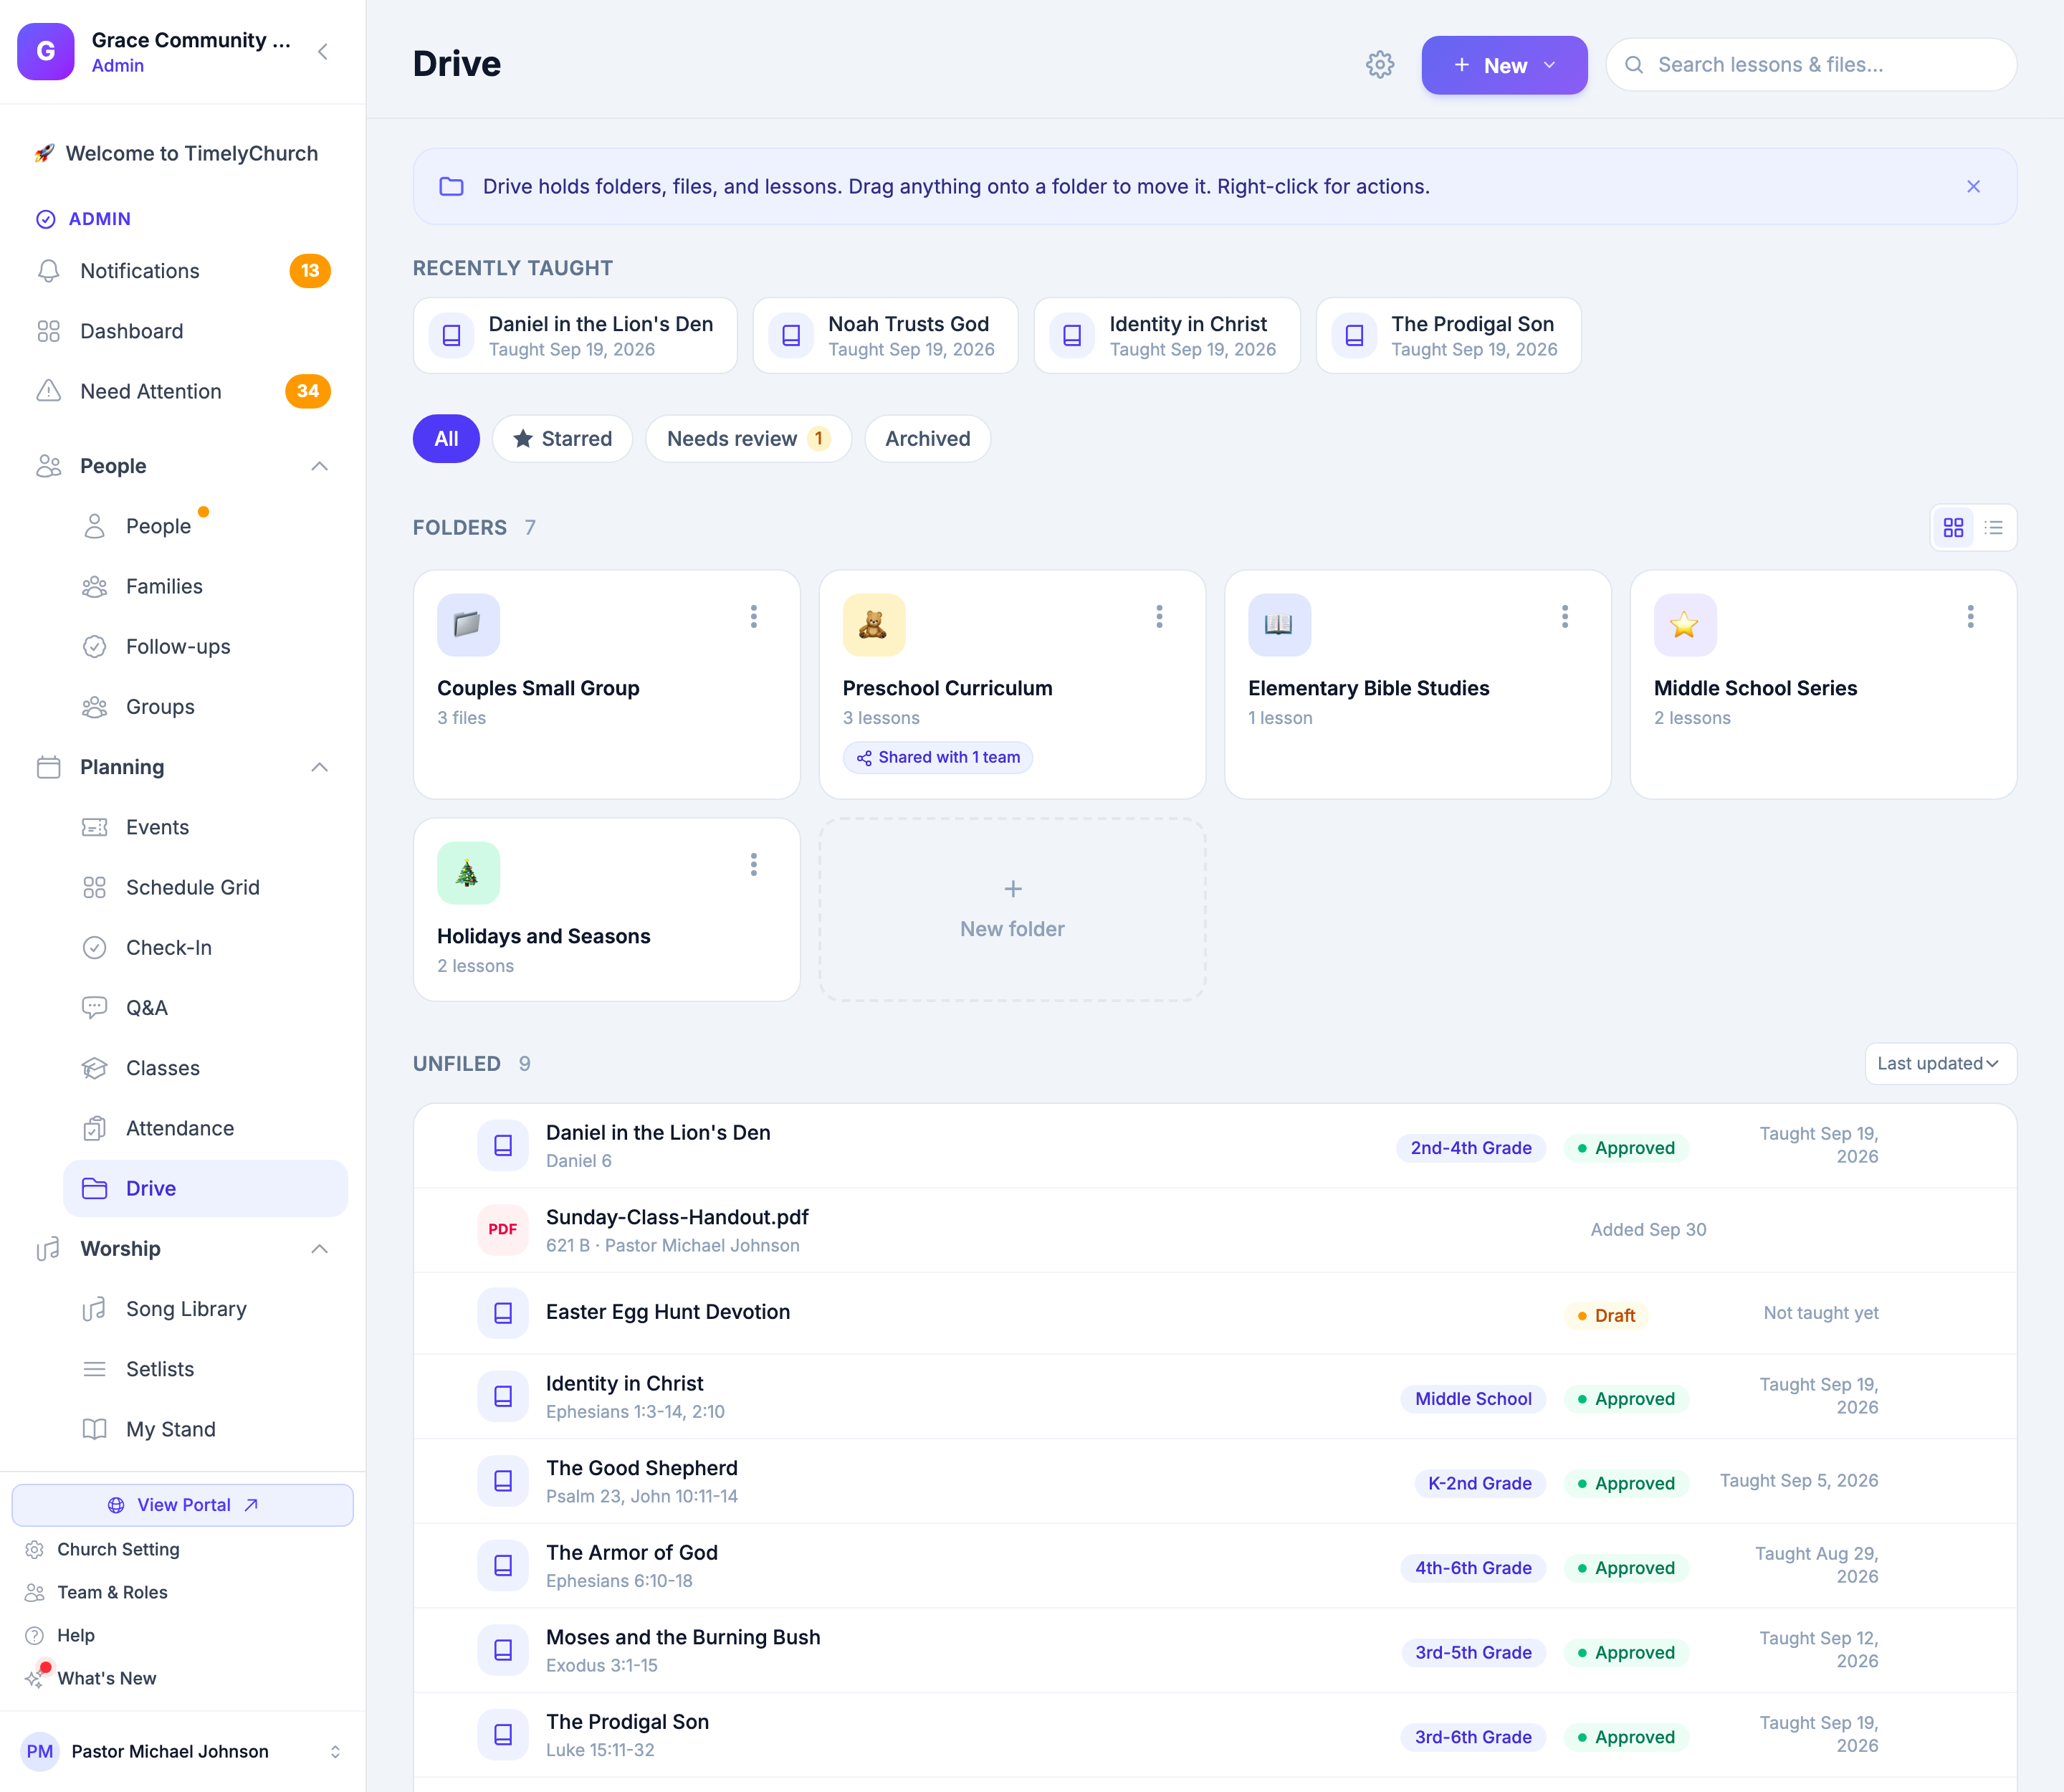
Opening Drive
Open Drive from the Planning section of the admin sidebar. The Drive home shows:
- Recently taught -- a strip of lessons taught lately, for quick access.
- Chips to narrow what you see: All, Starred, Needs review (draft lessons waiting for approval, with a count), and Archived.
- Folders -- your folders as tiles (grid view) or rows (list view). Switch with the Grid view / List view buttons; your choice is remembered.
- Unfiled -- lessons and files that aren't in a folder yet.
- Trash -- with a count of what's in it.
- Lesson settings -- the gear icon at the top of the page.
Sort any list by Last updated, Name A–Z, or Recently taught.
"Drive holds folders, files, and lessons. Drag anything onto a folder to move it. Right-click for actions."
For folders -- creating them, nesting them, moving things between them -- see Organizing Lessons with Curriculum Folders.
Searching
Type in Search lessons & files… at the top of Drive. It finds lessons and files together, and shows the matches as Results for "...".
Starring
Click Star on a lesson or file to add it to the Starred chip; Remove star takes it off. Stars help you keep this quarter's curriculum one click away.
Working with Several Items at Once
Tick the checkbox next to each lesson, file, or folder you want (on a phone, choose Select from the item's More actions menu). A bar appears at the bottom of the screen with the number selected and these actions:
- Move -- choose a folder (or Unfiled) in the Move 1 item / Move N items window, which has its own search box and a New folder option.
- Approve -- approve every selected draft lesson at once. Helpful when reviewing a batch of teacher-submitted lessons.
- Archive -- mark the selected lessons Archived and move them, with any selected files, to the Trash.
- Move to Trash -- move the selected items to the Trash.
- Clear selection -- the × button.
After a move, archive, or trash, an Undo button appears for a few seconds in case you clicked by mistake.
Managing Individual Lessons
Viewing a Lesson
Click any lesson to open its page. It shows:
- Full lesson content (description, objectives, scripture, supplies)
- Audience and category labels, and a link to its folder (View curriculum)
- Parent Content (shown in the member portal): summary, memory verse, home activity, discussion questions
- Materials -- files and links, with an inline preview for PDFs, images, and videos
- Teaching History -- the class sessions where this lesson has been used
- Times Taught and Last Taught
Editing a Lesson
- Open the lesson.
- Click Edit (it switches to Cancel while you are editing).
- Change any fields, including Status (Approved, Draft, or Archived) and Curriculum (the folder it lives in).
- Click Save Changes.
See Creating Lessons for every field.
Approving a Lesson
On a draft lesson's page, click Approve. Approved lessons become available for teachers to pick in the member portal. To approve several at once, select them in Drive and click Approve.
Archiving and Restoring a Lesson
Archiving takes a lesson out of use without deleting it. Set its Status to Archived while editing, or select it in Drive and click Archive. Archived lessons are listed under the Archived chip.
To bring one back, open it and click Restore -- it returns with the status it had before it was archived.
The Trash
Anything you move to the Trash -- folders, lessons, and files -- can be recovered for a while. Open Trash from Drive.
- The page lists Folders, Lessons, and Files in the Trash, each with when it was deleted.
- Restore puts an item back where it was.
- Delete forever removes one item permanently after you confirm.
- Empty trash permanently removes everything in the Trash, including the uploaded files. "It cannot be undone."
The top of the page tells you how long items stay: "Folders, lessons, and files stay here for N days before they are permanently removed." Click Back to Drive to return.
Restoring needs permission to edit lessons; deleting forever needs permission to delete them.
Lesson Settings
Open Lesson settings from the gear icon at the top of Drive. The Lesson Settings page has three tabs:
Categories
- View, create, edit, and delete lesson categories (Add Category).
- Each category has a name, color, and active/inactive status.
- System categories (marked System) cannot be deleted but can be deactivated.
- Reset to Defaults restores the built-in categories (custom ones are deleted).
Audiences
- View, create, edit, and delete target audiences (Add Audience).
- Each audience has a name, emoji, color, age range, and active/inactive status.
- System audiences cannot be deleted but can be deactivated.
- Reset to Defaults restores the built-in audiences.
General Settings
- Workflow -- Require approval for new lessons (new lessons are saved as drafts until an admin approves them) and Allow teachers to create lessons.
- Required Fields -- make Scripture Reference and/or Learning Objectives required.
- Display Options -- Show teach count, Show last taught date, and Show parent content in portal.
- Class materials sharing -- the church-wide default for take-home materials on public event pages, and the 6-digit PIN (see PIN-Protected Take-Home Materials).
- Drive share links -- the default expiry for "anyone with the link" shares (see Share a File or Folder with a Link).
- Attachment uploads -- shows the Maximum file size for lesson materials (see Uploading Large Lesson Materials).
Click Save Settings when you're done.