
Tutorial: Volunteer "Set Your Availability" Walkthrough
Audience: A volunteer on a serving team (worship, sound, greeters, kids -- any team) Time needed: About 10 minutes You'll need: The email address your church has on file for you (you'll sign in with a one-time email link)
What You'll Learn
By the end of this walkthrough, you will know how to:
- Log in to the portal (no password to remember -- it's a one-tap email link)
- Block out a vacation so you don't get scheduled while you're gone
- Set a recurring pattern (like "I'm never available the first Sunday of the month")
- Tell the auto-scheduler your preferred days, times, and limits
- See your upcoming serving slots -- and who you're serving with -- in My Schedule
- Decline an assignment gracefully -- and know what happens after you do
This is the single most helpful thing you can do for your team leader. Five minutes here saves them a panicked Saturday-night text.
Step 1: Log In to the Portal
Time: 1 minute
- Open your church's member portal sign-in page (your church can send you the link, or you'll find it on the church website). Type your Email address and tap Send Magic Link.
- Open the email titled "Your Secure Login Link" and click Sign In to Member Portal. The link drops you straight into your member portal -- no password needed. (It works once, so request a new one next time.)
- You'll land on your portal dashboard. In the left sidebar you'll see your navigation, including a Team section once you're on a serving team.
Tip: Bookmark the portal on your phone's home screen. The next time you tap it, you'll usually still be signed in.
For more on how the login works, see Magic Link Login.
Step 2: Open Your Serving Availability
Time: 30 seconds
There are two availability surfaces in the portal, and it's worth knowing the difference:
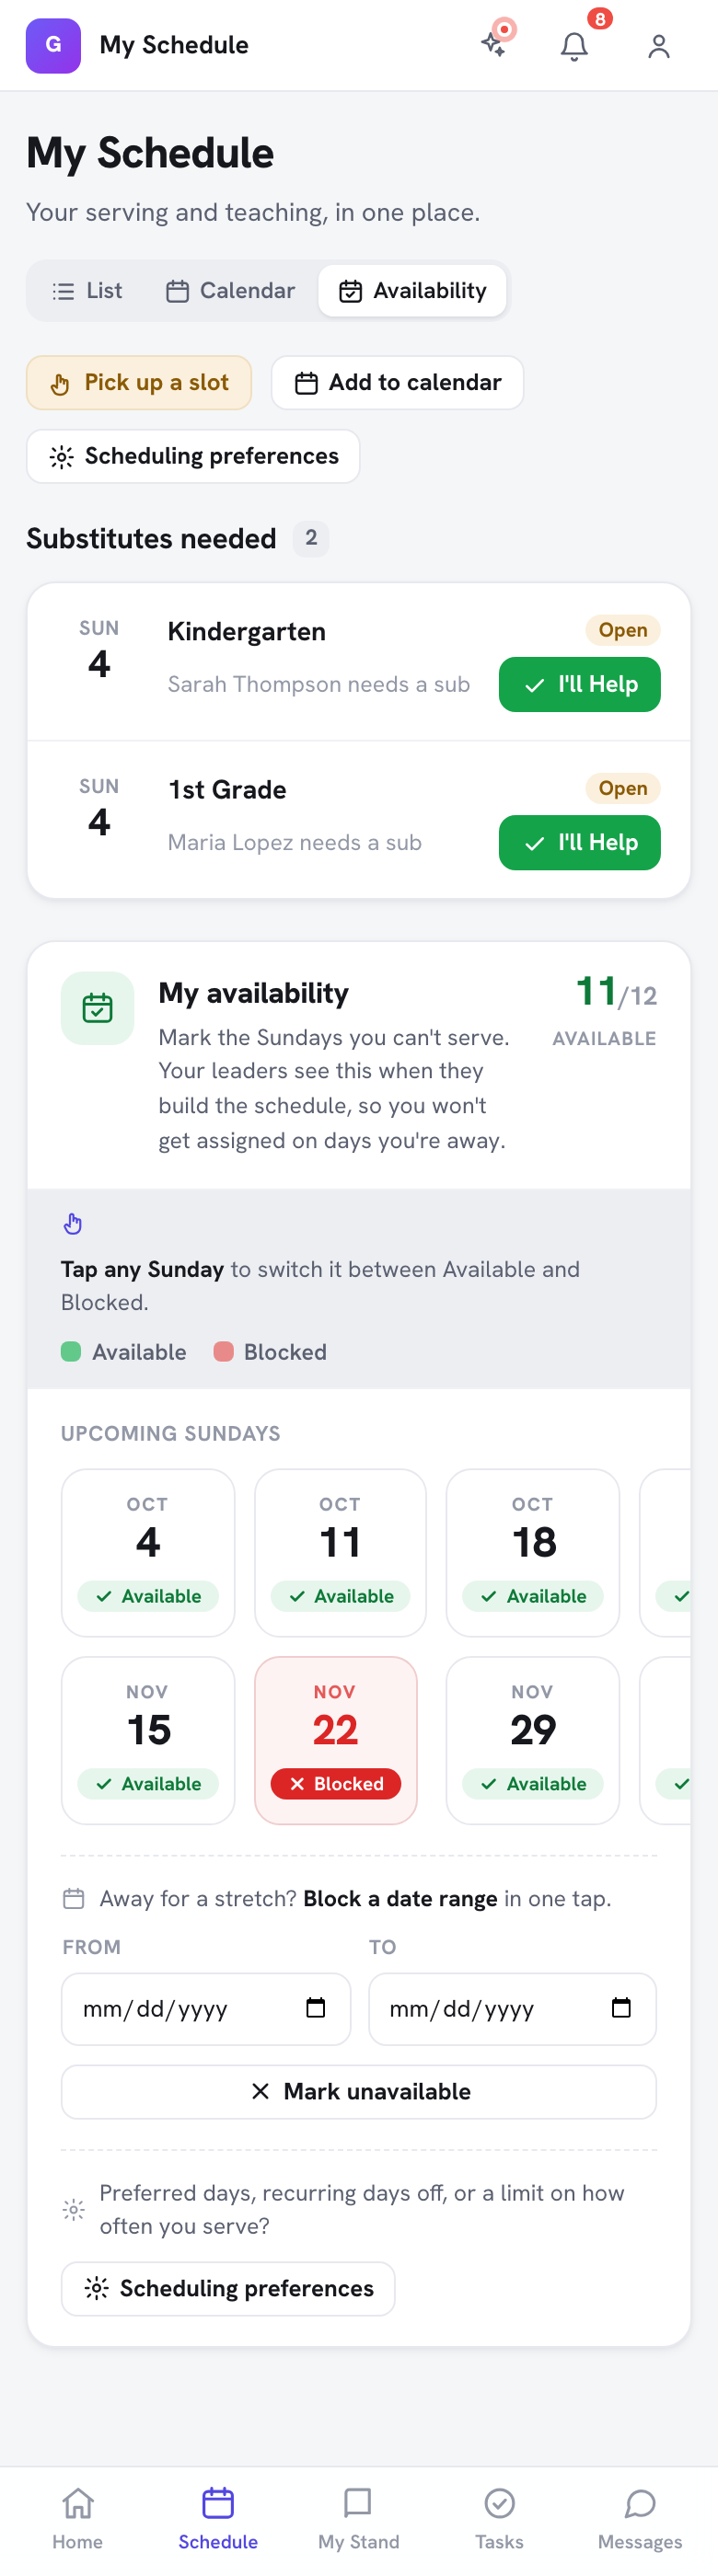
- The quick one is on My Schedule. In the sidebar's Team section, click My Schedule, then tap the Availability tab in the List / Calendar / Availability control at the top right. It shows your upcoming Sundays -- tap one to switch it between Available and Blocked -- plus a Block a date range tool for marking a stretch of dates at once.
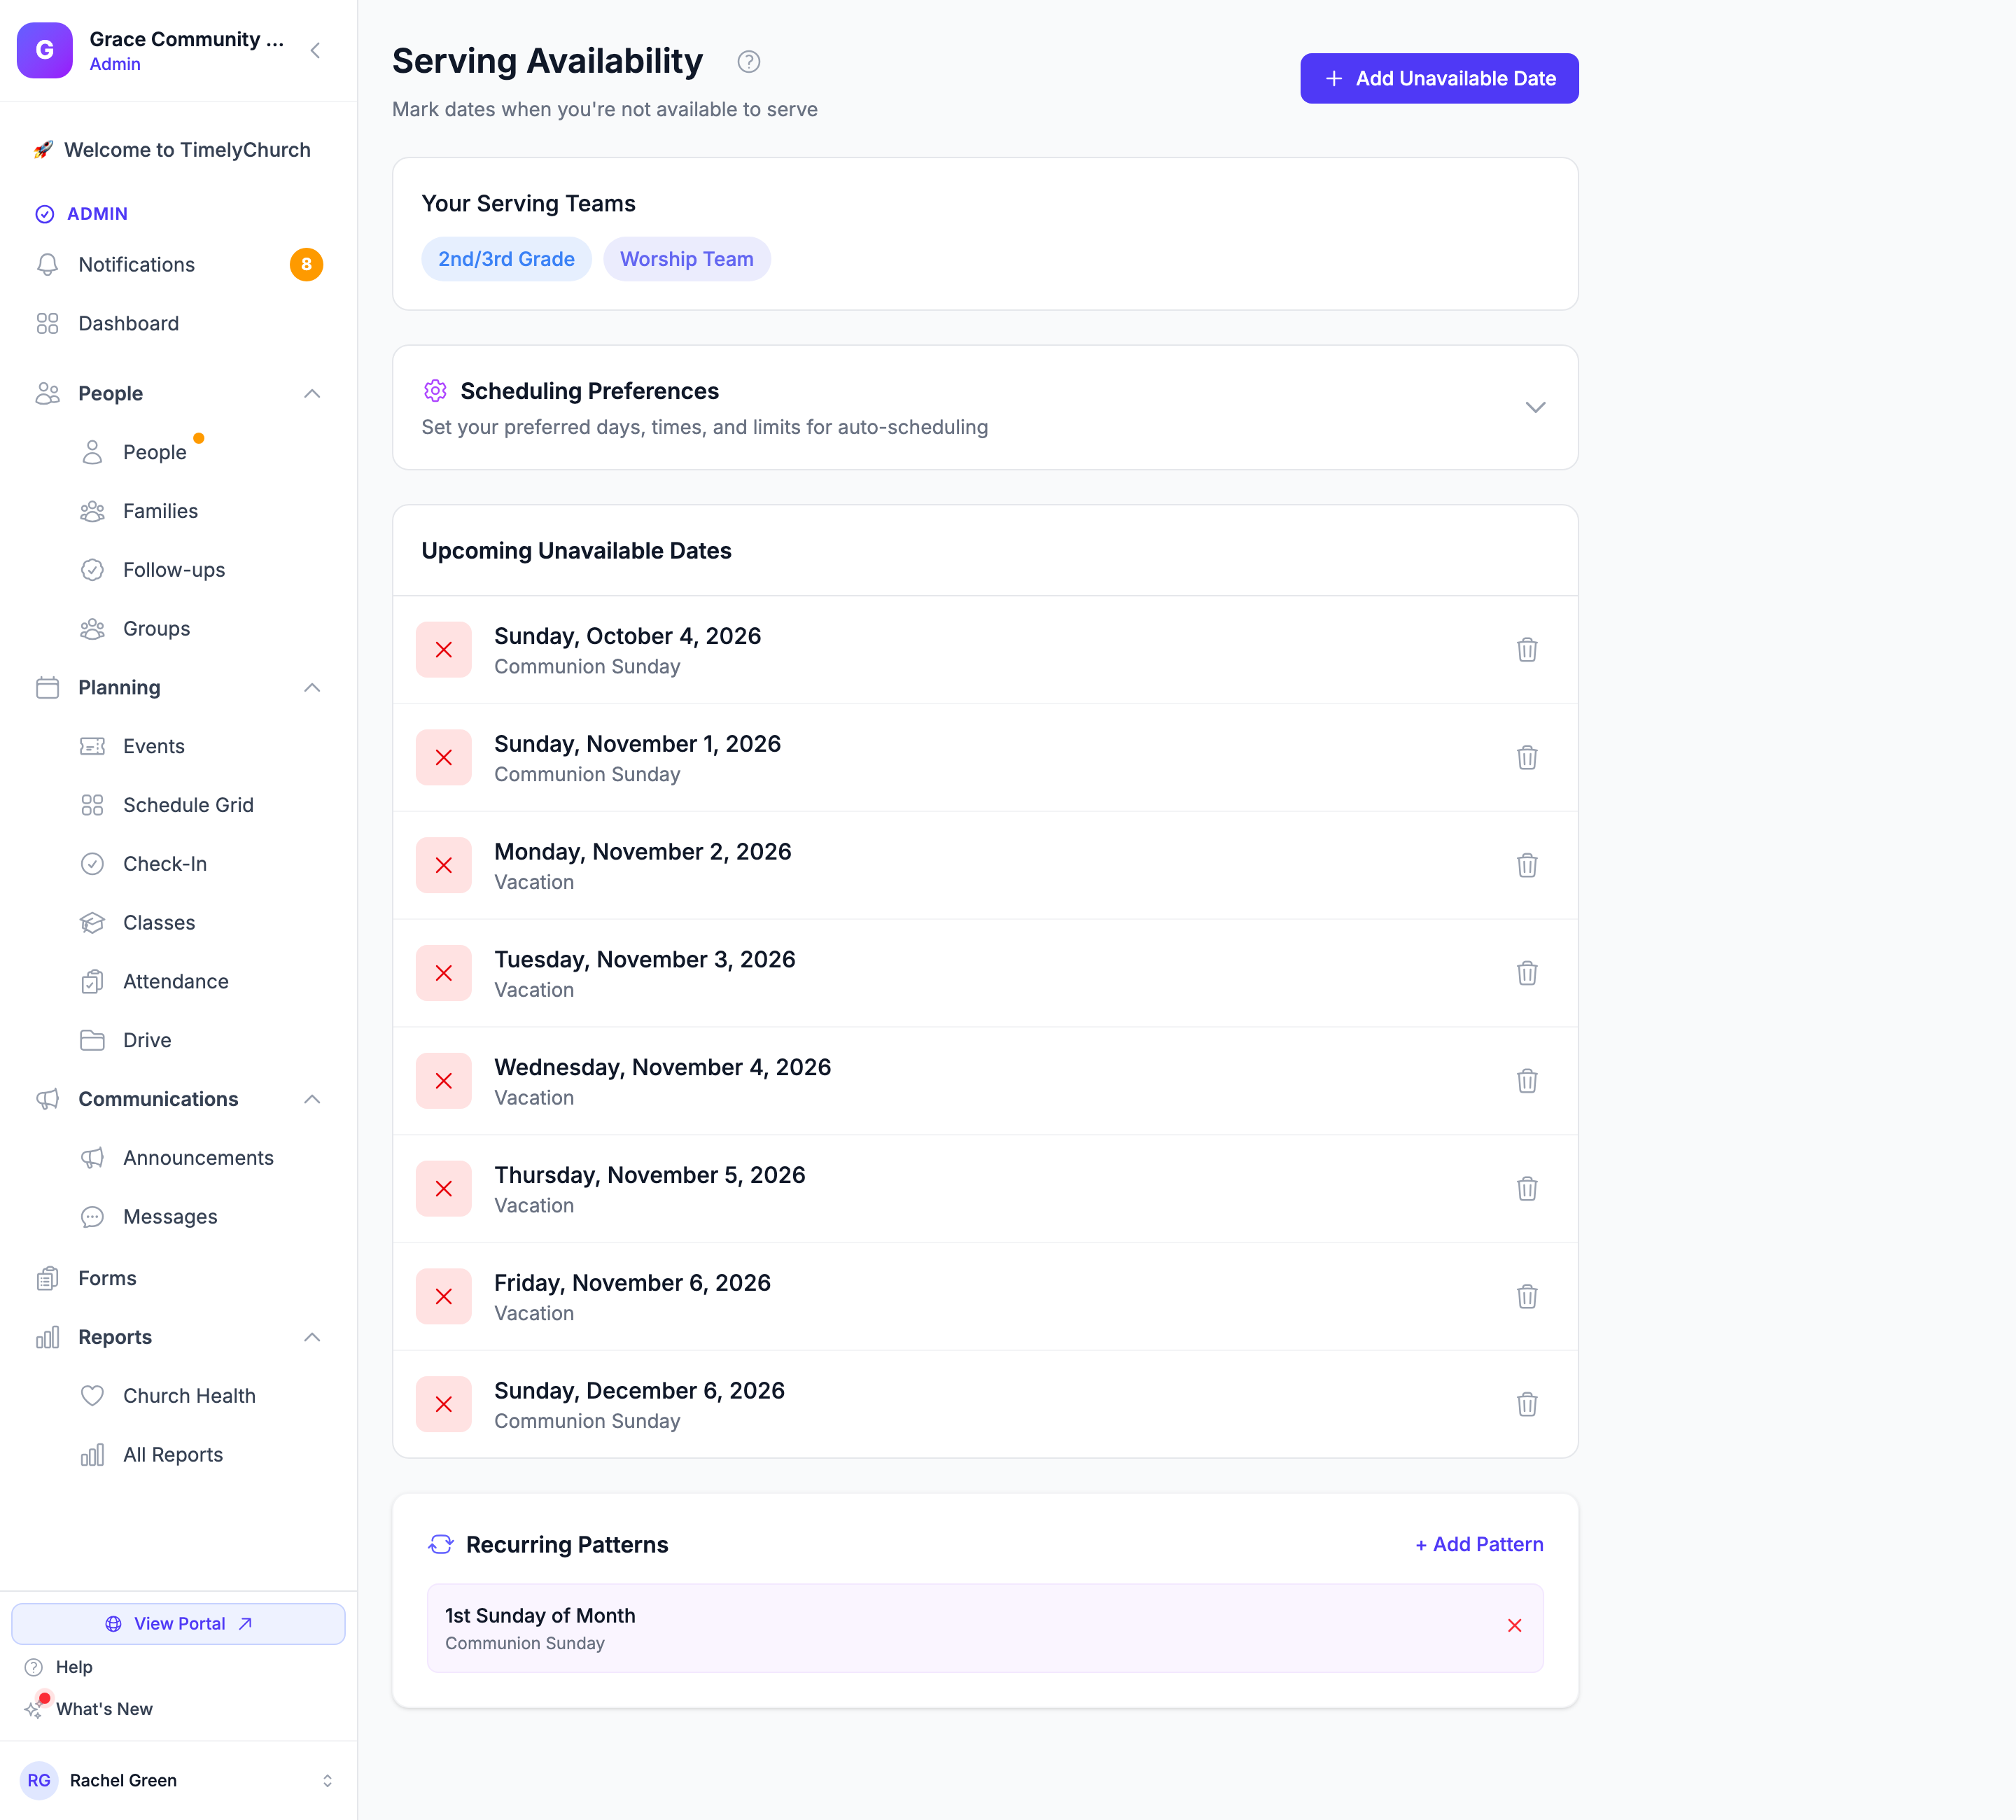
- The fuller one is the Serving Availability page. It's where you block out specific date ranges with reasons, set repeating patterns, and tell the auto-scheduler your preferences. This walkthrough (Steps 3-5) uses the Serving Availability page.
To open Serving Availability, click the Scheduling preferences button on your My Schedule page (it also appears at the bottom of the Availability tab).
The Serving Availability page lists your serving teams at the top, followed by three areas you'll use:
- Scheduling Preferences — preferred days, times, and serving limits
- Upcoming Unavailable Dates — one-off blockouts (vacations, weddings, surgeries)
- Recurring Patterns — patterns that repeat (e.g., "every 1st Sunday")
You start with no entries. By default, you're considered available unless you mark otherwise.
Note: The Serving Availability page only works once you're on at least one serving team. If you're not on a team yet, the page says "You're not currently on any serving team."
Step 3: Add a Vacation Blockout (Aug 1 - Aug 14)
Time: 2 minutes
Let's say you're going on vacation August 1-14.
- At the top of the Serving Availability page, click Add Unavailable Date.
- A dialog pops up. Fill in the fields:
- Start Date:
Aug 1 - End Date:
Aug 14 - Reason (optional):
Vacation
- Start Date:
- Click Add Date.
- The date range now appears under Upcoming Unavailable Dates, with your reason shown beneath each day.
Behind the scenes, the smart scheduler will skip you for any positions in that window, and your team leader can see you're unavailable when they build the roster.
Tip: For a single day off, set the Start Date and End Date to the same date.
Tip: Reasons are optional, but adding one helps your leader plan. "Vacation," "work travel," or "out of town" is plenty -- no need to write a paragraph.
For the technical details of how blockouts interact with assignments, see Managing Availability.
Step 4: Add a Recurring Pattern (Every 1st Sunday)
Time: 2 minutes
Maybe your family always travels to see grandparents the first Sunday of every month. You can set that once and forget about it.
- Scroll to the Recurring Patterns section.
- Click + Add Pattern.
- In the Add Recurring Pattern dialog:
- Pattern: open the dropdown and choose a preset. The choices are Every Sunday, Every Other Sunday, 1st Sunday of Month, 2nd Sunday of Month, 3rd Sunday of Month, 4th Sunday of Month, 5th Sunday of Month, Every Saturday, and Every Wednesday. For this example, pick 1st Sunday of Month.
- Reason (optional):
Visiting family
- Click Add Pattern.
- The pattern now appears in your Recurring Patterns list as
1st Sunday of Month.
You can stack multiple patterns. For example, "1st Sunday of Month" and "Every Wednesday." They all combine.
To remove a pattern, click the small X next to it and confirm.
For more, see Recurring Unavailability.
Step 5: Set Your Scheduling Preferences (Optional)
Time: 2 minutes
If your church uses auto-scheduling, you can guide how often -- and when -- it picks you.
- On the Serving Availability page, click the Scheduling Preferences header to expand it.
- Set any of the following (all optional):
- Preferred Days to Serve and Days to Avoid — tap the day pills to toggle them.
- Preferred Times — check Morning, Afternoon, and/or Evening.
- Max Times Per Month — cap how often you're scheduled (or leave at "No limit").
- Min Days Between — set a minimum gap between your serving dates.
- Include me in auto-scheduling — turn this off to be skipped by the auto-scheduler entirely.
- I can fill in last-minute when needed — opt in to short-notice requests.
- Click Save Preferences.
Tip: These preferences are guidance for the scheduler, not hard blocks. Use Unavailable Dates and Recurring Patterns for dates you truly can't serve.
Step 6: View My Schedule
Time: 1 minute
Now let's see what you're already on the hook for.
- In the sidebar Team section, click My Schedule (the List view is the default).
- Your upcoming slots are grouped under This week and Later. Each one shows:
- The event title and its time and location
- The position you're filling (e.g.,
Vocalist) and the team it belongs to - Its status (
Pendinguntil you respond, thenConfirmed)
- Under each upcoming serving slot, tap See who's serving with you to open that event's page. Its Who's serving this day section lists everyone on the schedule, team by team and position by position.
- Past slots are hidden; tap Show past to see them.
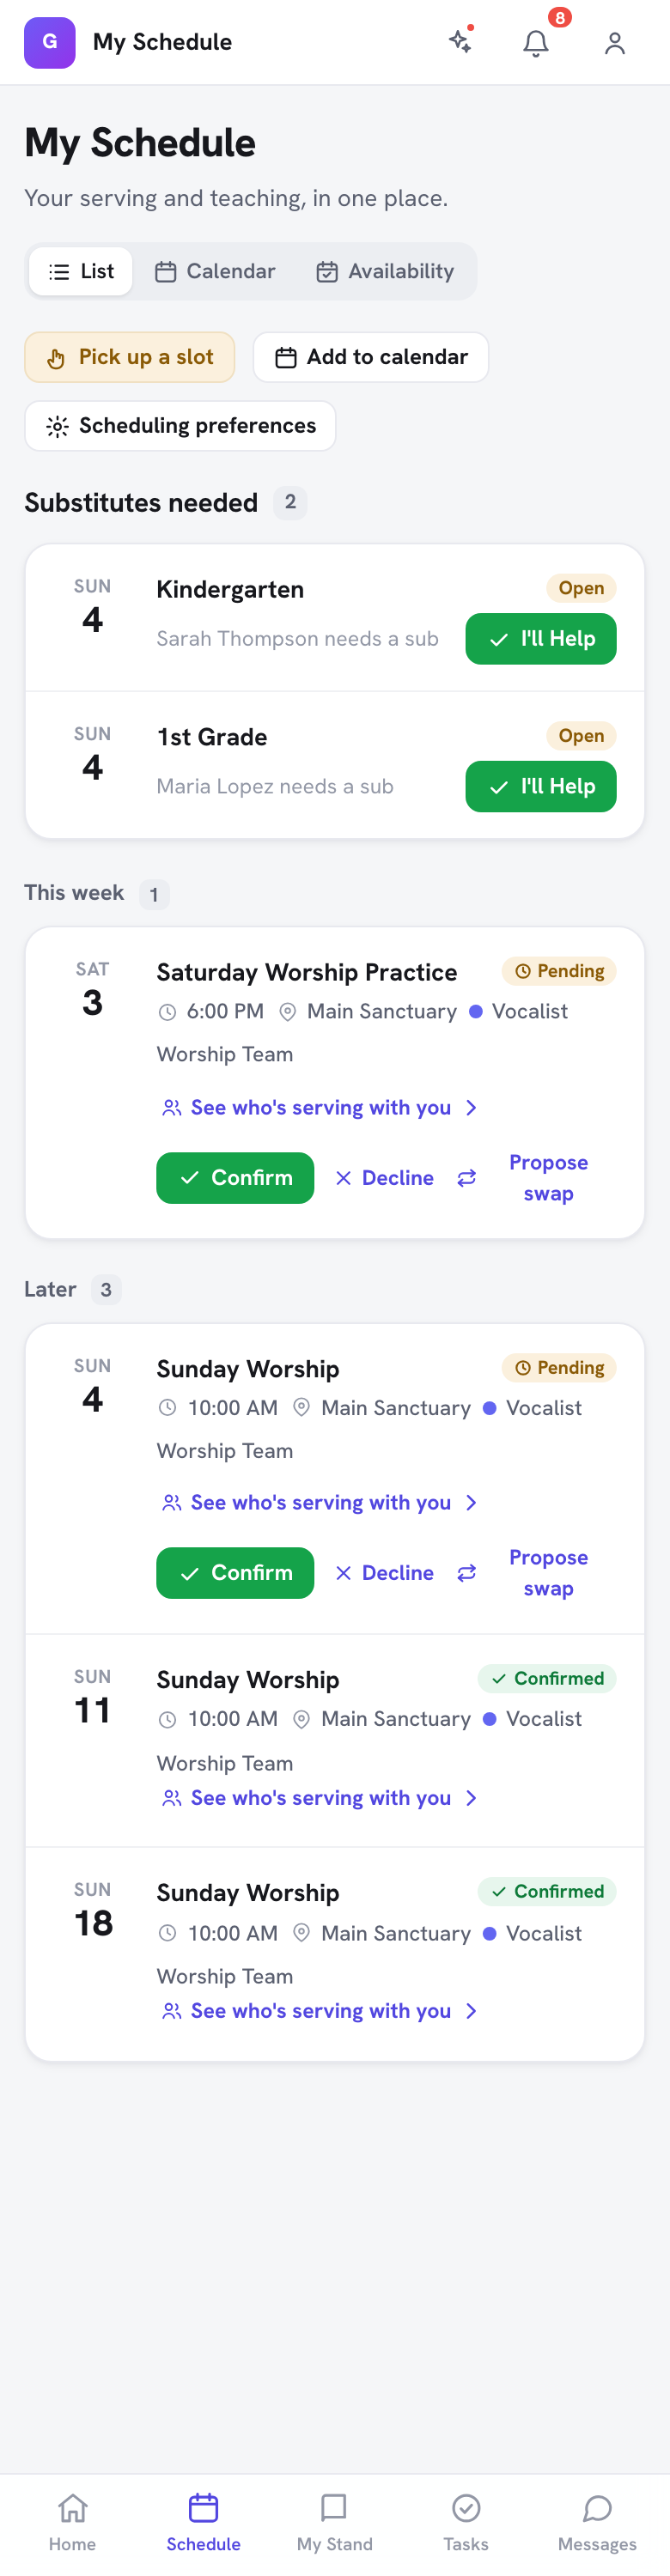
Tip: Want to serve more? Pick up a slot (in the row of buttons under the page title) shows open positions on your teams that you can sign up for. Next to it, Add to calendar gives you a calendar feed of your serving schedule for your phone's calendar app. See iCal Calendar Export.
If your church uses Telegram, you can also send /myschedule to your church's bot and tap 👥 Who's with me under a serving slot. See Who Am I Serving With?.
Step 7: Decline an Assignment (and What Happens After)
Time: 2 minutes
Sometimes life happens after you've been invited. Here's how to bow out cleanly.
- On My Schedule, find an assignment with status Pending (you've been scheduled but haven't responded yet).
- Click Decline. (Pending assignments also offer Confirm, and Propose swap when a teammate's slot is available to trade.)
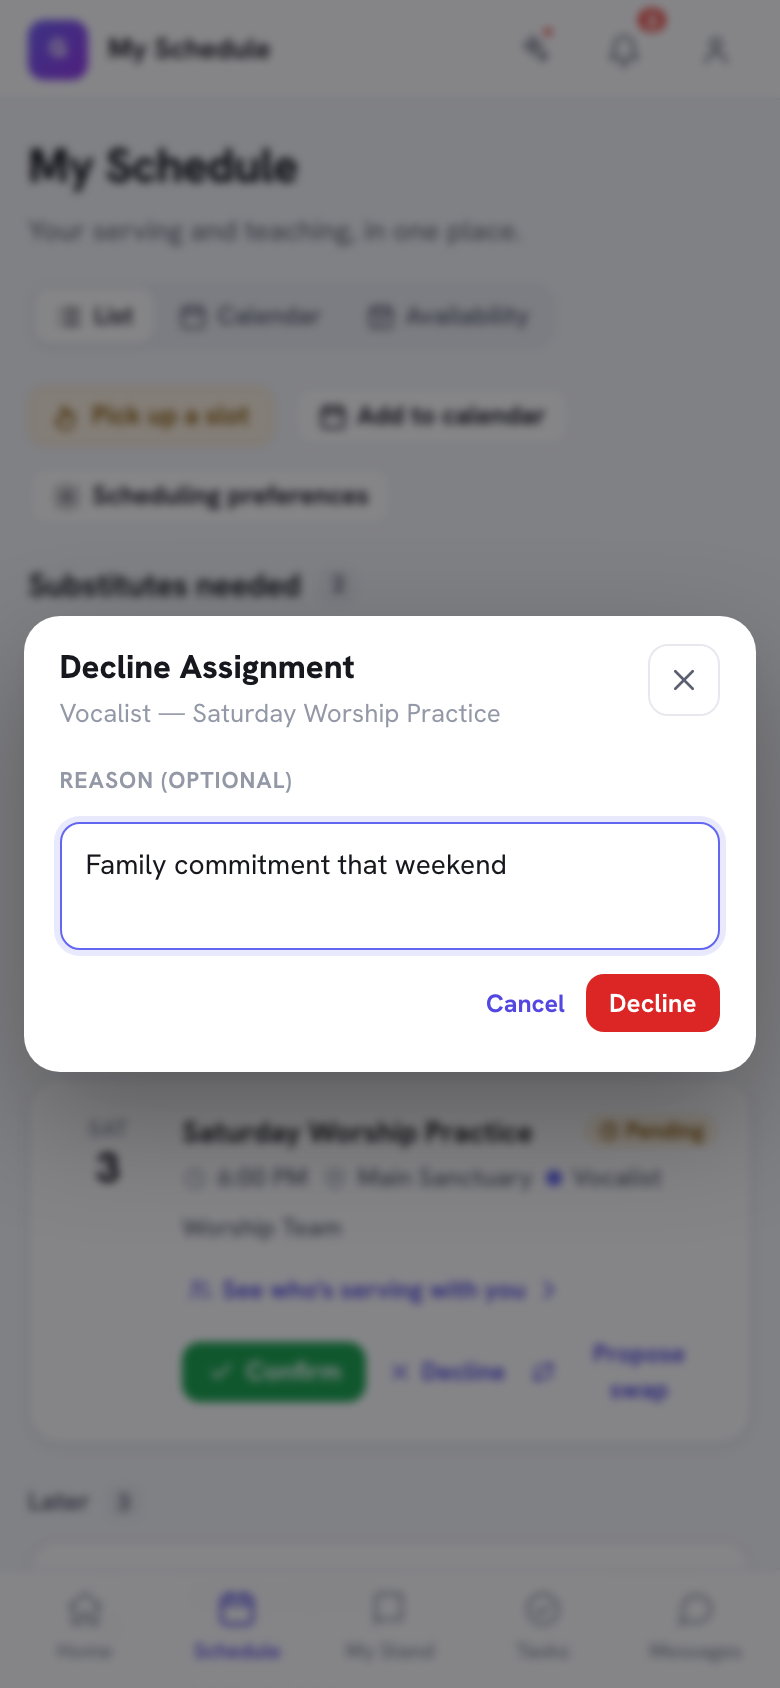
- The Decline Assignment dialog opens. Optionally type a note in the Reason (optional) box -- "Let the coordinator know why..."
- Click Decline to confirm.
- The assignment is declined and drops off your list.
What happens next, automatically:
- Your team's leaders get a notification that you declined, including your reason if you gave one.
- If your team has Auto-pick replacement when someone declines turned on, the system assigns the next eligible person from the same team -- no human action needed.
- If it's off (or nobody eligible is left), the spot stays open and your leader fills it -- for example by sending a fill request to a few teammates.
Either way, you don't need to scramble for a sub yourself unless your church culture asks you to.
Tip: Declining is not a big deal. The whole point of marking availability is to make it easy. Your leader would rather know on Tuesday that you can't make Sunday than find out on Saturday night.
For peer-to-peer trades (when you want to swap with a specific person), see Volunteer Swap and Trade.
What to Do Next
- Block out the rest of the year's known travel right now while you're already in the page. Trust me.
- Read Accepting Assignments so you're ready when the next invite arrives.
- Set up iCal Calendar Export to see your serving slots alongside your personal calendar.
That's it. You're now an organized volunteer, and your team leader is going to love you.