
Importing and Exporting Data
TimelyChurch makes it easy to bring data in from other systems and export your records when you need them. Whether you are migrating from another church management platform, sharing data with a ministry team, or creating a backup, this guide covers everything you need to know.
Importing People from a CSV File
Who Should Use This?
- Churches switching from another church management system
- Anyone with a spreadsheet of people to add (from a conference, event, partner church, etc.)
- Staff who received a list of new members or visitors in spreadsheet format
Before You Start
Make sure your CSV file has at least a first name and last name column for every person. All other fields are optional. The maximum file size is 10 MB.
Where to Find Import
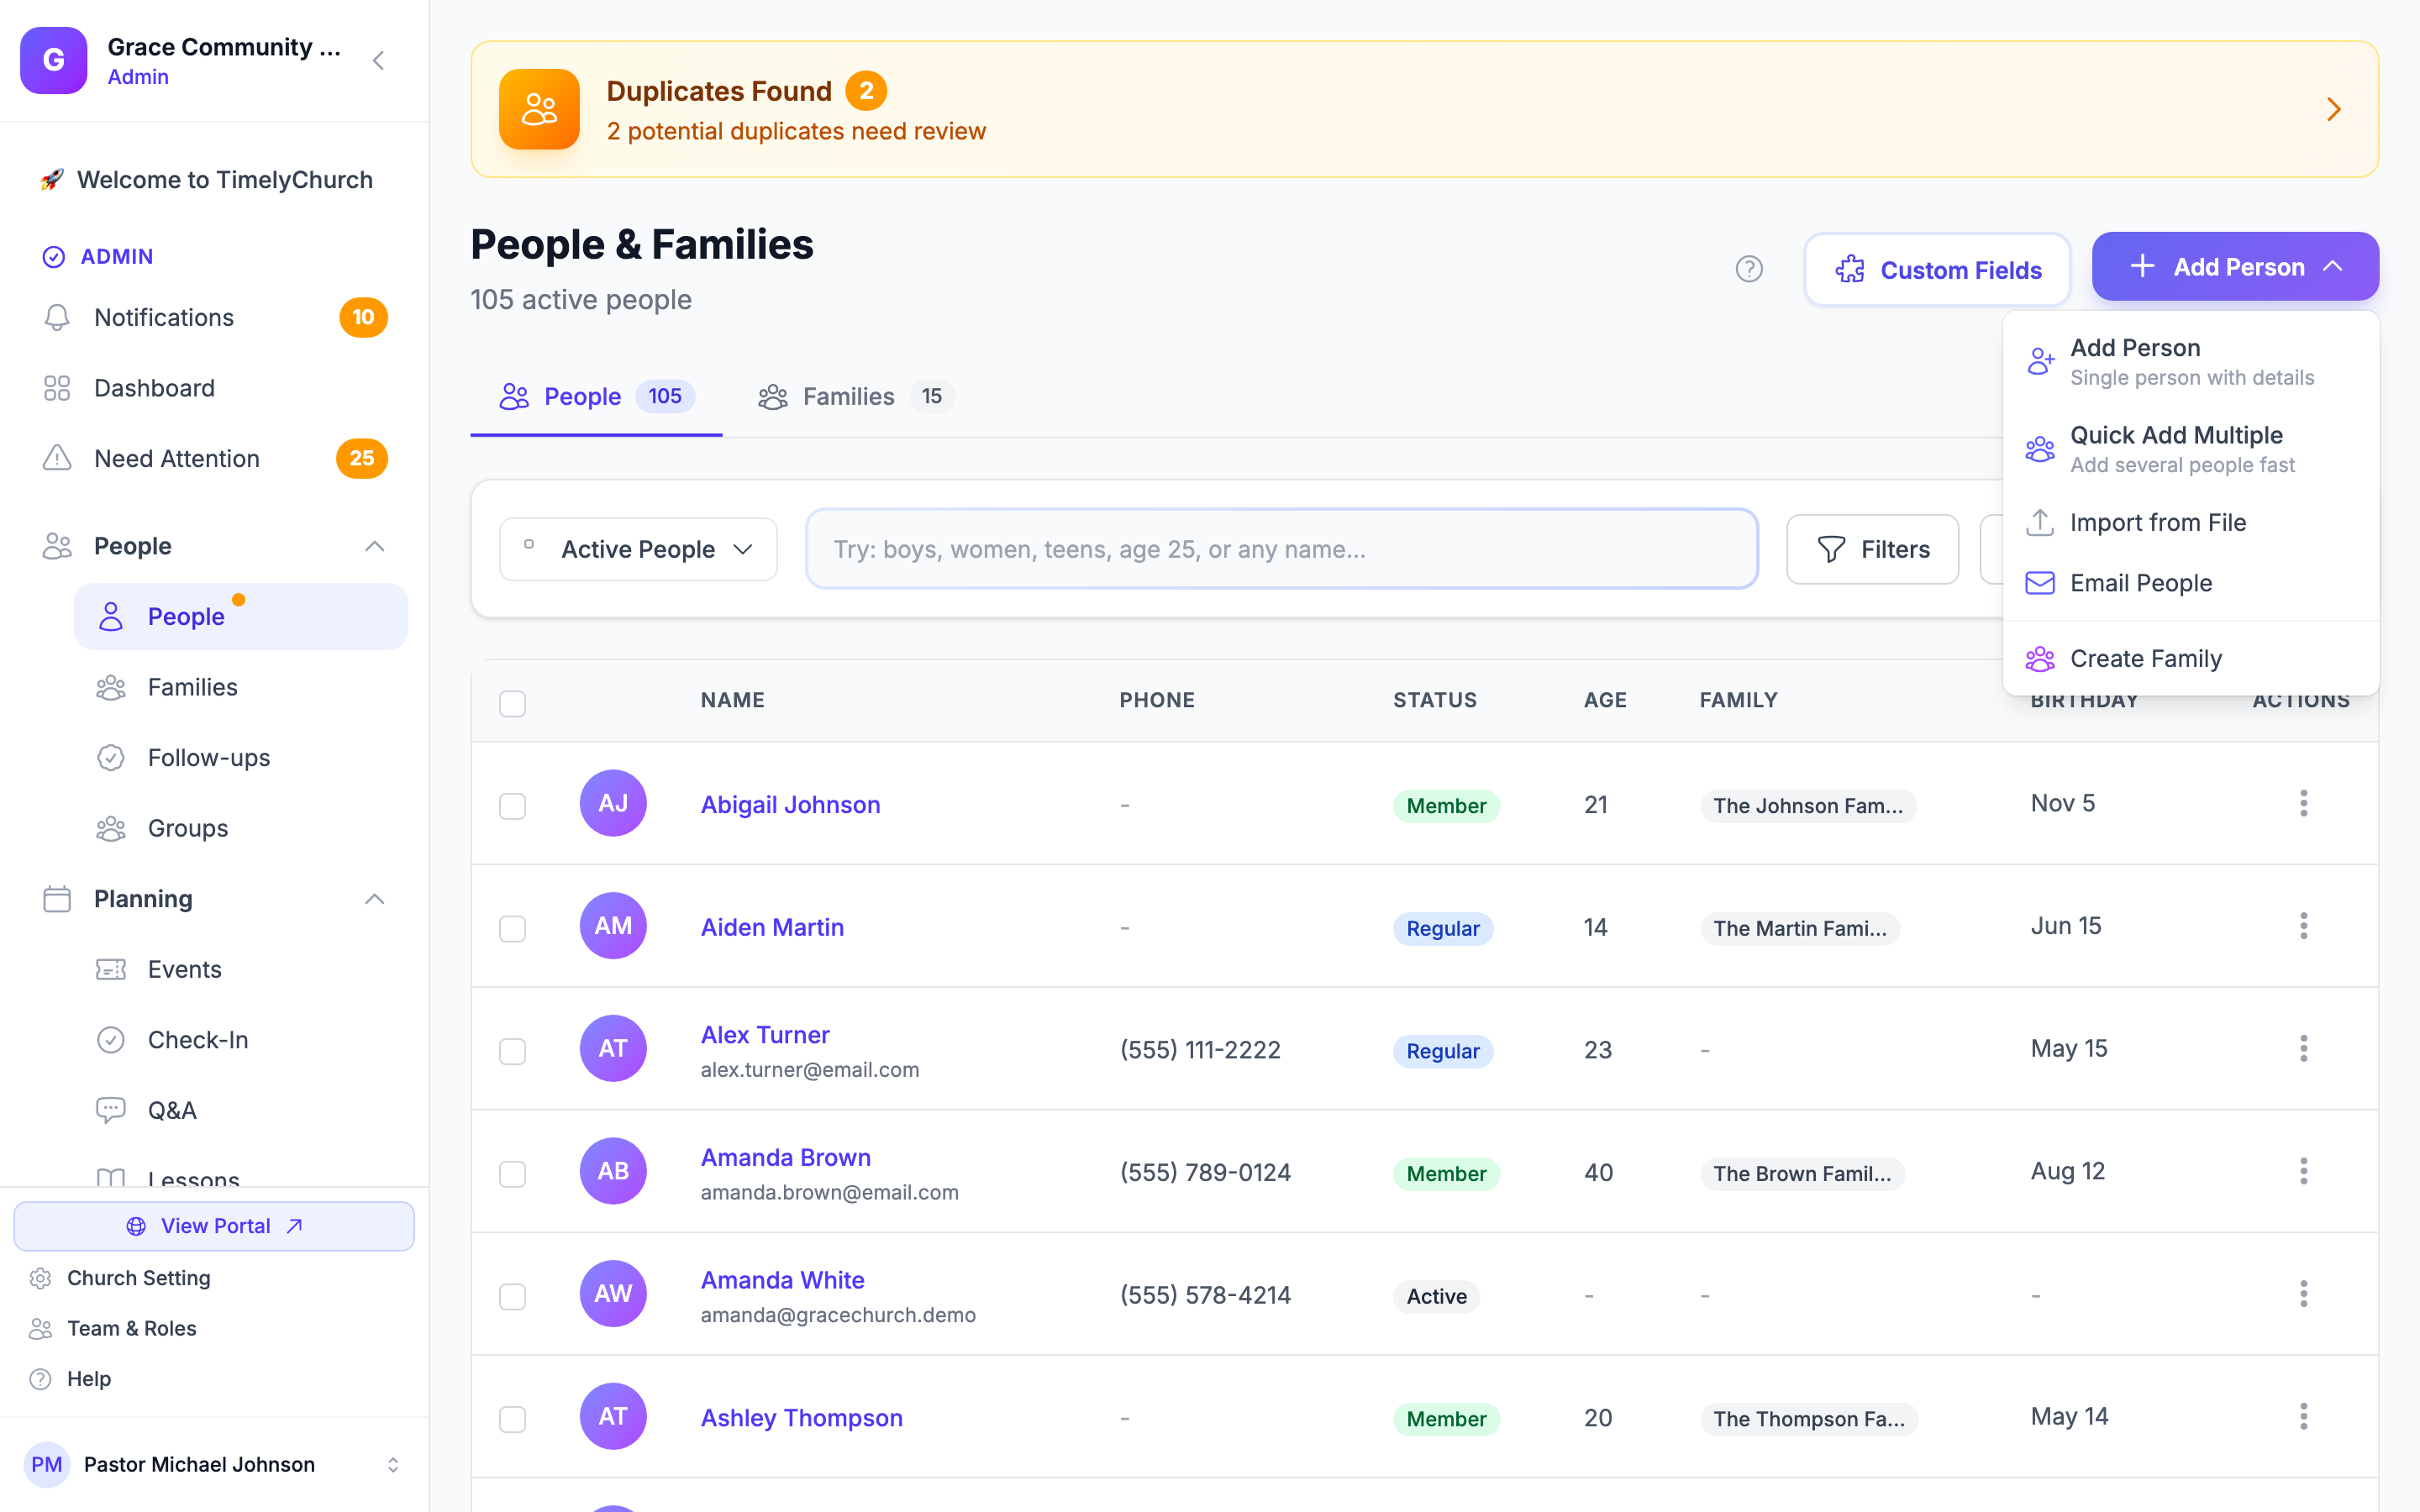
- Go to People from the left sidebar.
- Click the Add Person ▾ button in the top-right corner.
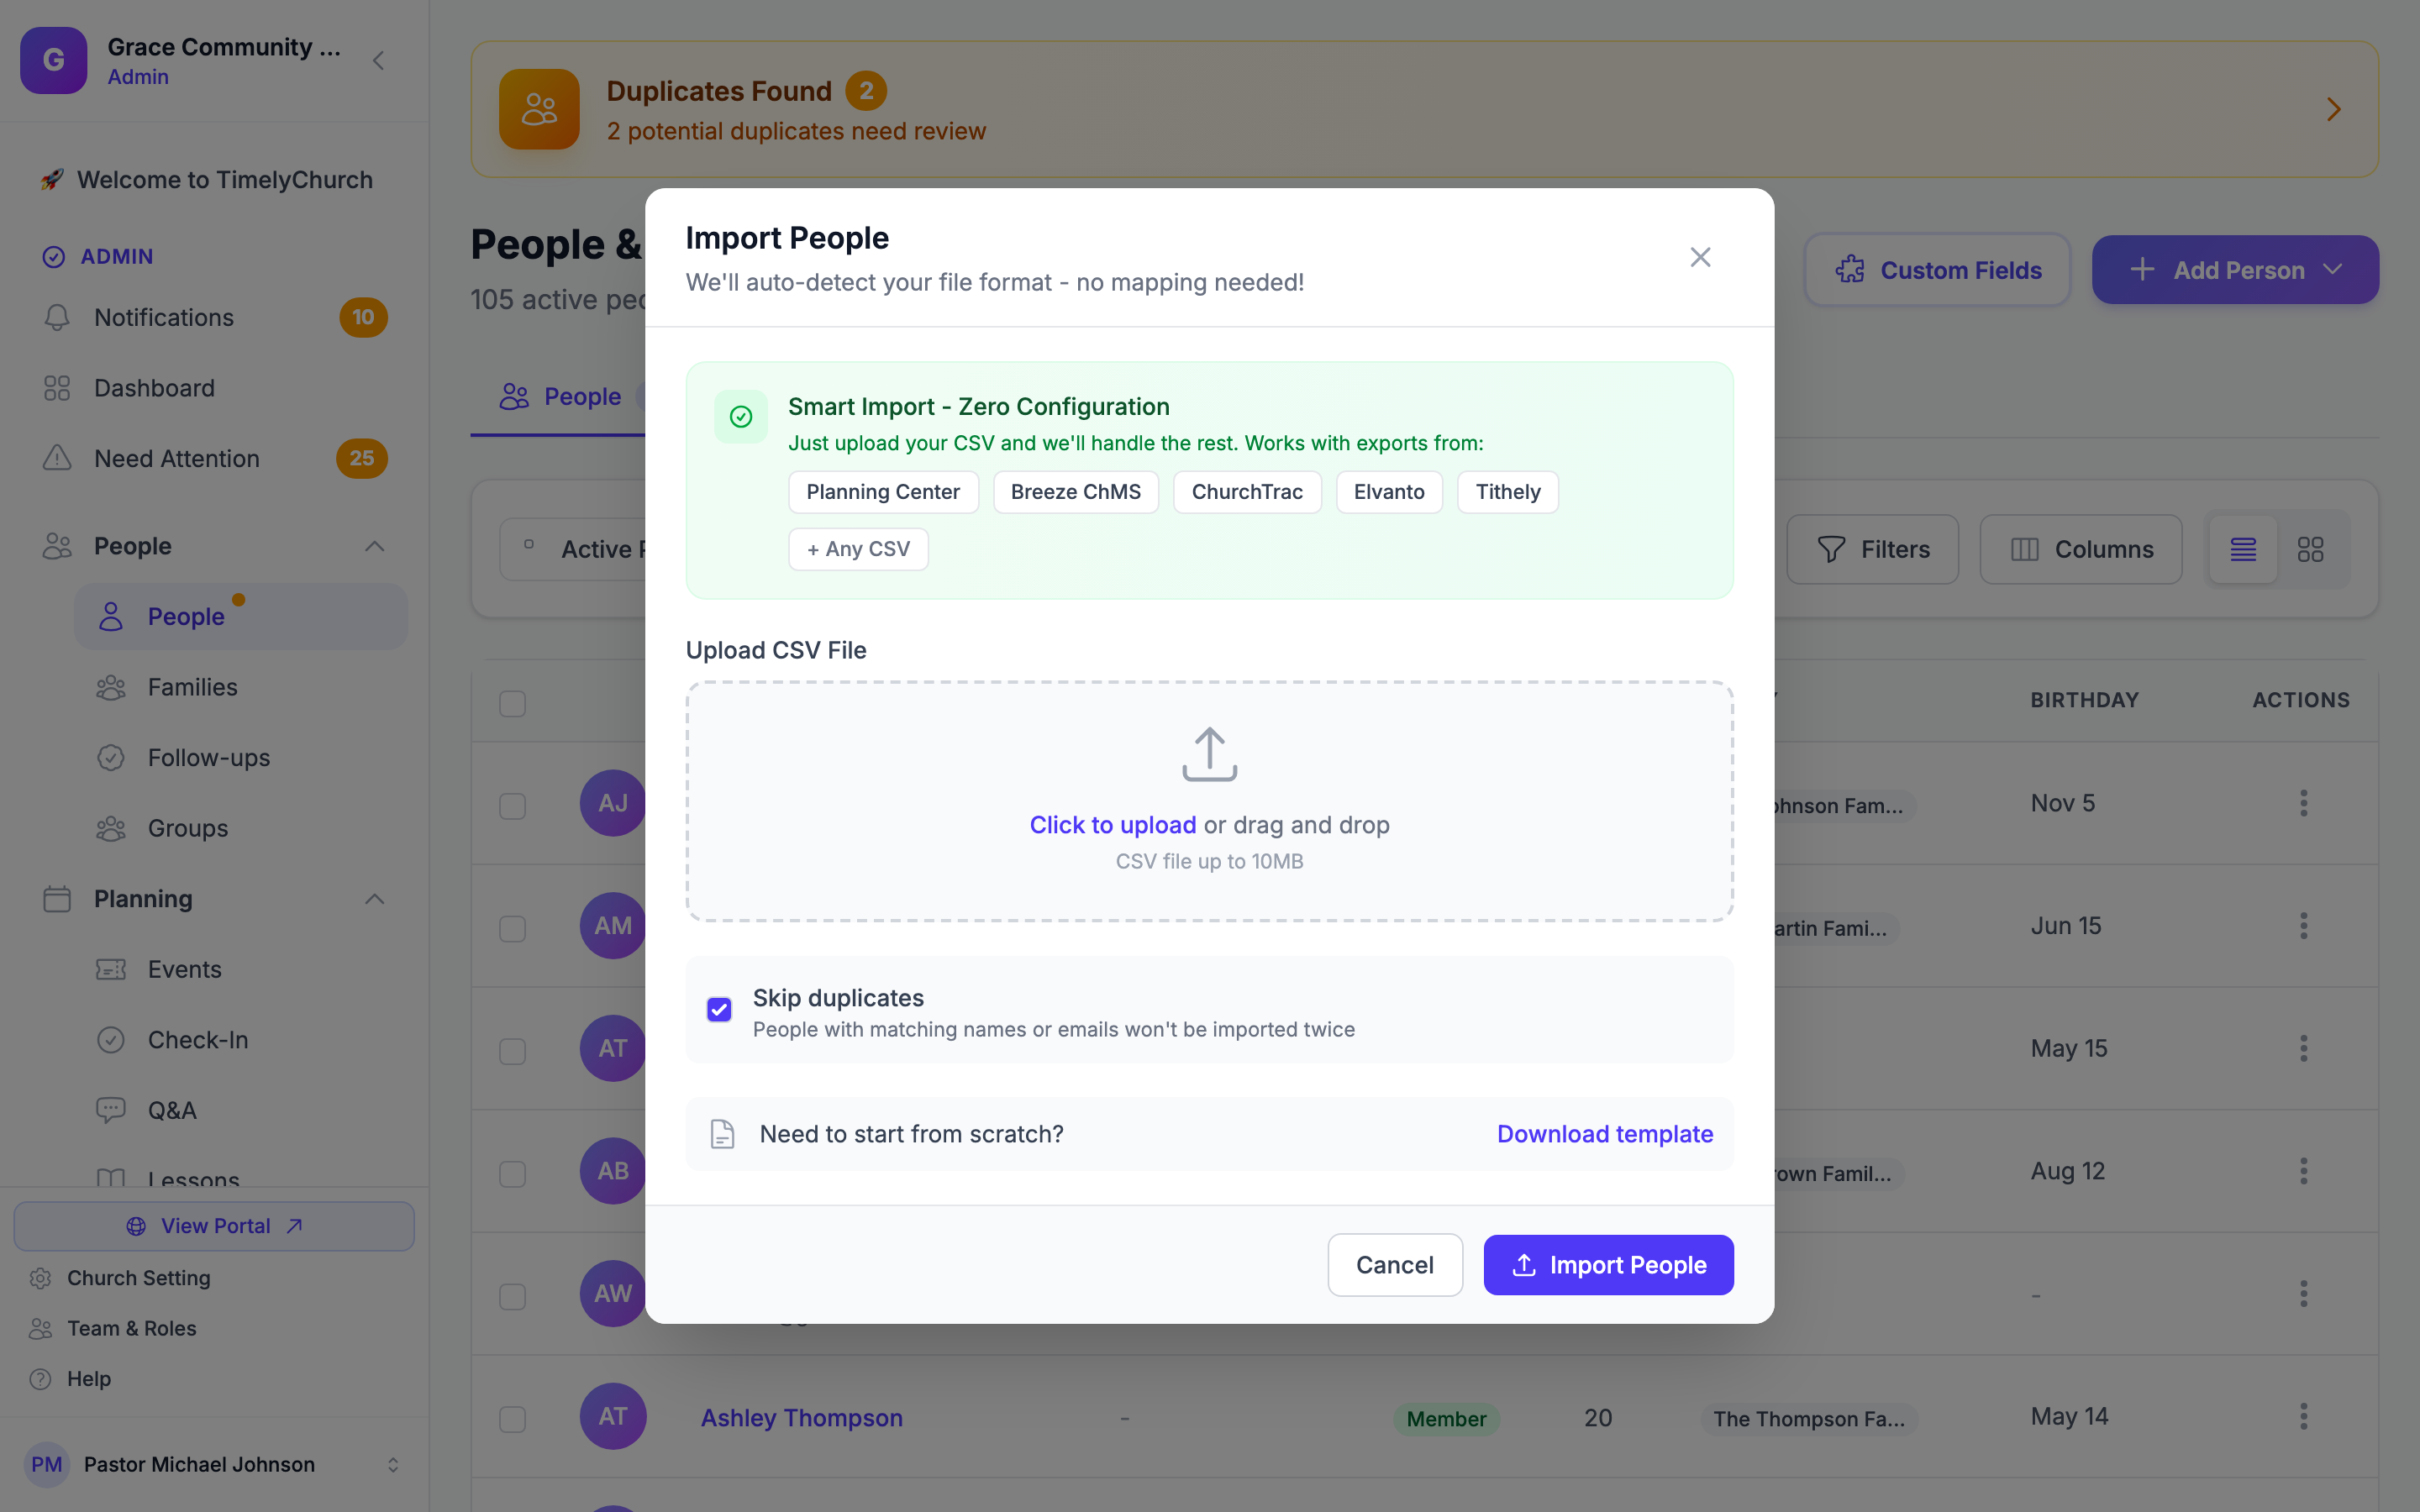
- Choose Import from File. This opens the Import People window, which auto-detects your file format — no column mapping needed.
Option A: Use the TimelyChurch Import Template
If you are starting with your own spreadsheet data, the template ensures your columns match what TimelyChurch expects.
- Go to People from the left sidebar.
- Click Add Person ▾, then Download CSV Template (you can also click Download template from inside the Import People window).
- Open the downloaded CSV file in Excel, Google Sheets, or another spreadsheet application.
- Fill in your data following the template columns:
| Column Header | Required | Accepted Values | Example |
|---|---|---|---|
| first_name | Yes | Any text | John |
| last_name | Yes | Any text | Smith |
| No | Valid email address | [email protected] | |
| phone_mobile | No | Any phone format | (555) 123-4567 |
| gender | No | male or female (only two values supported) |
male |
| membership_status | No | visitor, regular_attendee, member, inactive, or former |
visitor |
| birthdate | No | YYYY-MM-DD format | 1990-05-15 |
| address_line_1 | No | Any text | 123 Main Street |
| city | No | Any text | Springfield |
| state | No | State abbreviation or full name | IL |
| postal_code | No | Any text | 62701 |
- Save the file as CSV format.
Tip: If you leave the membership_status column empty, imported people will default to "Visitor." If a row is missing a first name or last name, it will be skipped.
Option B: Import Directly from Another Church Management System
TimelyChurch automatically recognizes CSV exports from many other platforms and maps their columns for you. Recognized systems include:
| Platform | What TimelyChurch Detects |
|---|---|
| Planning Center | person_id, given_name, home_email, membership, household columns |
| Realm (ACS) | family_key, family_position, individual_id, member_status columns |
| Breeze ChMS | breeze_id, family_id, family_role columns |
| ChurchTrac | peopleid, familyrole, membertype, envelope columns |
| Elvanto | family_relationship, preferred_name, family_id columns |
| Tithely | id_member, id_household, mobile_phone_country_code columns |
| Pushpay (CCB) | family_position, individual_id, campus columns |
| Servant Keeper | familyid, individual_id, individual_number columns |
| Church Windows | family #, individual #, family_role columns |
Even if your system is not listed, you can still upload any CSV — TimelyChurch will fall back to a generic import that reads standard column names like first_name, last_name, email, and so on.
To import from one of these platforms:
- In your current church management system, export your people list as a CSV file.
- In TimelyChurch, open People > Add Person ▾ > Import from File.
- Upload the CSV file directly -- no reformatting needed.
- TimelyChurch detects the source format and notes it in the result message (e.g., "Detected Planning Center format").
- Click Import People to finish.
Tip: If your export includes household or family data, TimelyChurch will automatically create family records and link people to their families. You do not need to set up families separately.
Uploading and Importing
- Open People > Add Person ▾ > Import from File.
- Drag your CSV onto the upload area, or click it to browse and select your file (CSV up to 10 MB).
- Review the import options:
- Skip duplicates (recommended, on by default) -- If a person with the same name or email already exists in your directory, that row will be skipped instead of creating a duplicate record.
- Click Import People.
- Wait for the import to process. For large files, this may take a moment.
Understanding the Import Results
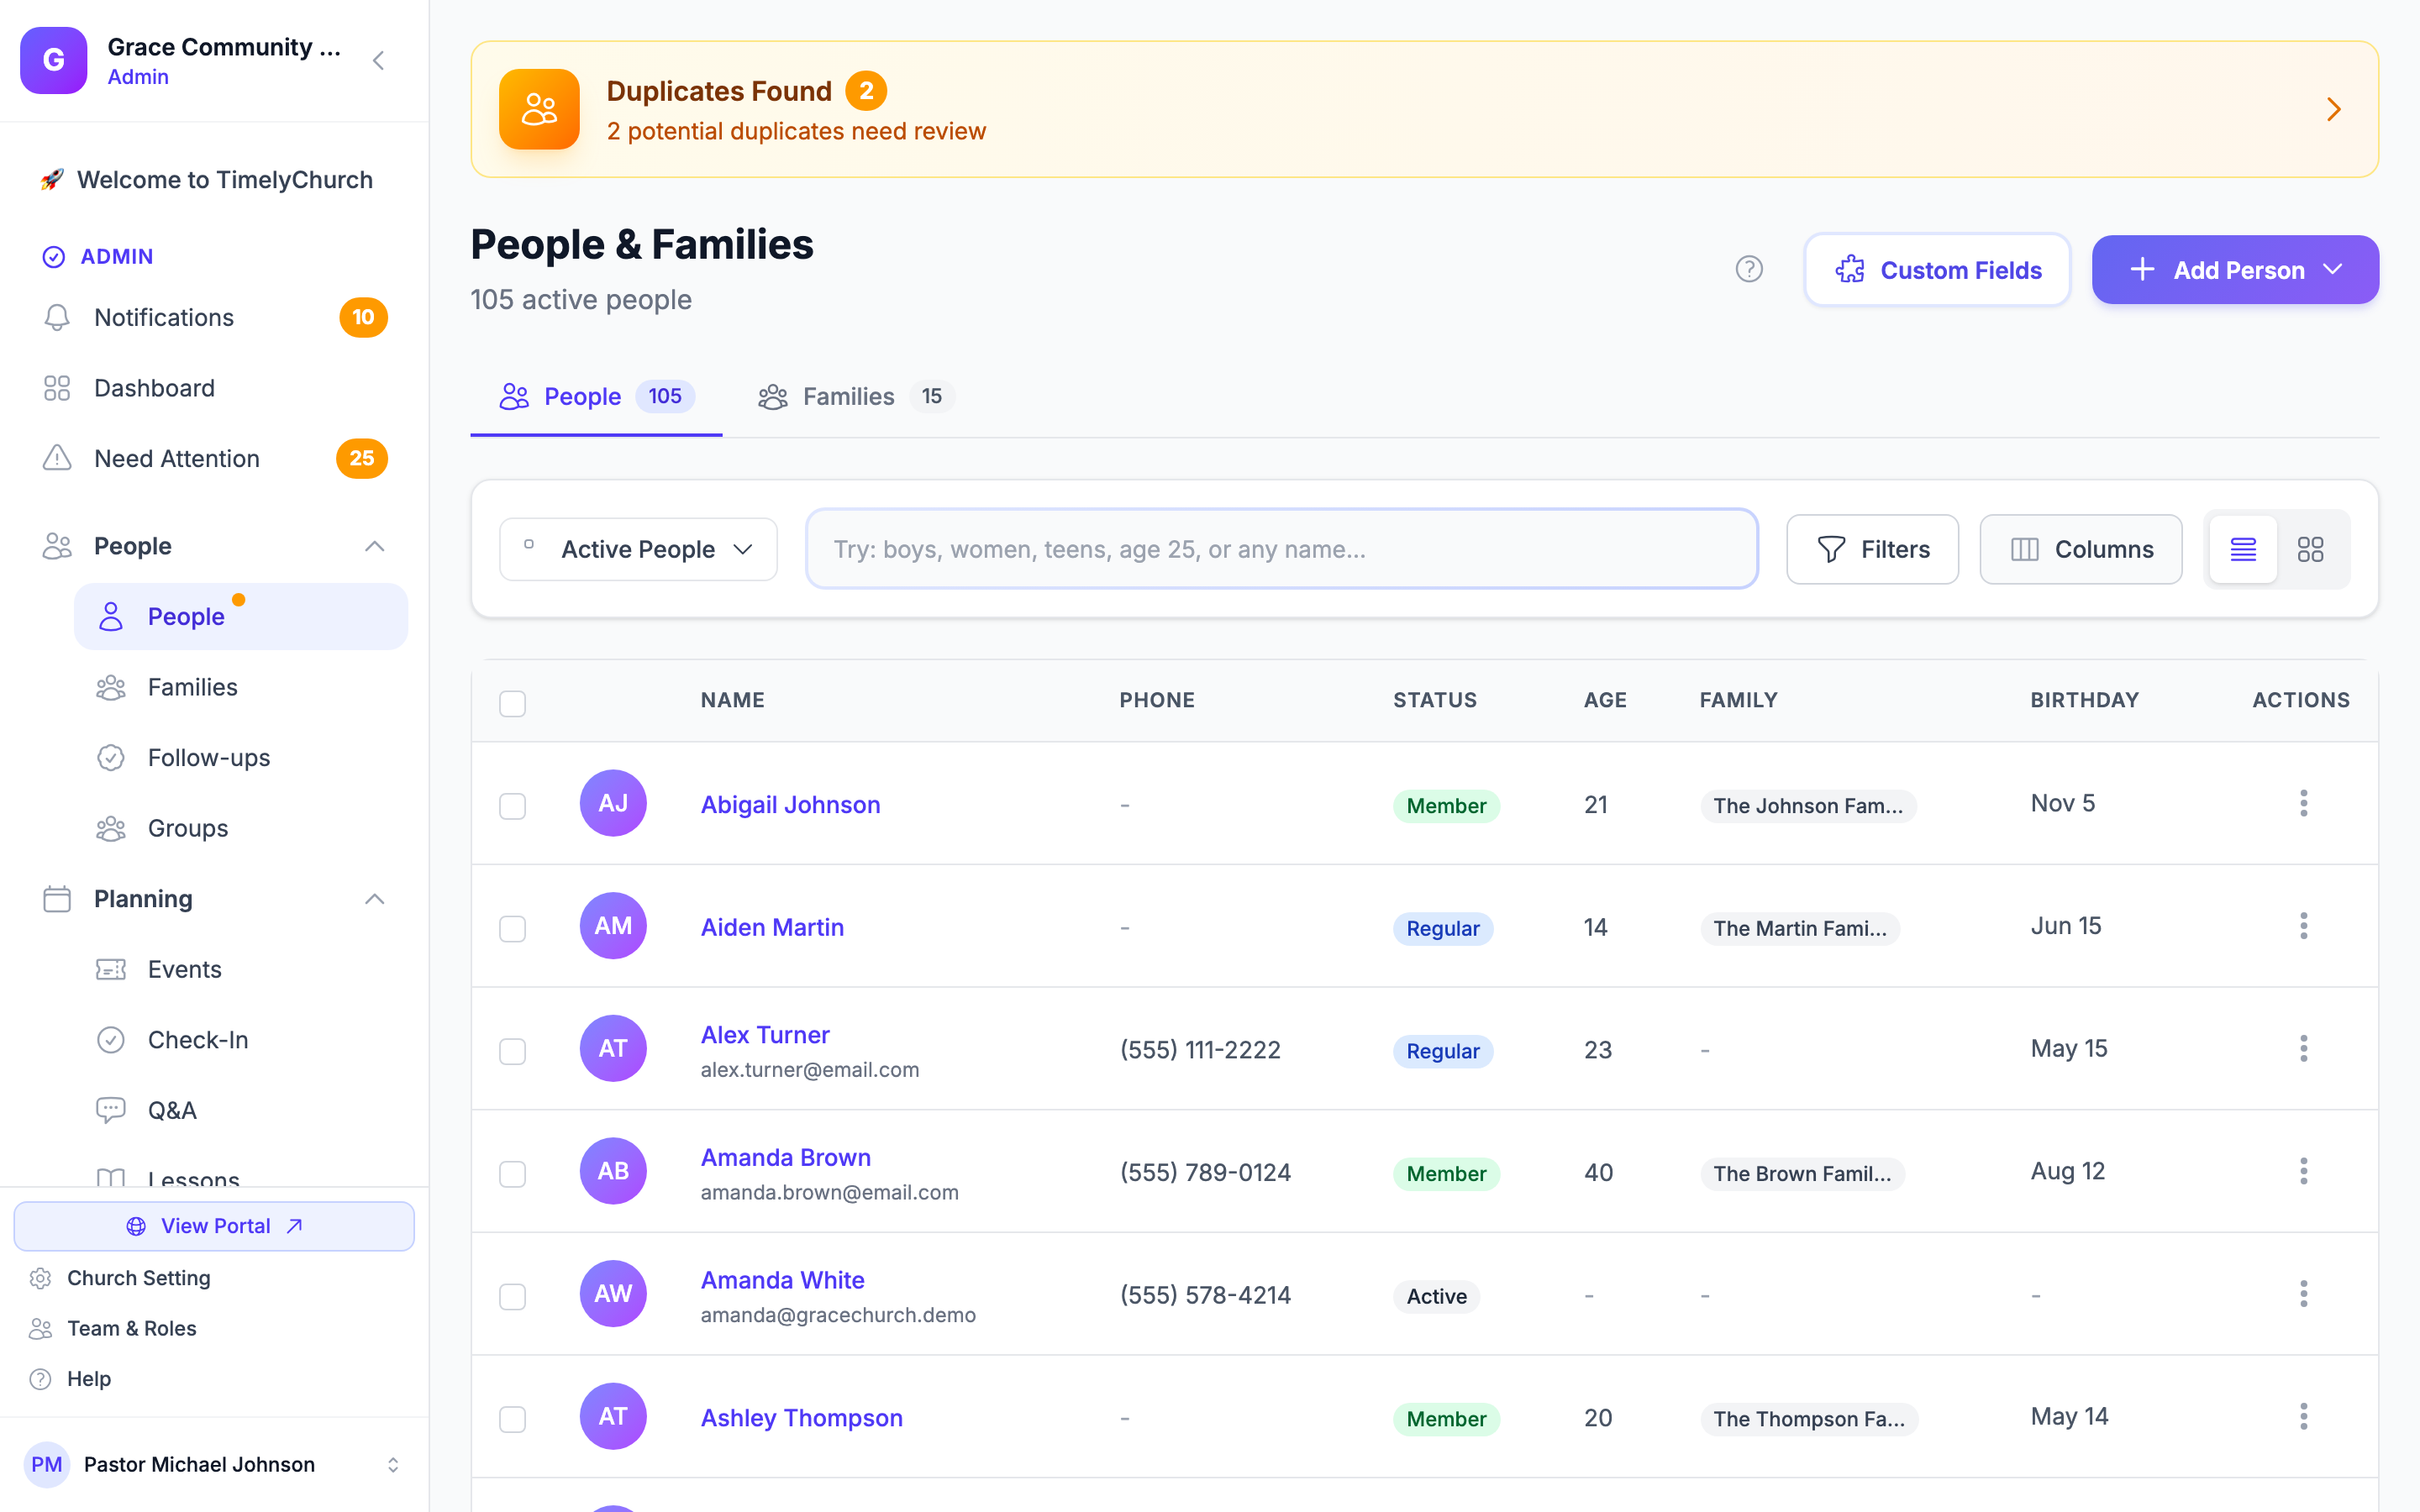
After the import completes, TimelyChurch shows a summary message at the top of the page describing what happened. Depending on your file, that message can include:
| Result | What It Means |
|---|---|
| Detected [Platform] format | TimelyChurch recognized which system the file came from |
| X people imported successfully | New person records were created |
| X families created | New family records created from household data |
| X duplicates skipped | Rows that matched existing records (when Skip duplicates is on) |
| X rows skipped due to errors | Rows that could not be imported (missing name, invalid data, etc.) |
If some rows were skipped due to errors, fix the data in your spreadsheet and re-import just those rows.
Exporting People to CSV
Export your people data when you need to:
- Create a spreadsheet for an event or ministry team
- Share a member list with leadership
- Generate a mailing list
- Back up your data
- Migrate to another system
Where to Find Export
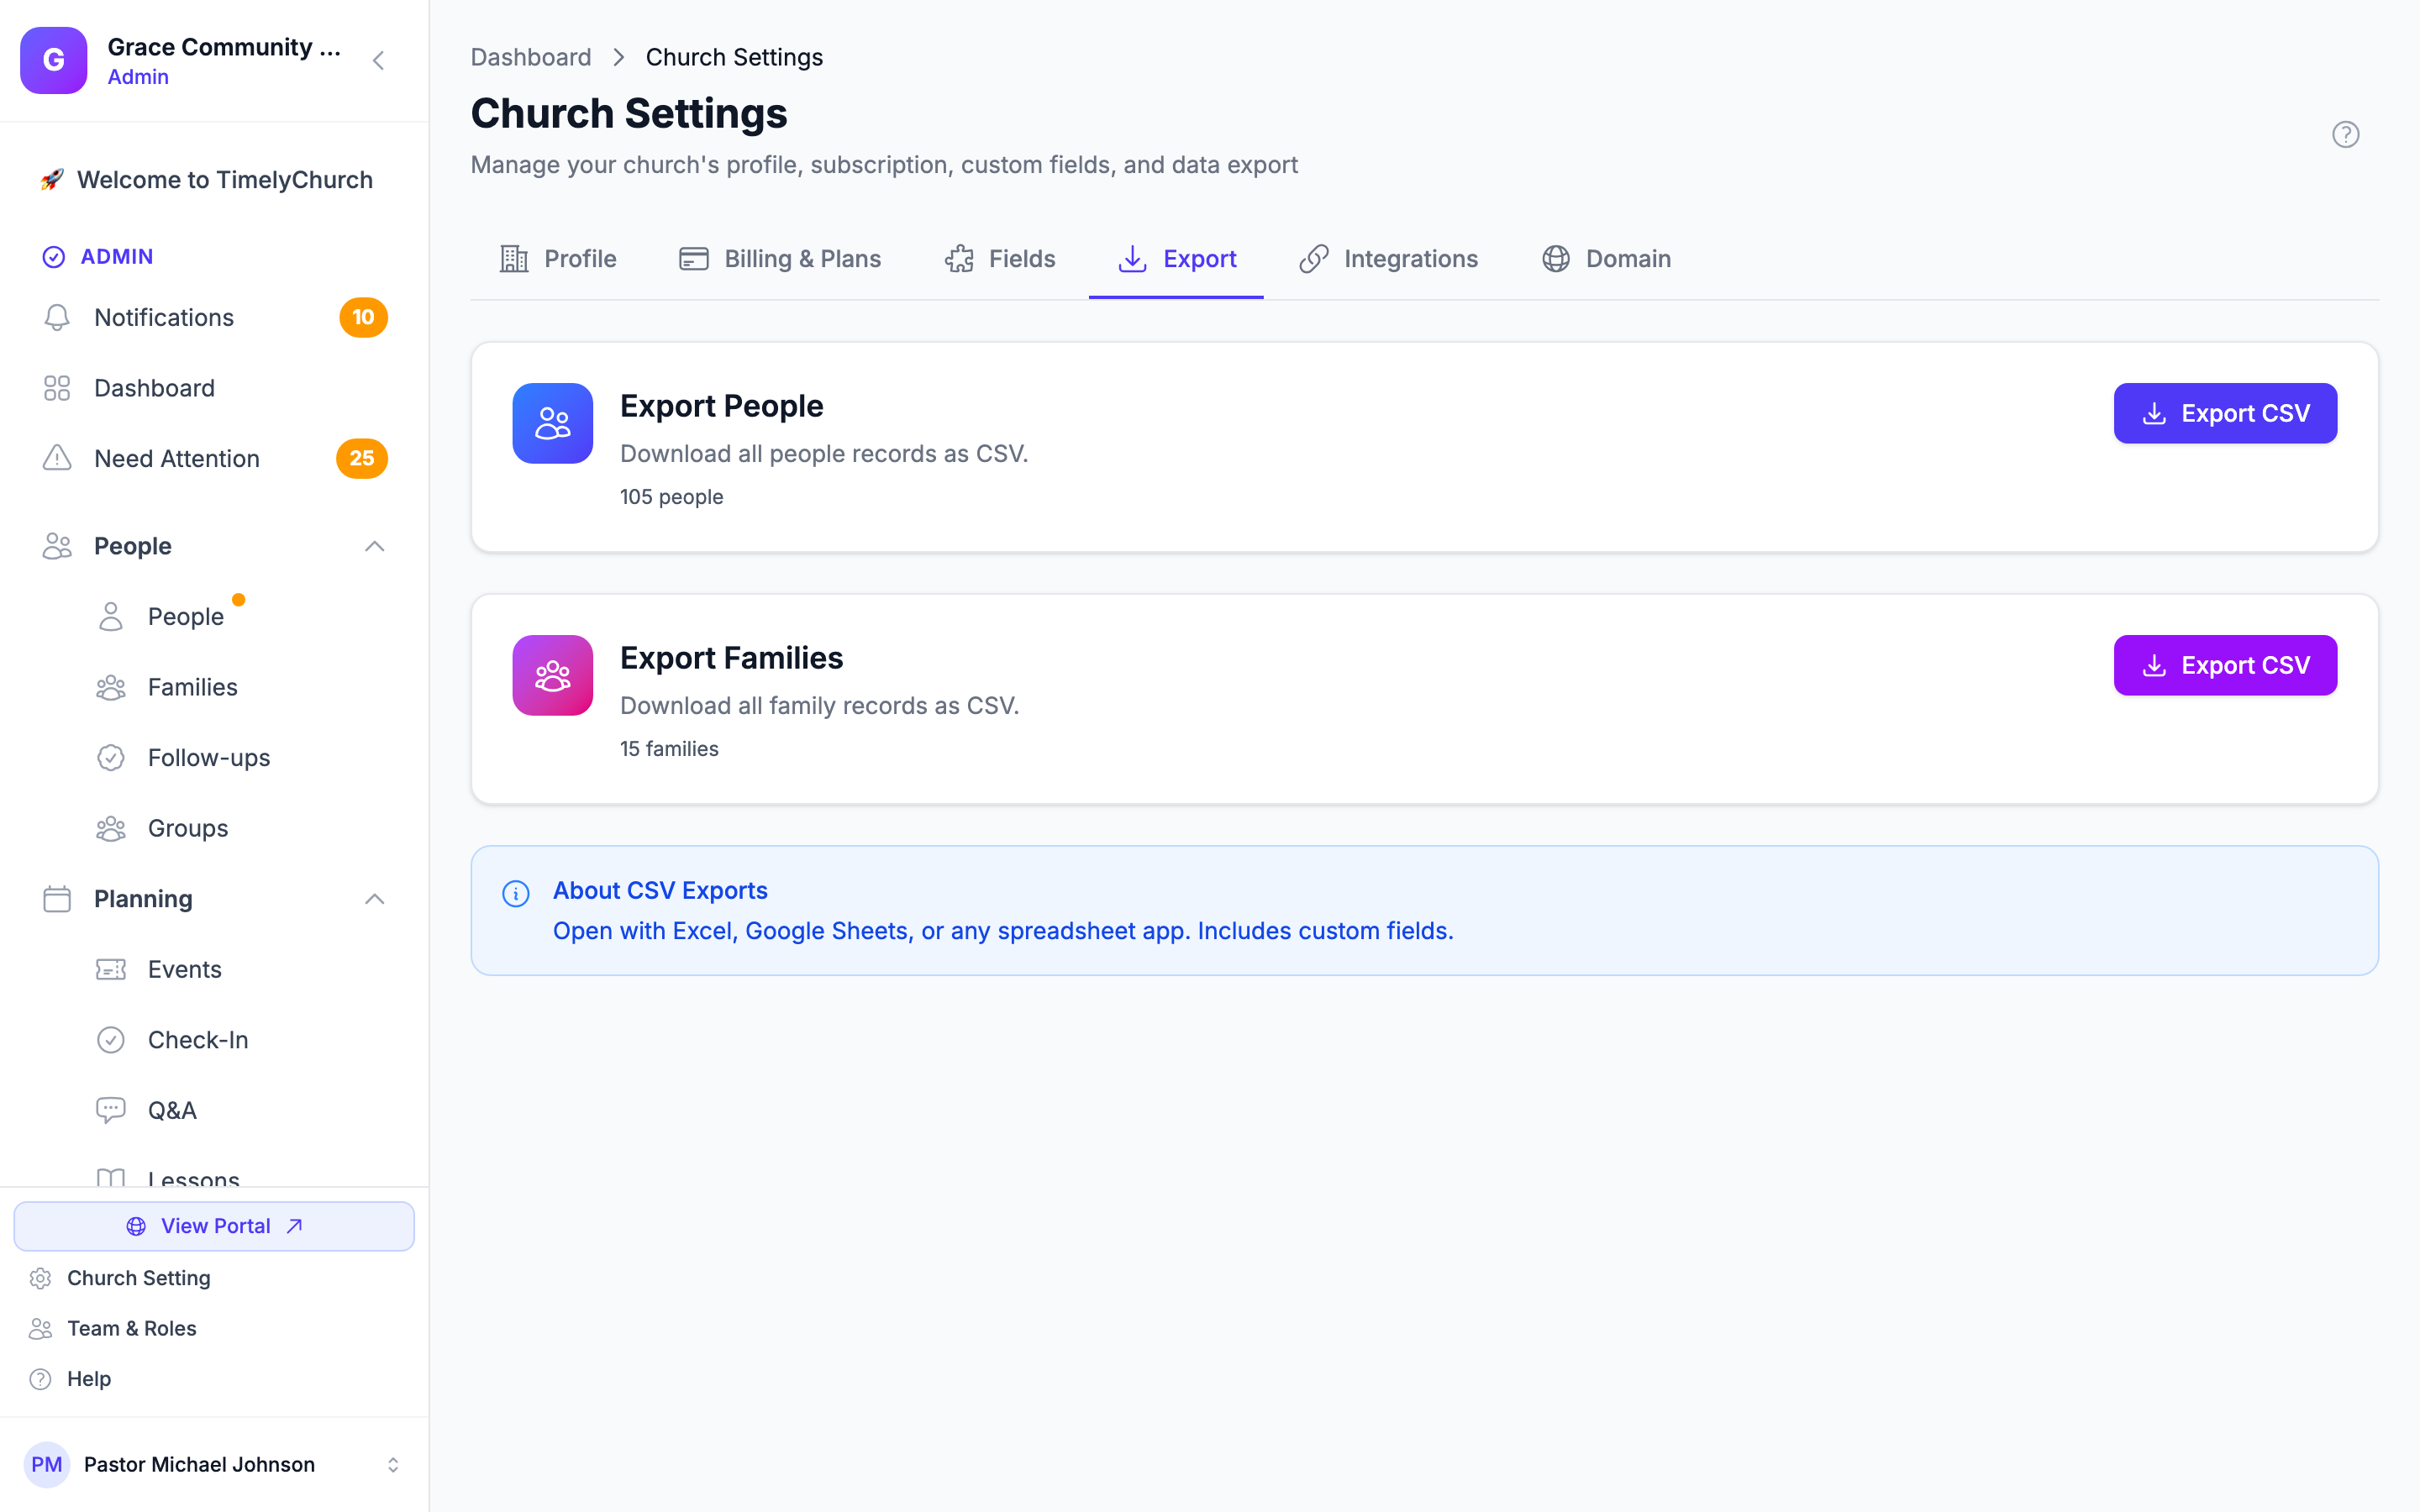
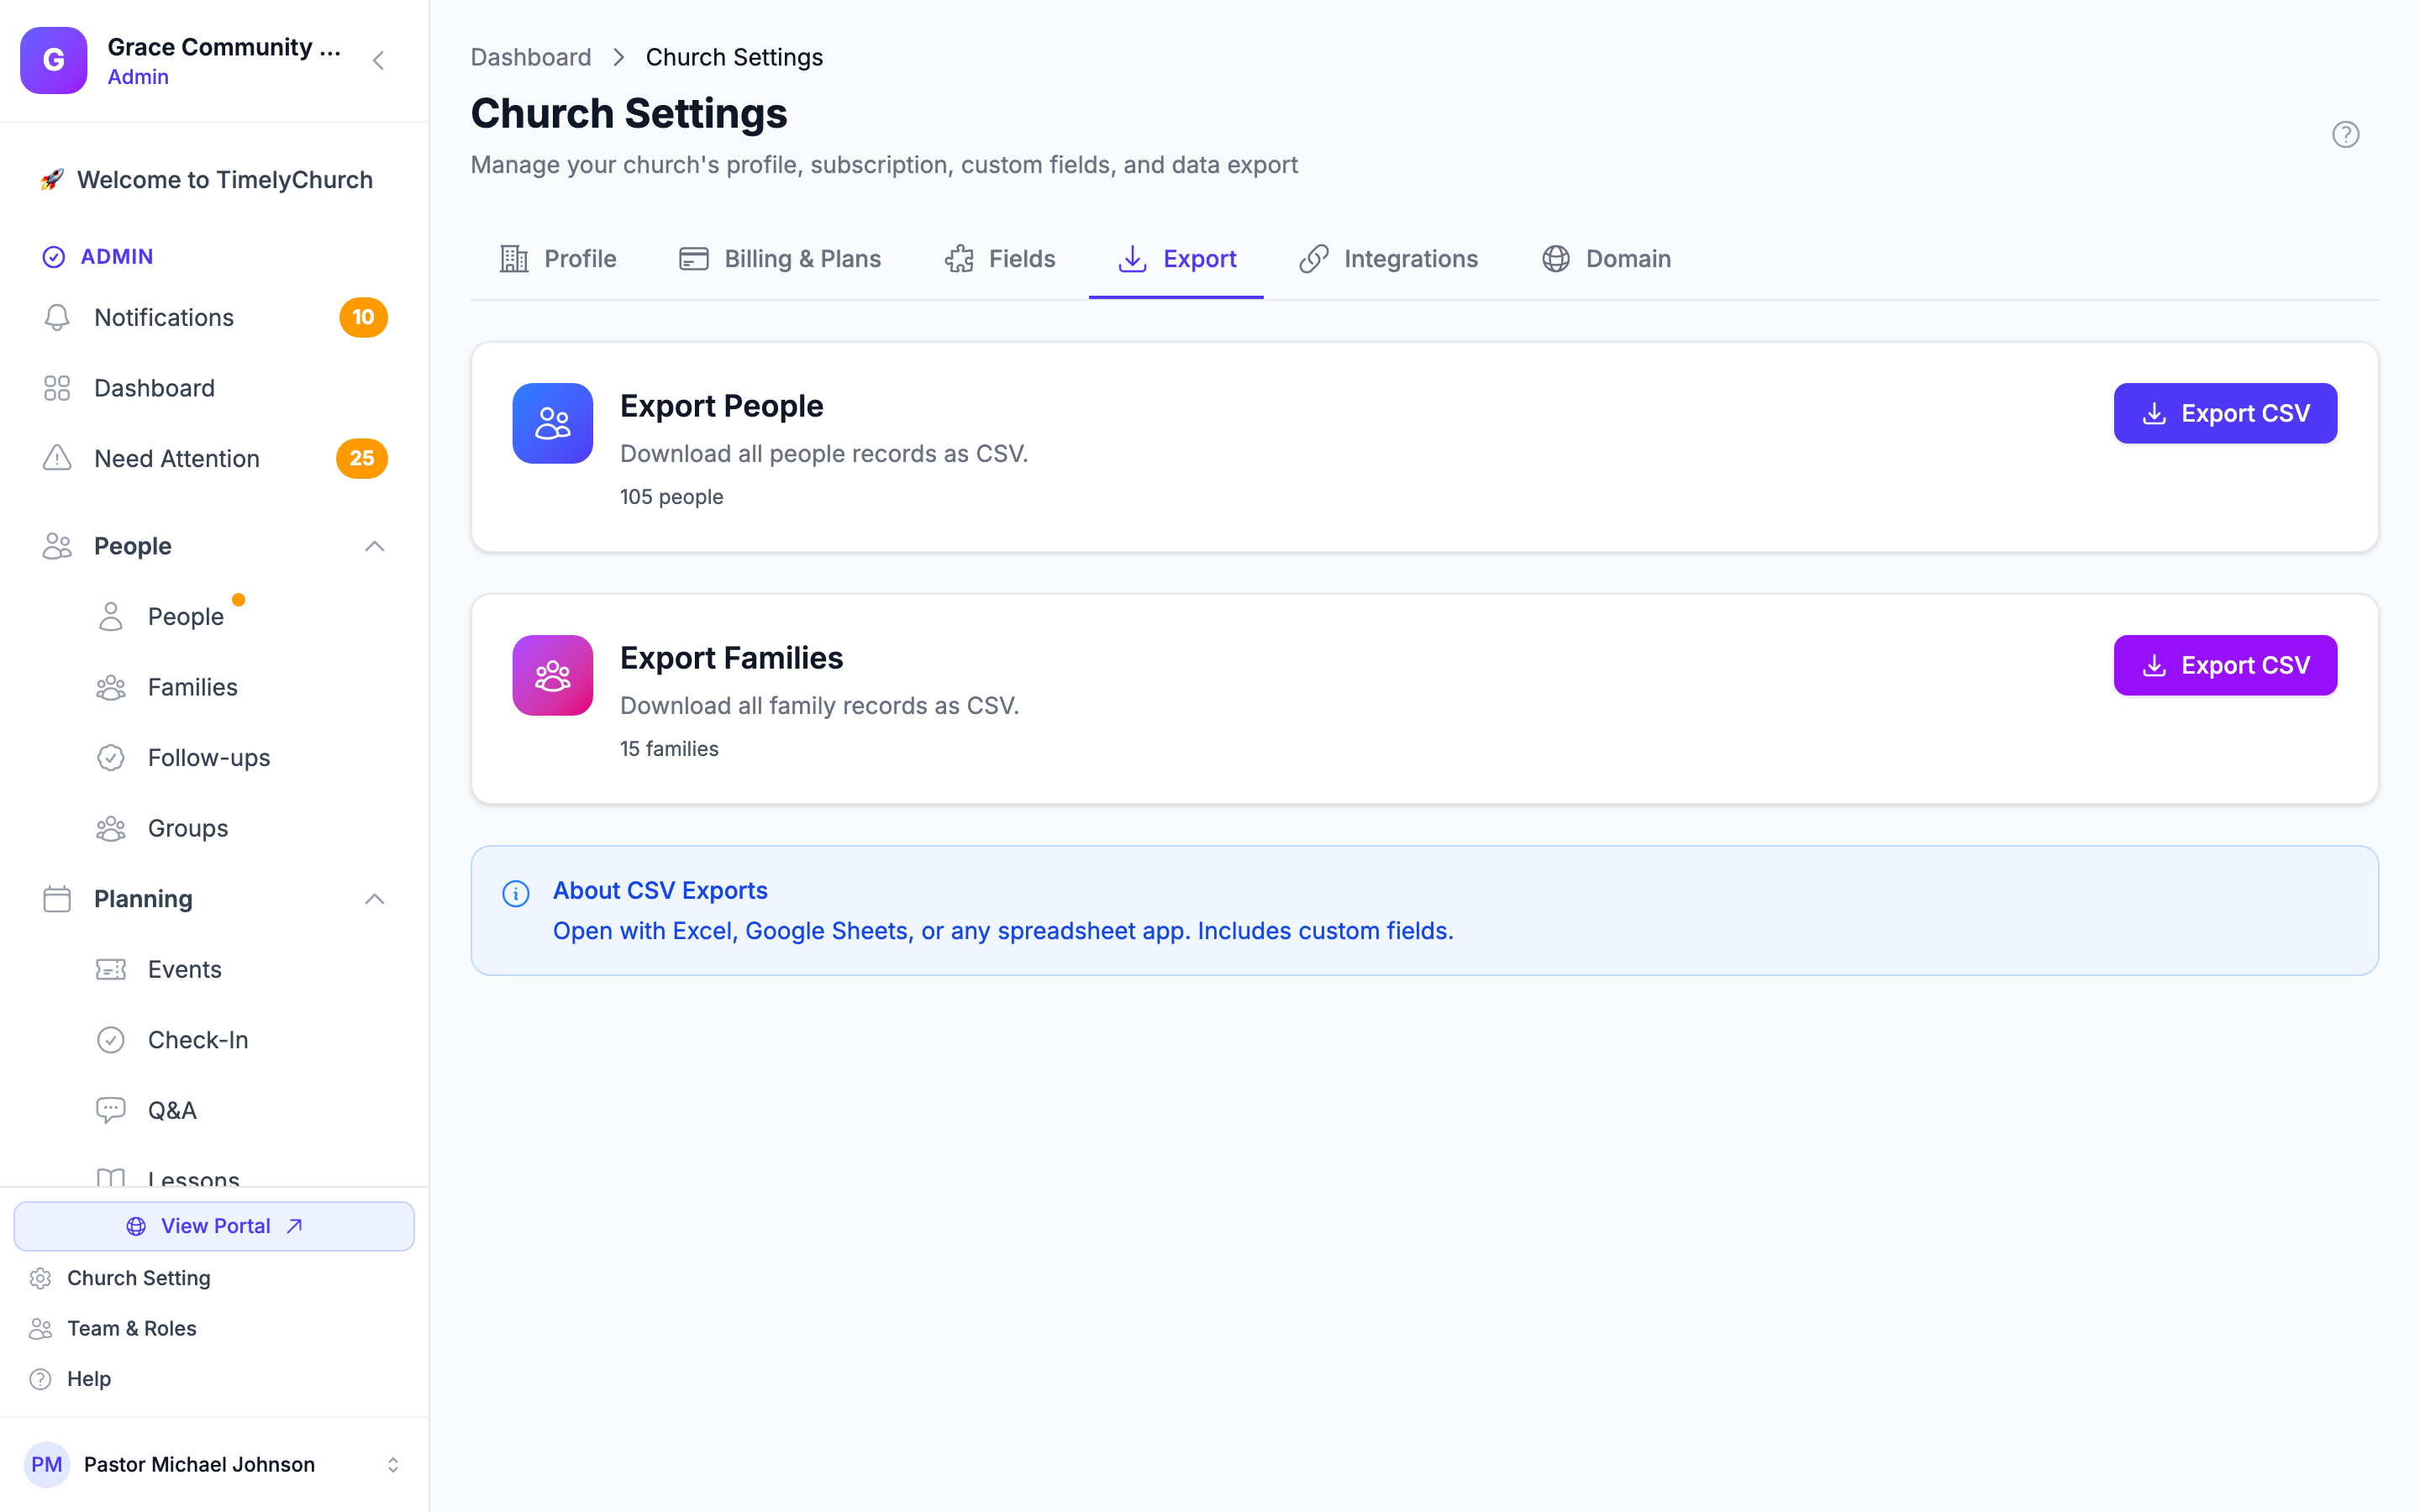
Export lives in your church settings, not on the People page.
- Go to Settings from the left sidebar (or open Church Settings).
- Open the Export tab.
- You will see separate Export People and Export Families cards.
Exporting All People
- On the Export tab, find the Export People card.
- Click Export CSV.
- A CSV file containing all of your people records will be downloaded to your computer.
The export includes everyone in your directory. If you need a filtered subset (for example, only a single class or only members), export the full file and filter it in your spreadsheet application.
What is Included in a People Export
The exported CSV file has 19 columns, in this exact order:
| # | Column | Description |
|---|---|---|
| 1 | ID | TimelyChurch internal ID |
| 2 | First Name | Person's first name |
| 3 | Last Name | Person's last name |
| 4 | Primary email address | |
| 5 | Phone | Phone number |
| 6 | Birthdate | Date of birth (YYYY-MM-DD) |
| 7 | Gender | male or female |
| 8 | Address | Street address |
| 9 | City | City |
| 10 | State | State / Province |
| 11 | Zip | ZIP / Postal code |
| 12 | Membership Status | Current membership status (for example: member, regular attendee, visitor, participant, in progress, inactive, or former) |
| 13 | Is Active | Yes or No |
| 14 | Is Teacher | Yes or No |
| 15 | Family Name | Name of the family they belong to (blank if not in a family) |
| 16 | Family Role | Their role within the family |
| 17 | Classes | Comma-separated list of class enrollments |
| 18 | Notes | Notes field |
| 19 | Created At | When the record was created (YYYY-MM-DD HH:MM:SS) |
Known limitation: A few columns -- specifically Phone, Address, Zip, Family Role, and Notes -- may appear blank in your exported file. These details are stored on each person's profile but are not always carried into the current export. If you need those values, look at the underlying detail in the person profile or open a support ticket so we can prioritize the export fix.
Exporting Families to CSV
You can also export your family records as a separate file.
- Go to Settings > Export tab.
- Find the Export Families card.
- Click Export CSV.
What is Included in a Families Export
| Column | Description |
|---|---|
| ID | TimelyChurch internal ID |
| Family Name | Name of the family |
| Address | Street address |
| City | City |
| State | State/Province |
| Zip | ZIP/Postal code |
| Primary Phone | Family phone number |
| Primary Email | Family email |
| Member Count | Number of people in the family |
| Members | Comma-separated list of member names |
| Created At | When the family was created |
Tips for a Successful Import
- Clean your data first -- Before importing, review your spreadsheet for obvious errors: empty rows, misspelled names, inconsistent formatting.
- Use consistent formats -- For dates, use YYYY-MM-DD. For phone numbers, any format works (TimelyChurch will normalize them). For gender, use "male" or "female."
- Start with a test import -- If you have a large file (hundreds or thousands of people), try importing just the first 10-20 rows to verify everything maps correctly.
- Keep "Skip duplicates" on -- This prevents accidental double entries. You can always add people manually later if they were incorrectly flagged as duplicates.
- Check the results -- After importing, browse through the People directory and spot-check a few records to make sure the data came through correctly.
- Import families too -- If your CSV includes household data (from Planning Center, Breeze, ChurchTrac, etc.), TimelyChurch will create families automatically. Check the Families tab to verify.
Troubleshooting Common Import Issues
| Problem | Solution |
|---|---|
| "No people were imported" | Check that your file has first_name and last_name columns (or recognized equivalents from a supported platform). |
| All rows show as duplicates | Your data may already be in TimelyChurch. Check the People directory. If you want to re-import, uncheck "Skip duplicates." |
| Some rows were skipped | Common causes: missing first or last name, invalid date format, or malformed email addresses. Fix those rows and re-import. |
| Dates are not importing correctly | YYYY-MM-DD format (e.g., 1990-05-15) is the most reliable. TimelyChurch can read several other common date formats, but mixed or ambiguous formats may not be recognized. |
| File too large | The maximum file size is 10 MB. If your file is larger, split it into smaller files. |
| Columns are not mapping | Make sure your CSV uses comma separation (not tab or semicolon). If exporting from Excel, choose "CSV (Comma delimited)" format. |