
Quick Start Checklist
This checklist walks you through setting up TimelyChurch for your church from start to finish. Follow these steps in order, and you will be up and running in no time.
Heads up: Your church account starts with a 30-day Pro trial -- every feature unlocked, no credit card needed. The full setup below typically takes 1-2 hours; the trial gives you plenty of room to import real data and run a real Sunday before you decide on a plan. See Trial and Plan Selection.
Before You Begin
Make sure you have:
- Your church's name, address, phone number, and email ready.
- A church logo image file (JPG or PNG, under 2 MB).
- A list of staff and volunteers you want to invite, including their email addresses.
- An idea of which team members should have which levels of access.
Step 0: Sign Up and Create Your Church
Time needed: 5 minutes
If you haven't already created your TimelyChurch account, start here:
- Go to timelychurch.com/register.
- Create your user account (name, email, phone, password).
- On the next screen, set up your church (name, slug, timezone, address).
- You land on your fresh admin dashboard with a 30-day Pro trial automatically activated.
For the full walkthrough, see Sign Up and Create Your Church.
Tip: Get the timezone right during church creation. It controls when scheduled emails send, when daily resets happen, and how all dates display. You can change it later under Church Settings → Profile, but it's easier to pick correctly the first time.
Step 1: Complete Your Church Profile
Time needed: 5 minutes
- Log in to your TimelyChurch admin panel.
- Click Church Settings at the bottom of the sidebar.
- On the Profile tab, fill in:
- [ ] Church name
- [ ] Email address
- [ ] Phone number
- [ ] Website
- [ ] Physical address
- [ ] Description
- [ ] Timezone
- Upload your church logo.
- Click Save.
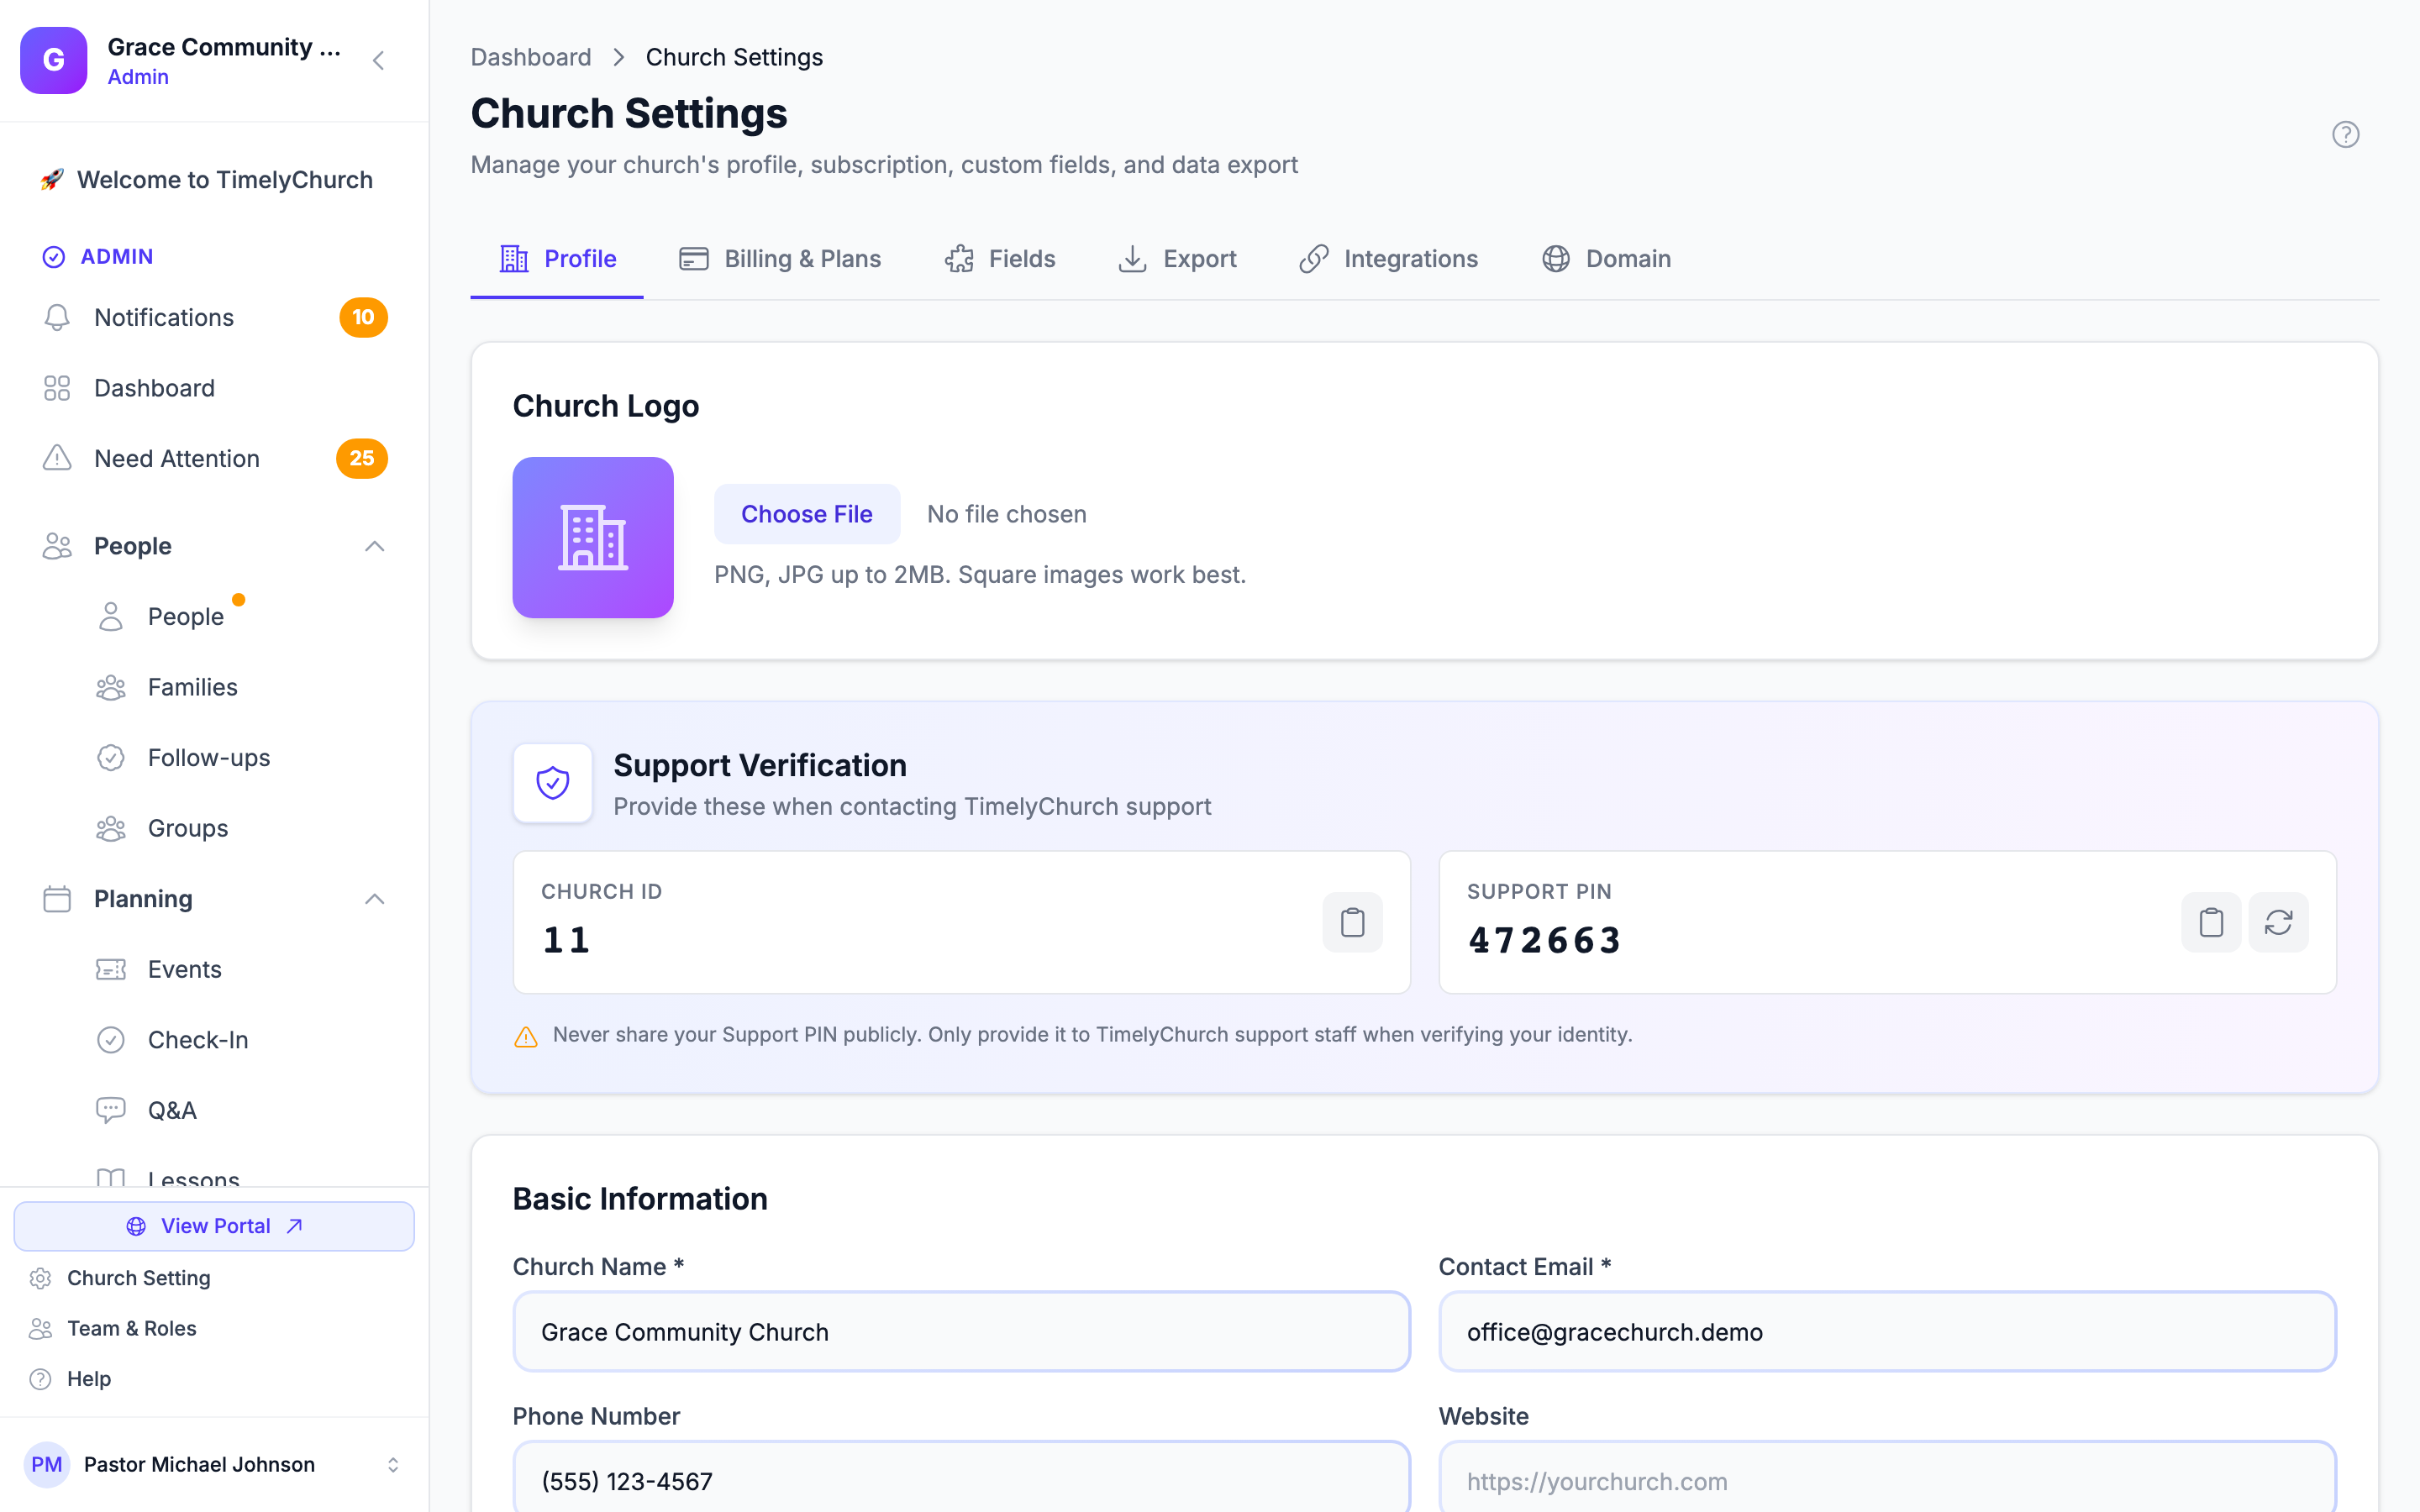
See Church Settings for detailed instructions.
Tip: Getting the timezone right is important. It affects how all dates and times display throughout the platform. Double-check this before moving on.
Step 2: Review and Customize Roles
Time needed: 10-15 minutes
- In the sidebar, expand the Administration category and click Roles & Permissions.
- Review the default roles that come with TimelyChurch (Administrator, Pastor, Team Leader, Team Member, Member).
- Note that the Administrator role always has full access -- its permissions are locked and can't be edited here.
- Decide if you need to:
- [ ] Adjust permissions on any default roles
- [ ] Create custom roles for specific positions at your church
- For each custom role, set:
- [ ] A clear, descriptive name
- [ ] The appropriate scope (Self, Team, or All)
- [ ] A permission level for each module (None, View, Edit, or Full -- choose Custom to fine-tune the individual view/create/edit/delete checkboxes)
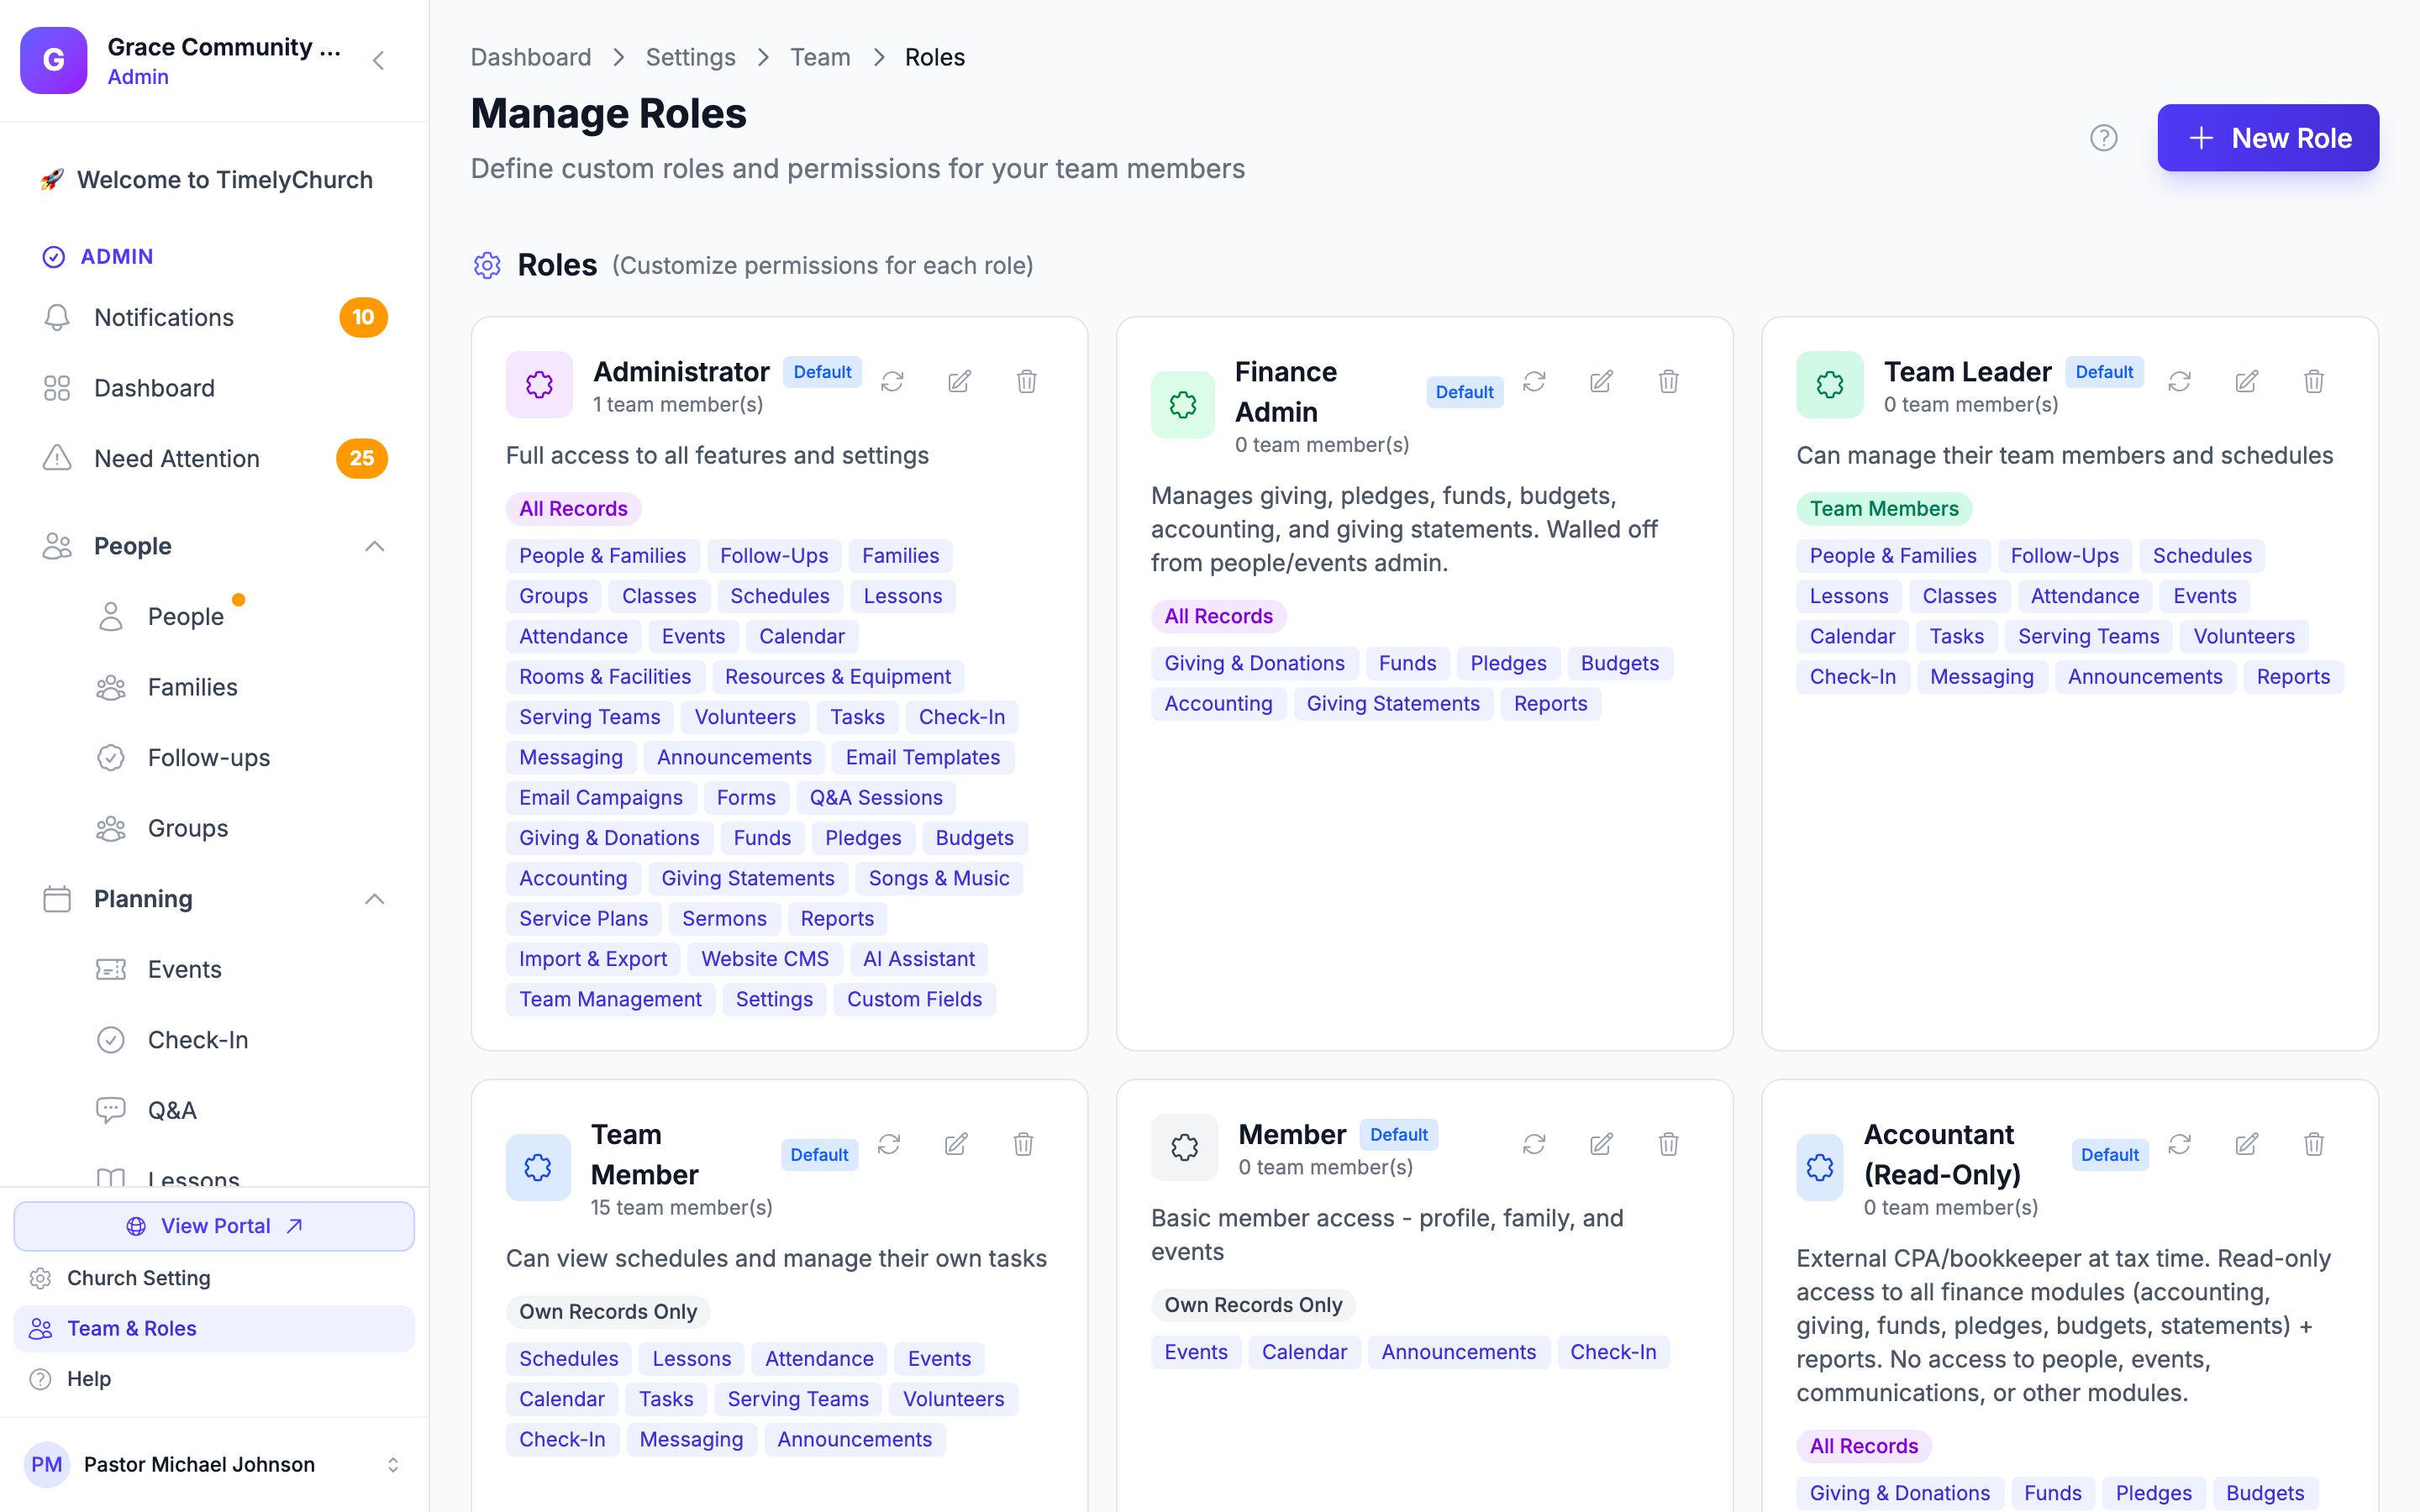
See Setting Up Roles and Permissions for detailed instructions.
Tip: You do not need to get roles perfect right away. You can always adjust permissions later as you learn what your team needs.
Step 3: Invite Your Team
Time needed: 5-10 minutes
- In the sidebar, expand the Administration category and click Team Members (you can also use the Team & Roles link near the bottom of the sidebar).
- Use the invite option on the Team Members page to invite your core team members:
- [ ] Senior pastor / lead administrator
- [ ] Office staff
- [ ] Ministry leaders
- [ ] Key volunteers
- Choose the method that works best:
- Email invitations for specific people.
- Directory invitations for people already in your database.
- Invite links for onboarding a group of volunteers at once.
- Assign each person the appropriate role.
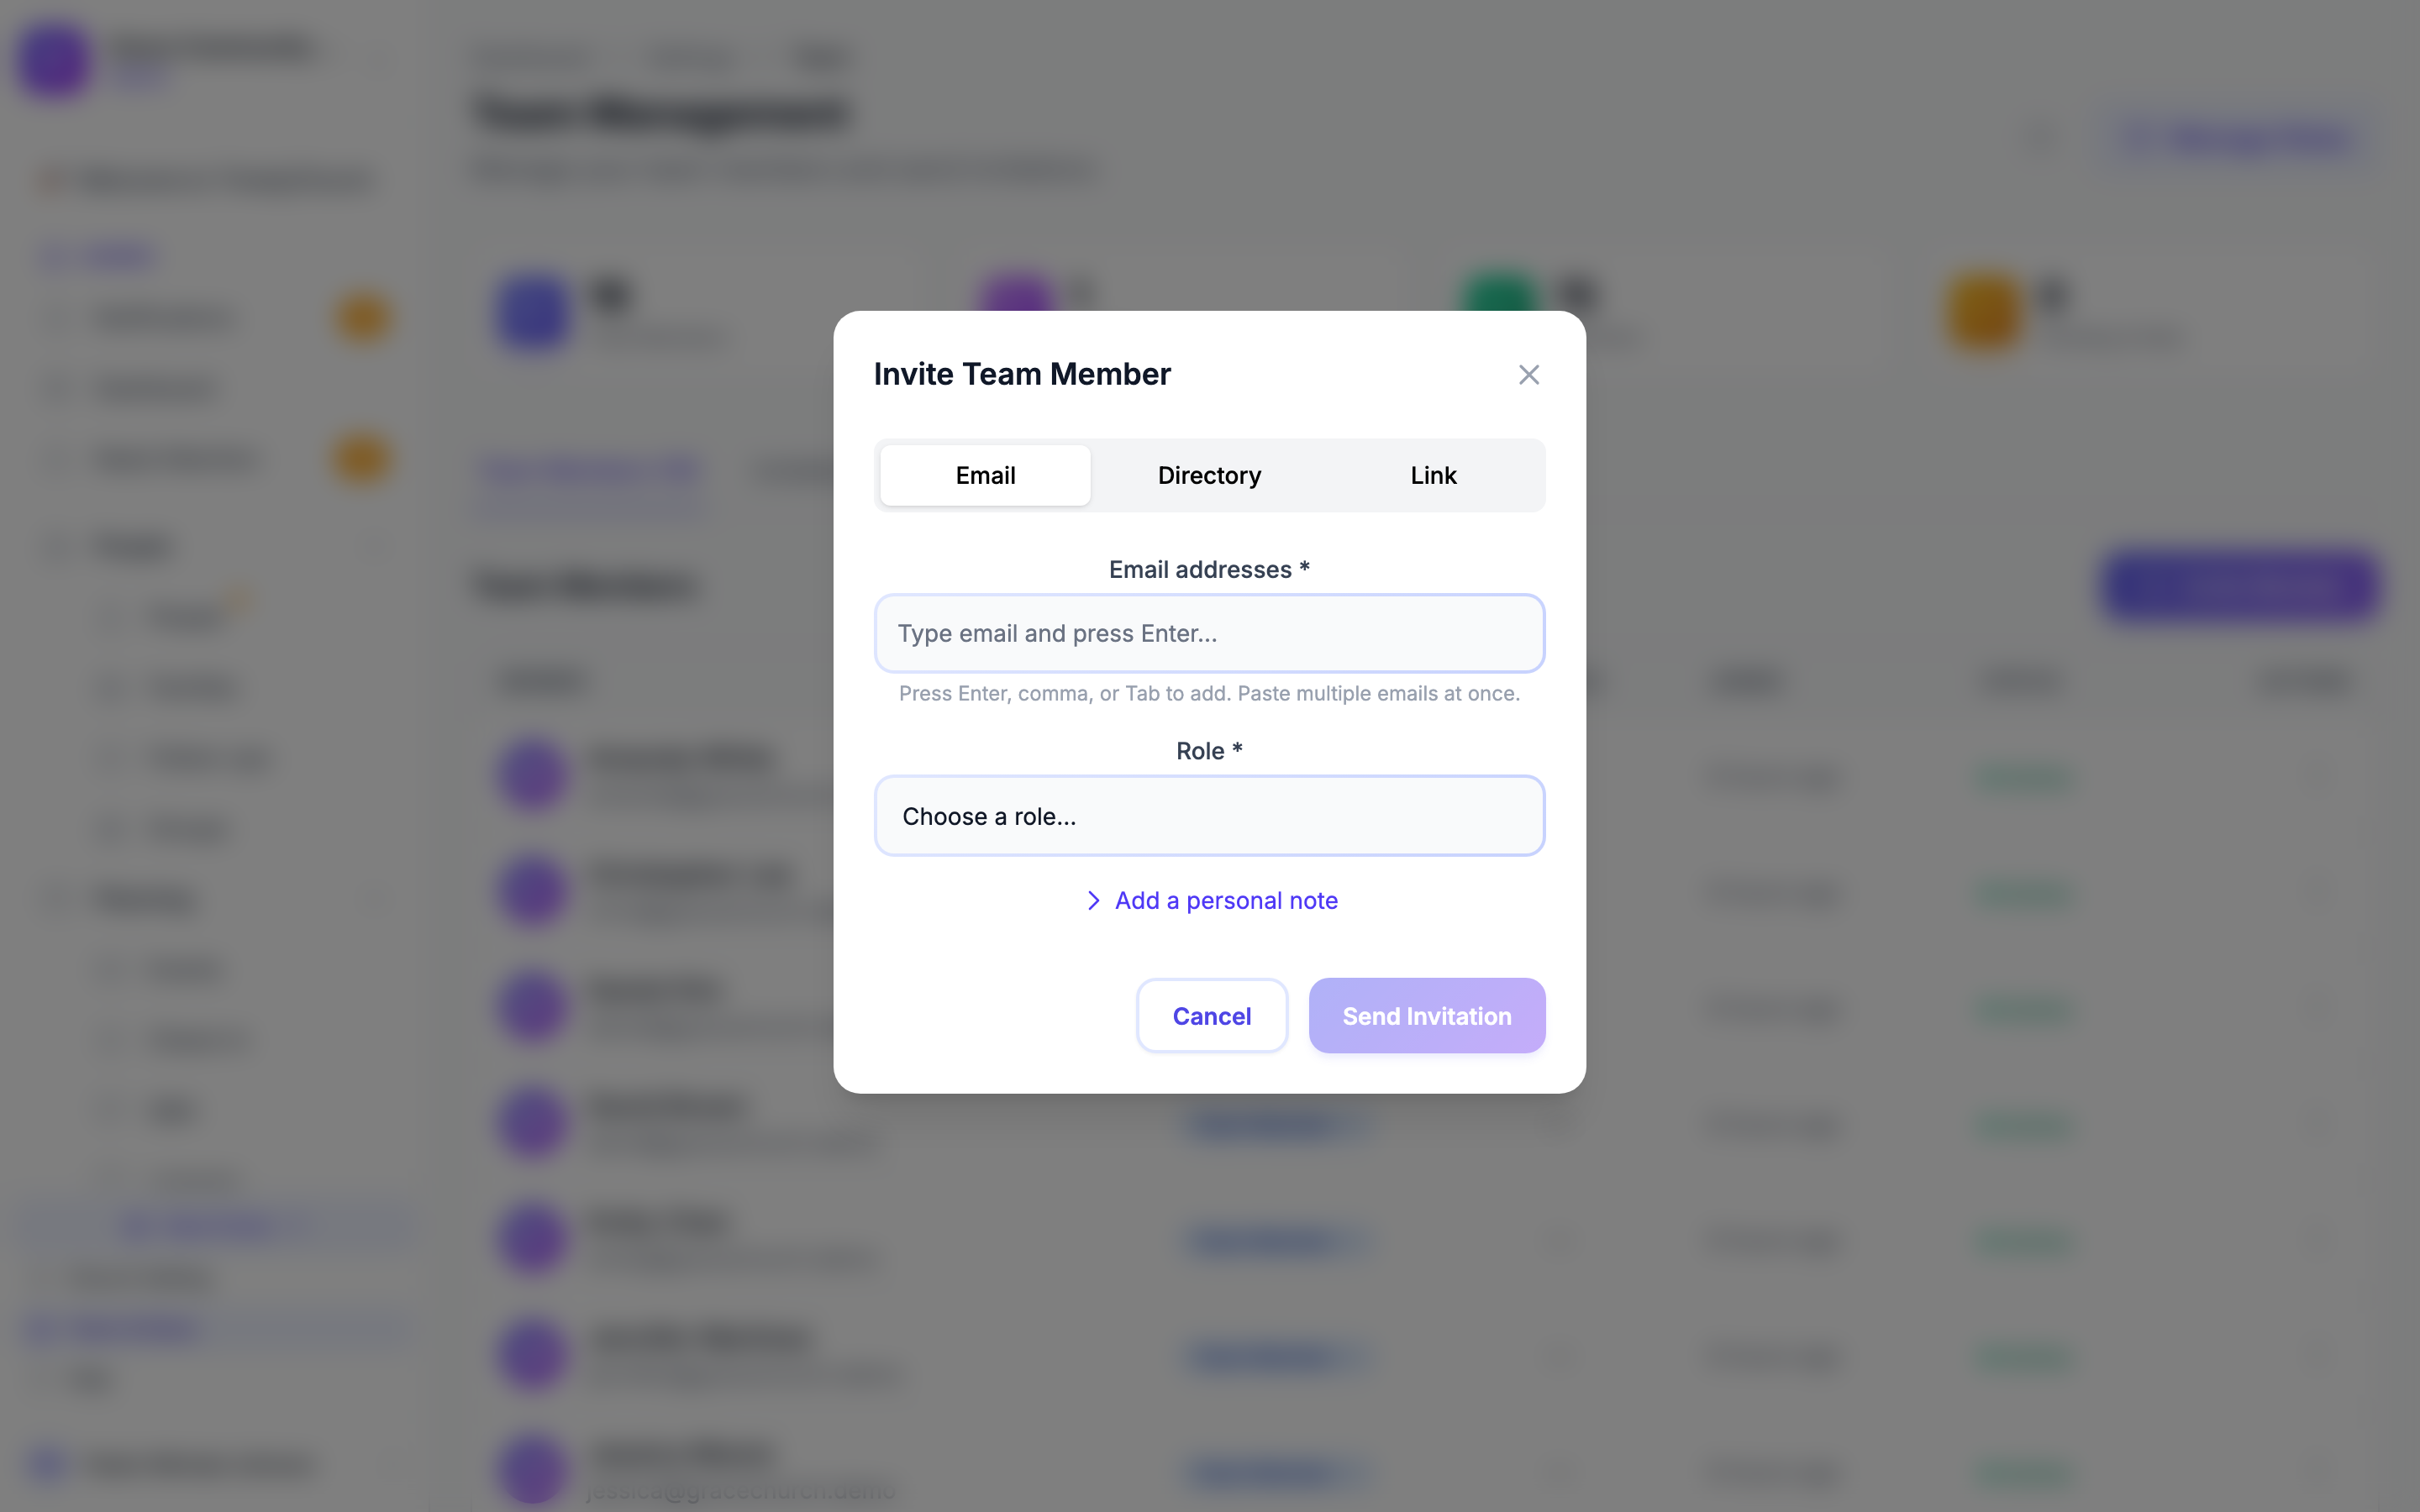
See Inviting Team Members for detailed instructions.
Tip: Start by inviting just your core team (2-3 people). Once you are comfortable with the platform, invite the rest of your staff and volunteers.
Step 4: Add Your People
Time needed: Varies (10 minutes to 1 hour depending on your congregation size)
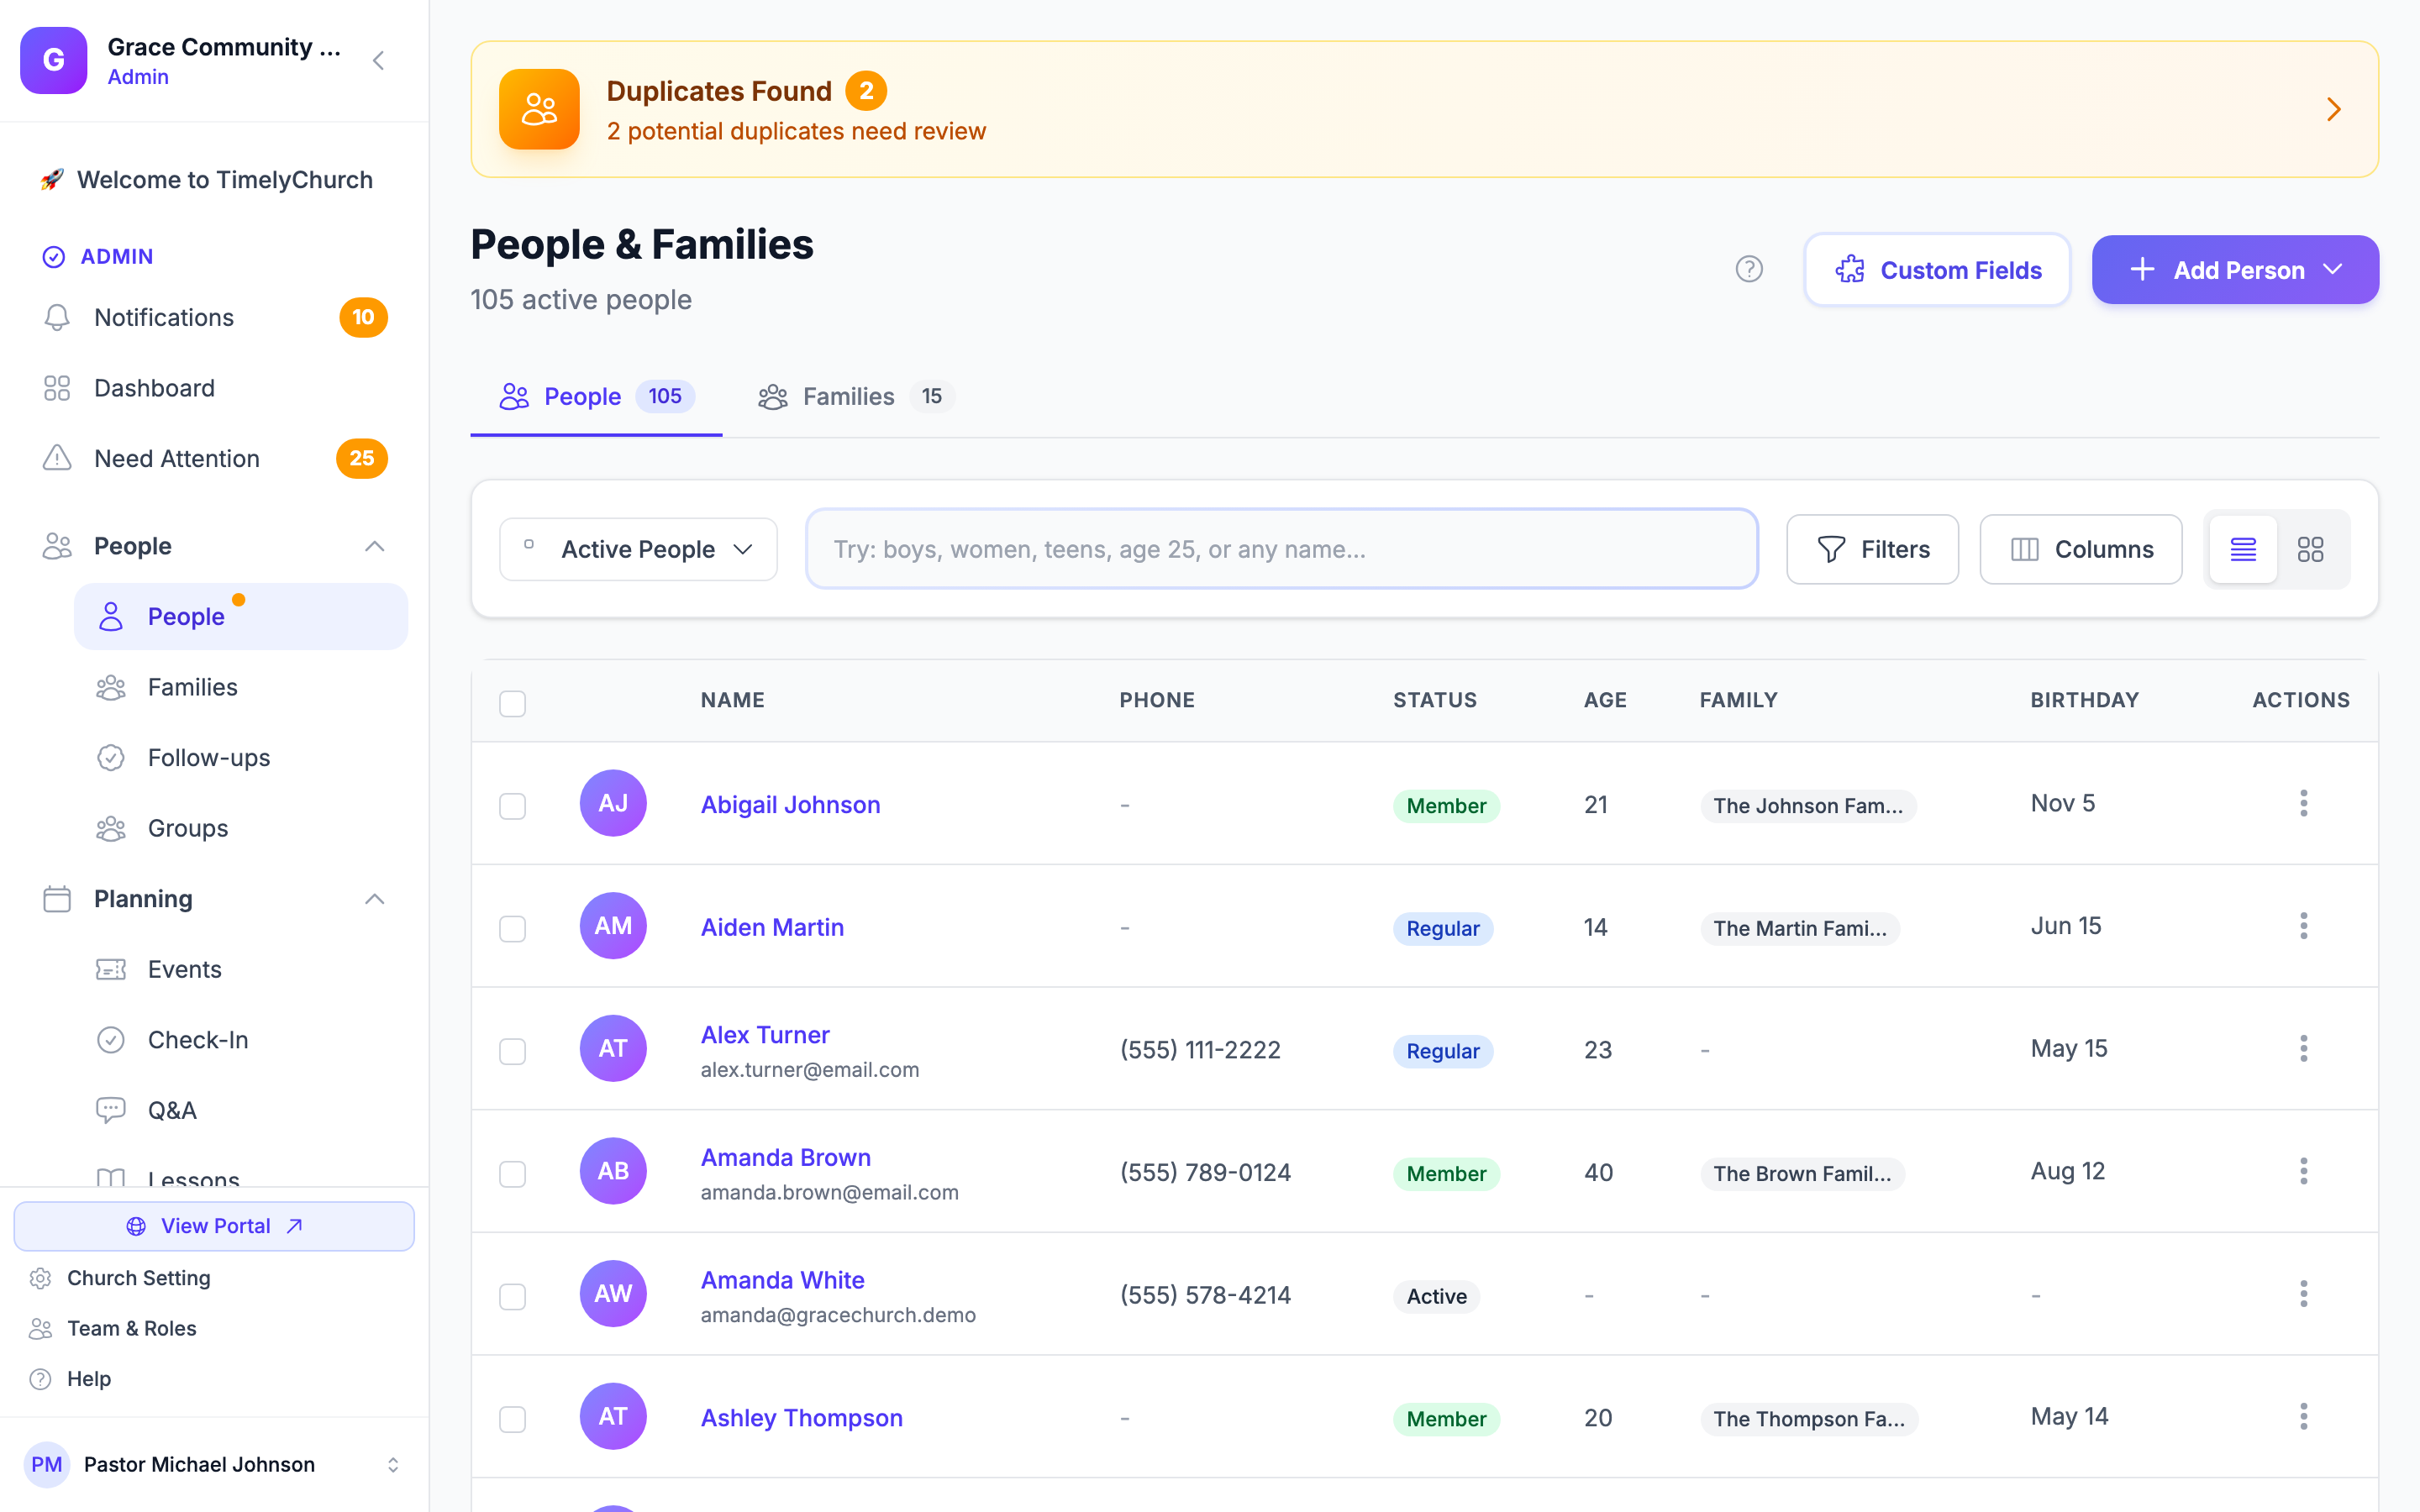
- From the sidebar, expand People and click People.
- Add people to your directory. You can:
- [ ] Add individually -- Click "Add Person" and fill in their information one at a time.
- [ ] Import from a file -- If you have a spreadsheet (CSV) of your congregation, use the import tool to add them in bulk.
- For each person, consider including:
- [ ] First and last name
- [ ] Email address
- [ ] Phone number
- [ ] Mailing address
- [ ] Birthday
- After adding people, organize them into families:
- [ ] From the sidebar, expand People and click Families.
- [ ] Create family records and link people together.
Step 5: Set Up Groups
Time needed: 10-15 minutes
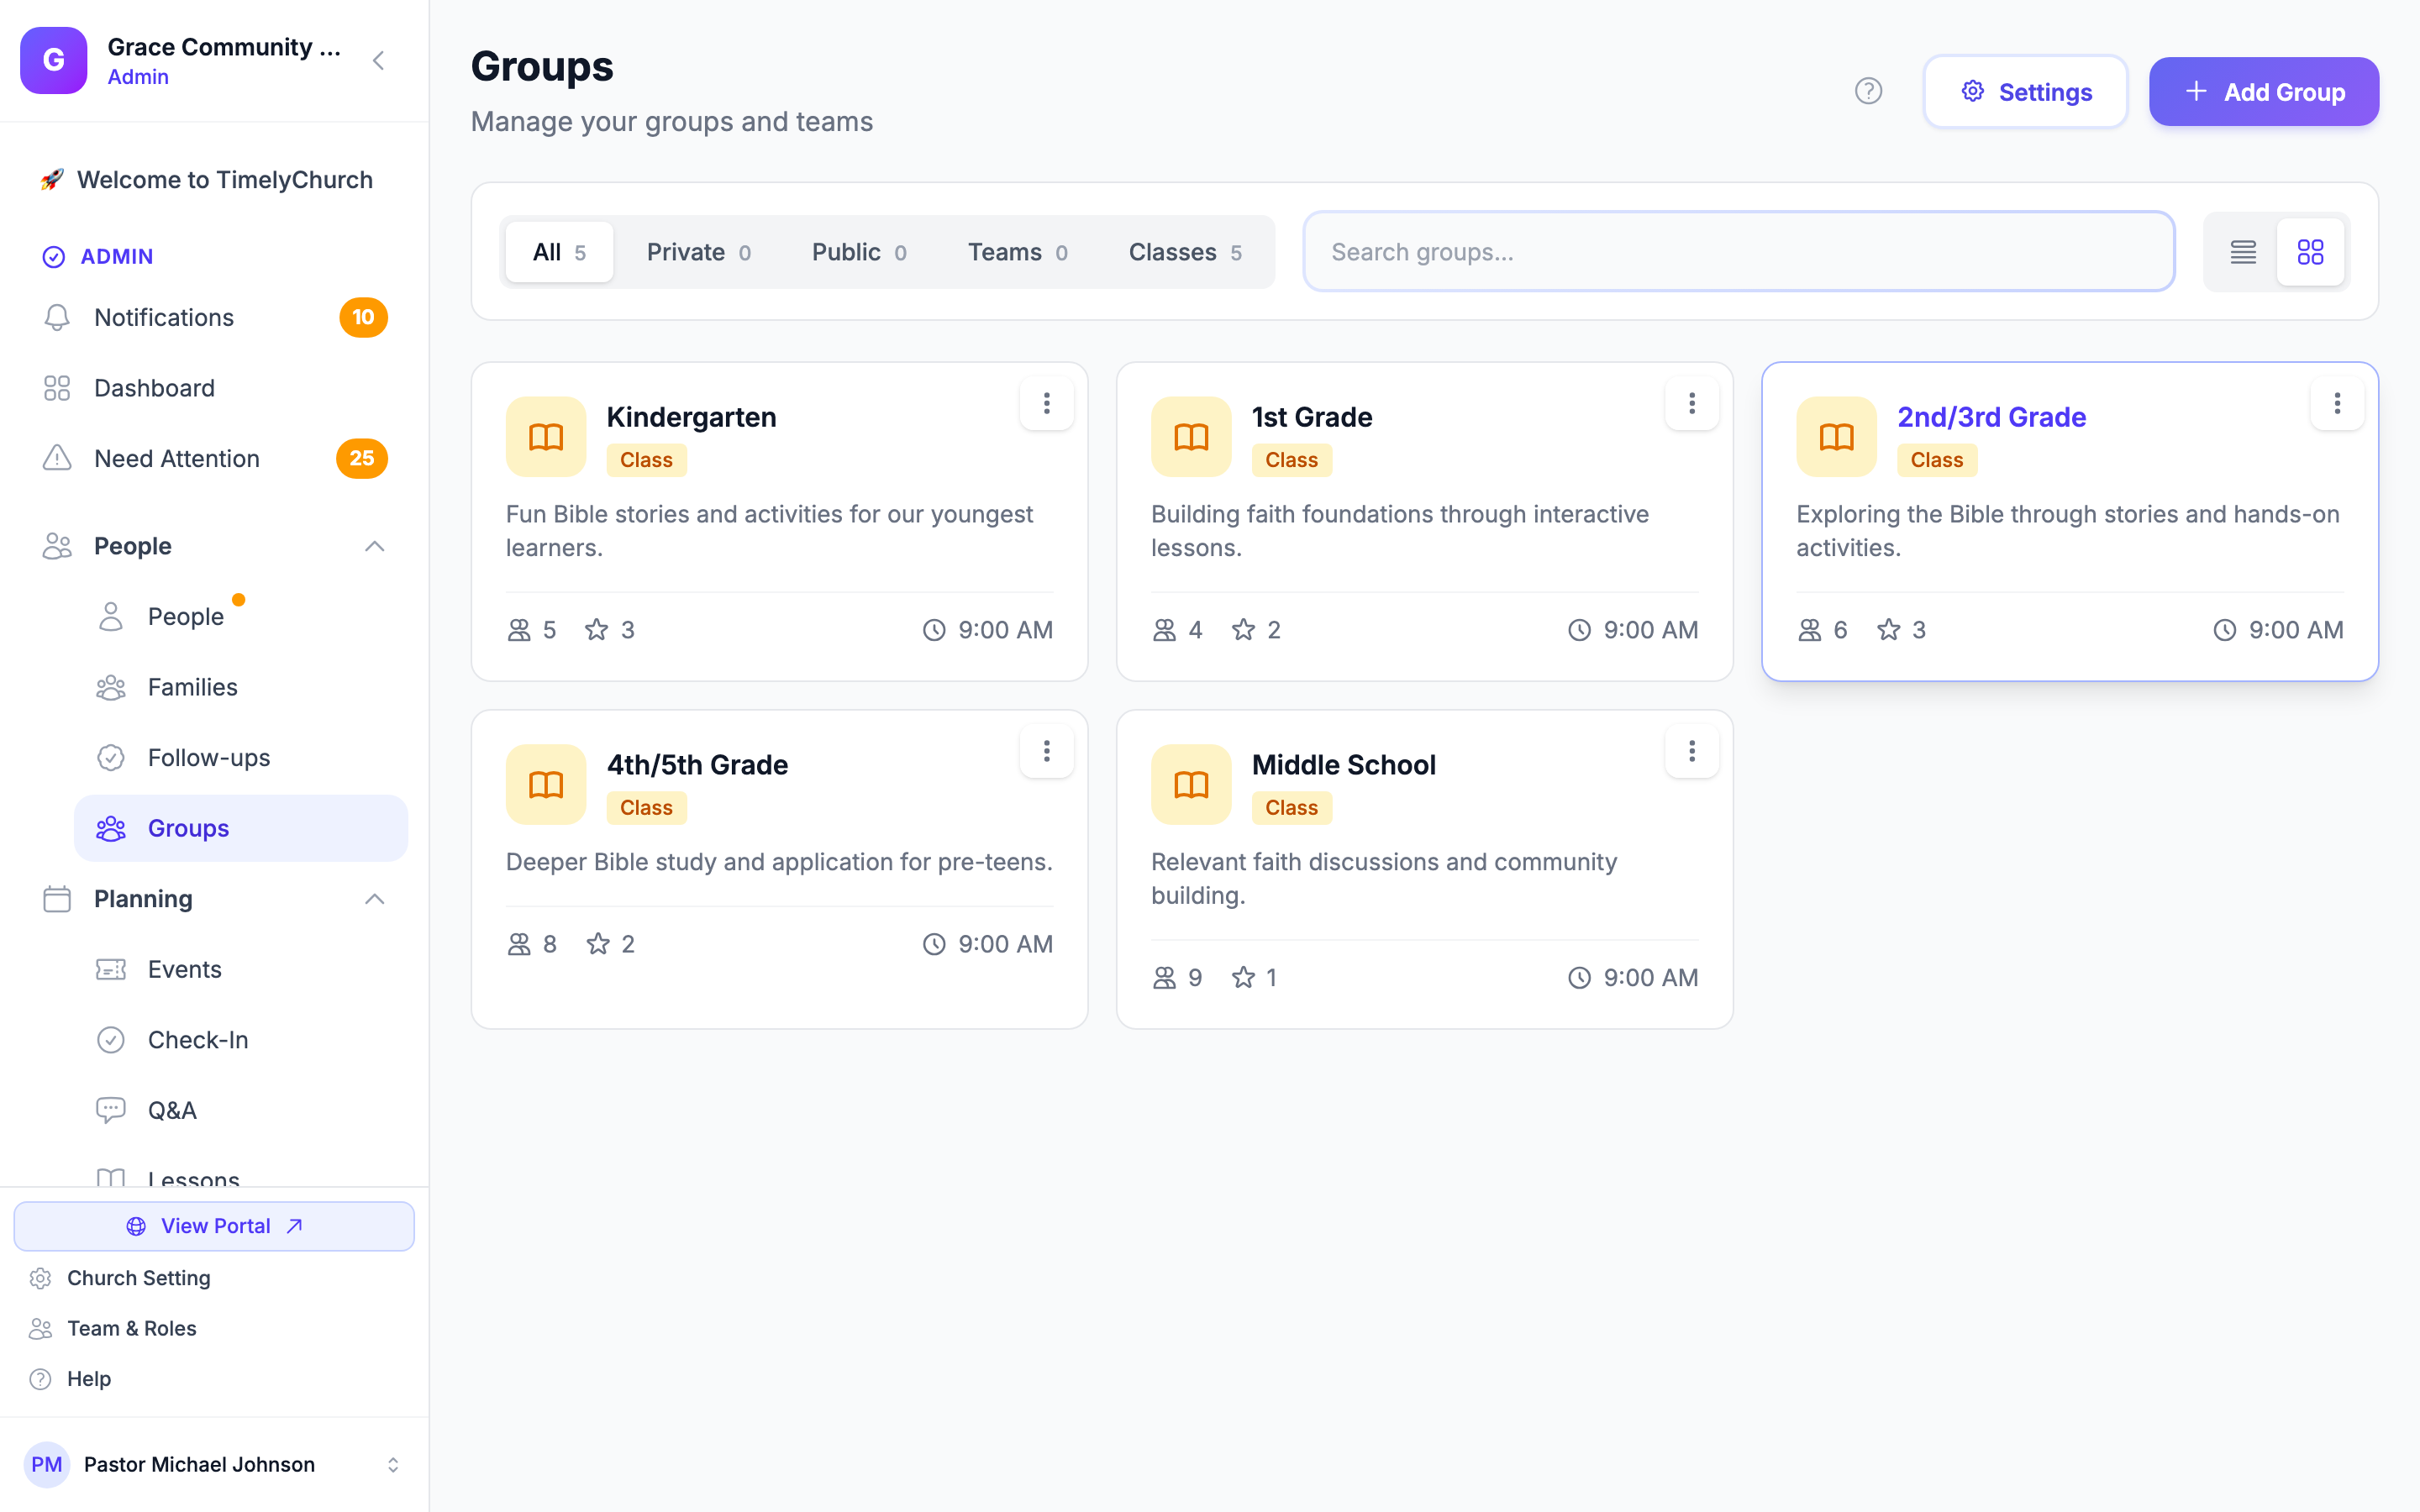
- From the sidebar, expand People and click Groups.
- Create groups for your church's ministries and programs:
- [ ] Sunday School classes by age group
- [ ] Small groups or life groups
- [ ] Ministry teams (worship, ushers, greeters, etc.)
- [ ] Committees or leadership teams
- Add members to each group.
Step 6: Create Your First Event
Time needed: 5 minutes
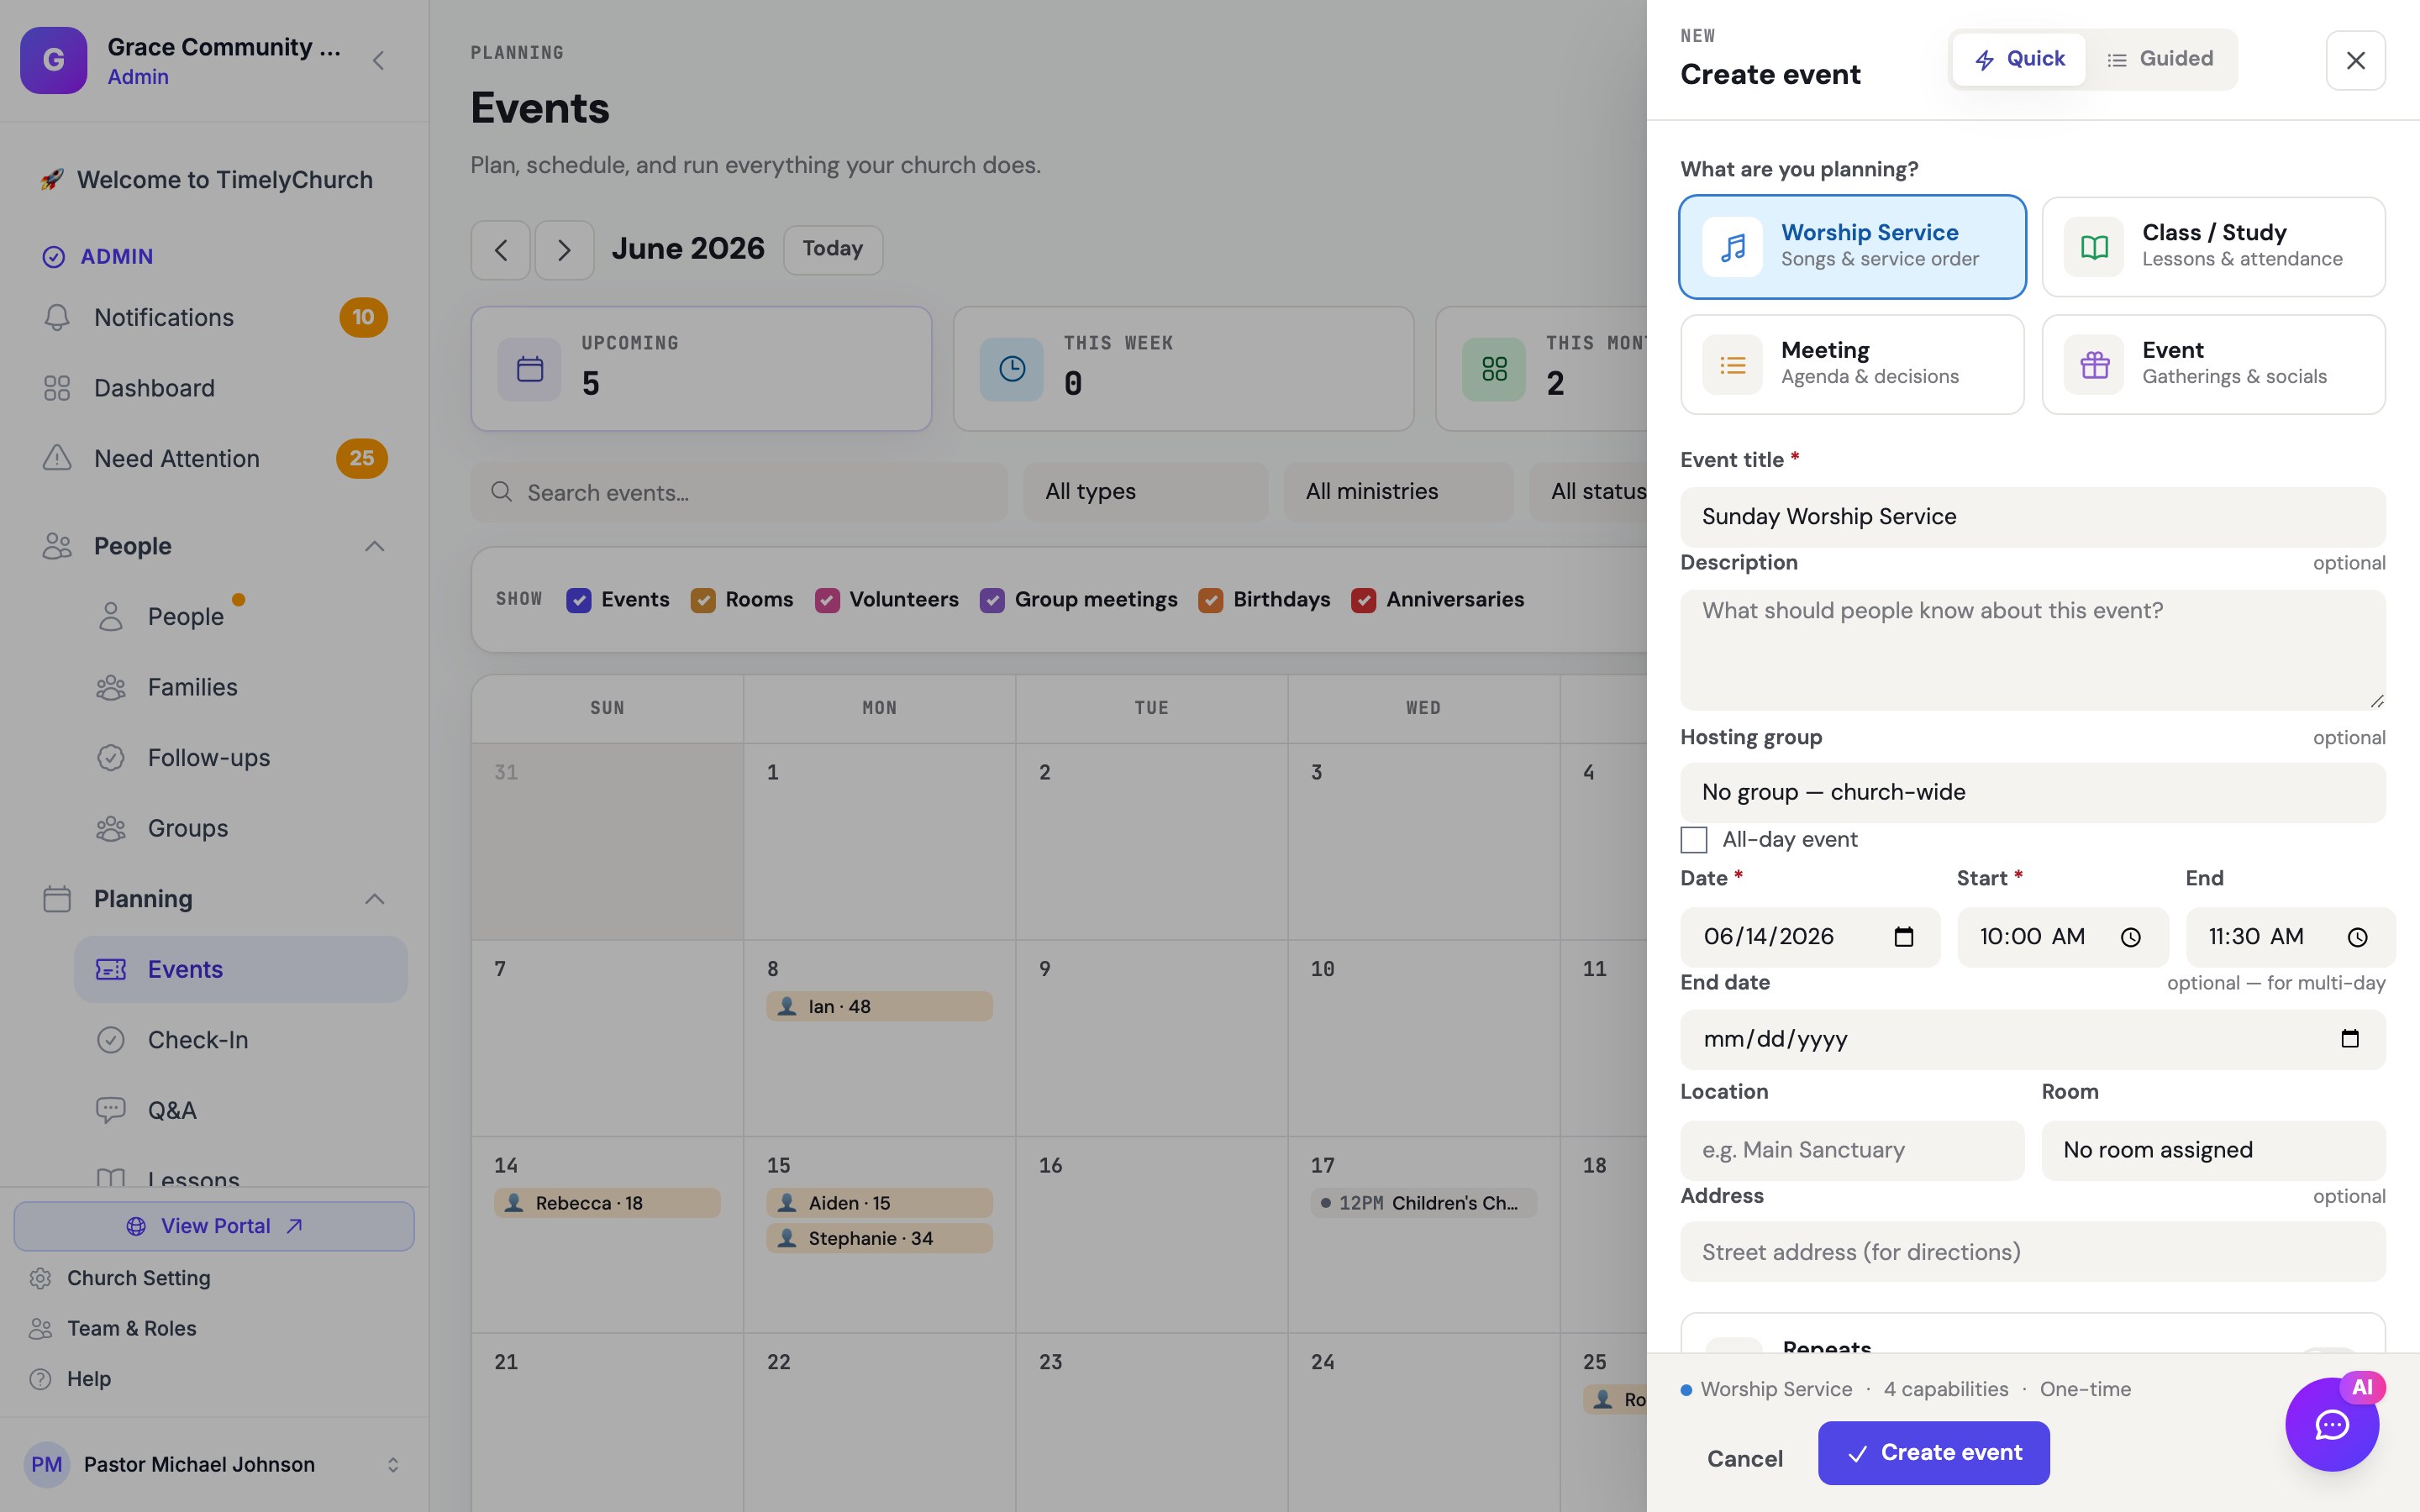
- From the sidebar, expand Planning and click Events.
- Click New event. A Create event drawer slides in -- toggle Quick for one short form or Guided for a step-by-step version.
- Fill in the event details:
- [ ] Event type (pick a type -- worship, class, meeting, or event -- which seeds sensible defaults)
- [ ] Event title
- [ ] Date and time
- [ ] Description (optional)
- [ ] Address for directions and/or a room
- [ ] Capabilities you need (Service Plan, Serving/volunteers, Check-In, Tasks, Registration, and more -- some are turned on automatically based on the type you picked)
- [ ] Flip the Repeats switch if it's a recurring series (it's off by default for one-time events)
- Click Create event.
Tip: Start by adding your regular weekly services as recurring events -- just flip the Repeats switch. This populates your calendar right away and gives your team a place to track attendance and volunteers. (The Calendar grid lives inside the Events page now -- there is no separate Calendar sidebar item.)
Step 6.5: Connect Stripe (if you'll take giving on opening Sunday)
Time needed: 10 minutes
If your church plans to receive online donations starting on opening Sunday, set up Stripe Connect before the day arrives -- not the morning of. Stripe needs to verify your identity and bank account, which can take 1-3 business days.
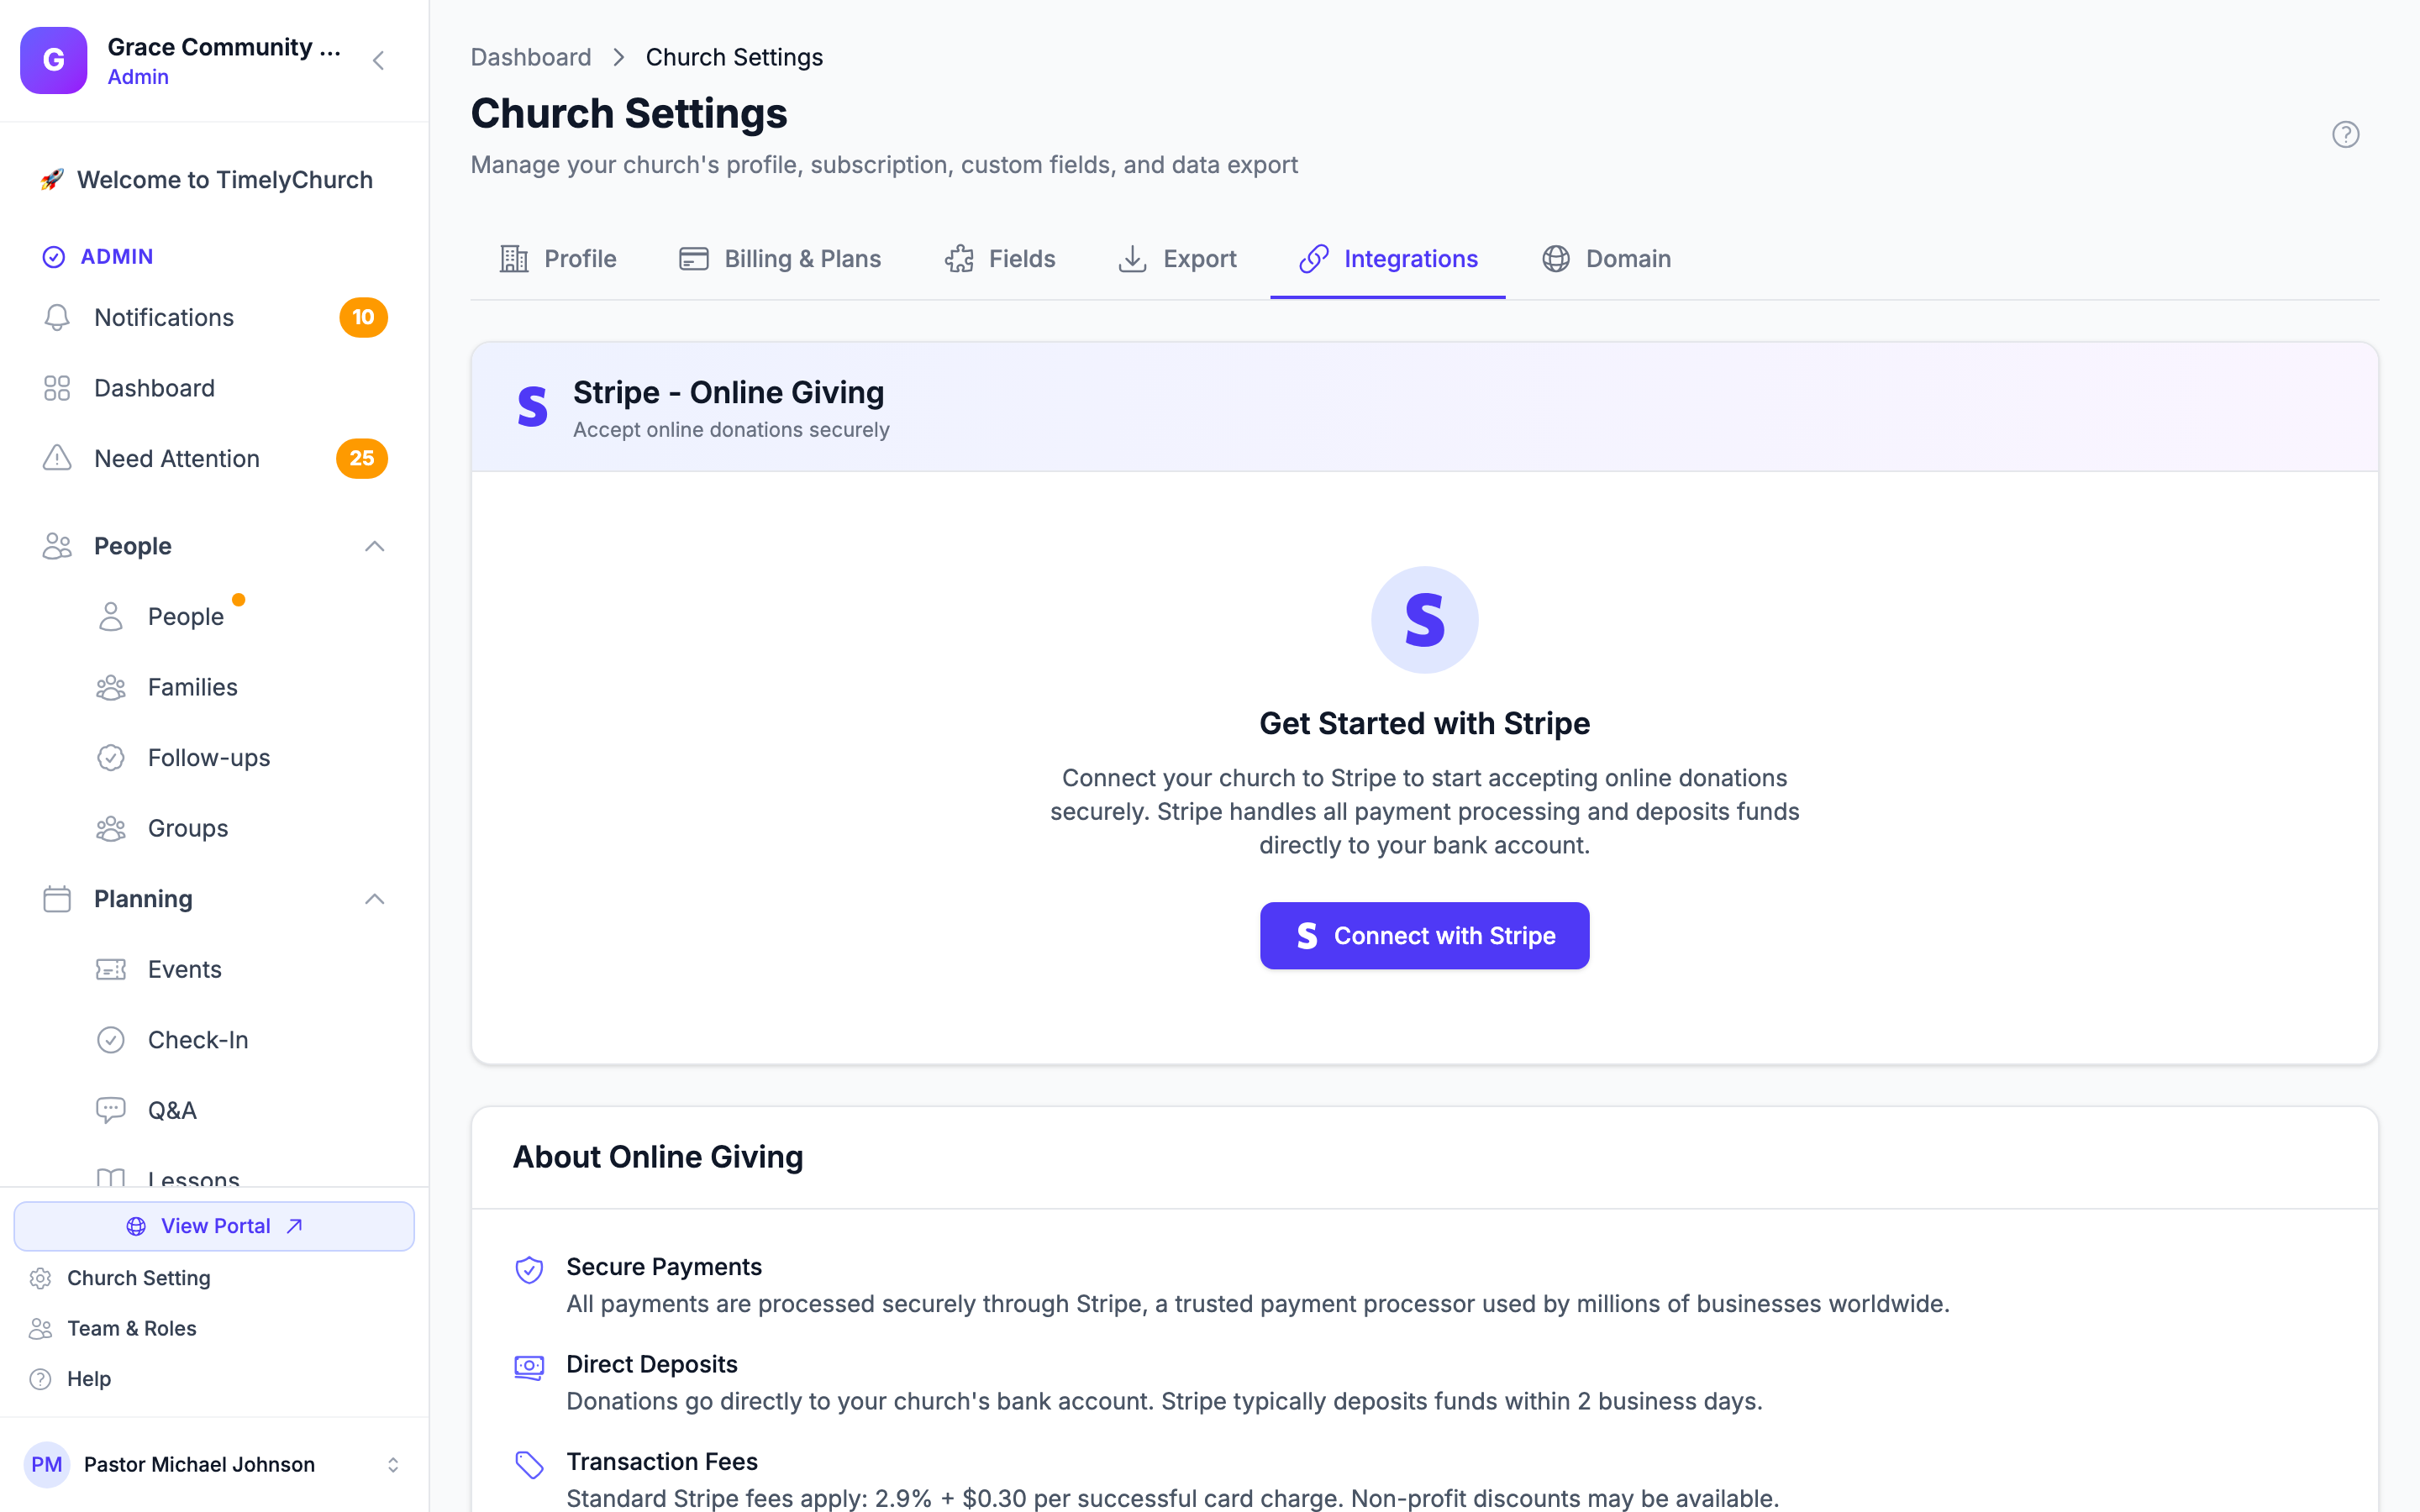
- Go to Church Settings → Integrations and find the Stripe Connect (Online Giving) card. (You can also expand Finances → Giving and click Activate online giving, which takes you to the same place.)
- Click Connect with Stripe.
- Follow Stripe's onboarding -- have your EIN/Tax ID, bank account info, and a photo of an authorized signer's ID ready.
- After Stripe approves, online giving becomes live on your portal.
See Stripe Connect Setup for the full walkthrough.
Tip: If you're not collecting giving online yet, skip this step -- you can come back to it any time. Stripe Connect requires the Pro plan to remain active beyond your trial.
Step 7: Post Your First Announcement
Time needed: 5 minutes
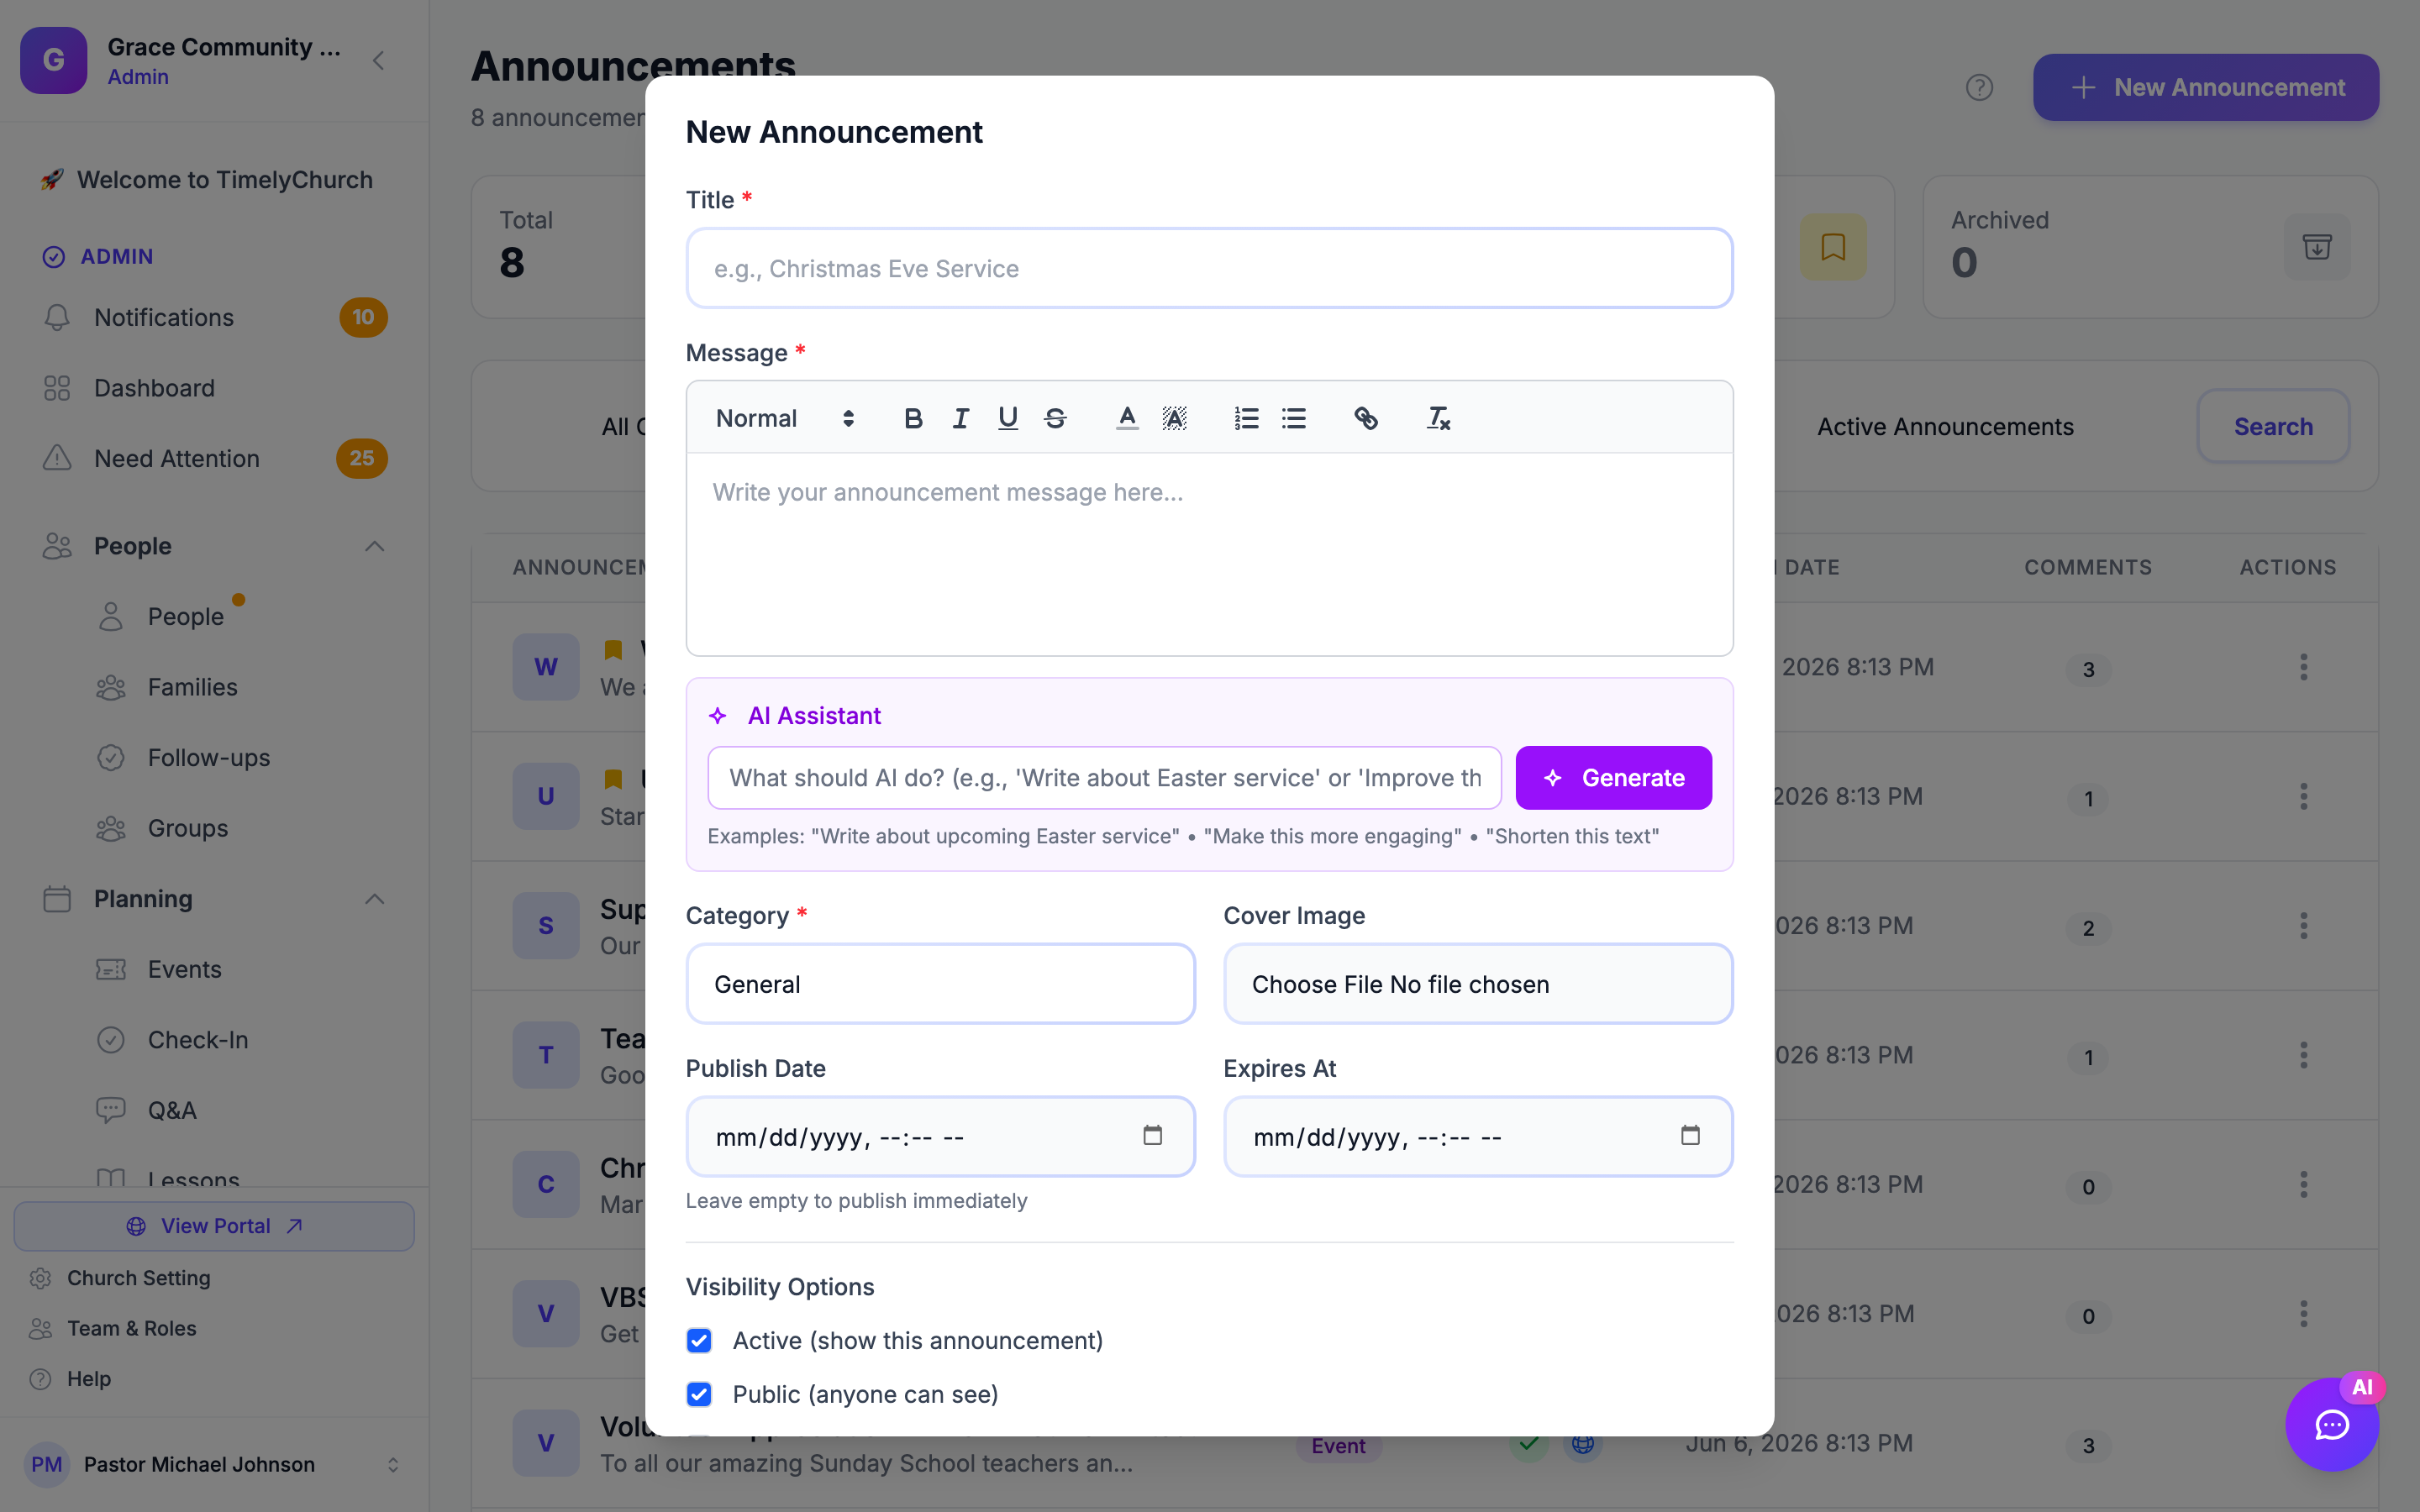
- From the sidebar, expand Communications and click Announcements.
- Click New Announcement.
- Write your announcement:
- [ ] Title
- [ ] Content
- [ ] Pin it if you want it to stay at the top
- Save and publish it.
Your announcement will appear on the Dashboard and in your member portal.
Step 8: Invite Your Members to the Portal
Time needed: 5-10 minutes (then ongoing)
Inviting your team (Step 3) is for staff who manage the church. Members -- your congregation -- get a different, simpler login experience using magic links. There's no password to remember.
You don't need to do anything special to "invite" them. Once a person is in your People directory with an email address:
- They open your church's member portal sign-in page.
- They enter their email.
- TimelyChurch emails them a one-tap login link.
- They click it. They're in.
To kick this off:
- [ ] Share your member portal link with your congregation (in a Sunday bulletin, group text, or your first announcement).
- [ ] Optionally send a welcome email through TimelyChurch's messaging tools letting members know the portal exists.
- [ ] Consider setting up a custom domain (Pro plan) so members reach your portal at a clean address like
portal.yourchurch.com.
For the full member-facing flow, see Magic Link Login for Members.
Step 9: Explore Additional Features
Once the basics are set up, explore these features at your own pace:
- [ ] Check-In -- Set up child check-in for services and events. Configure label printing from the Settings area inside the Check-In module.
- [ ] Drive -- Create curriculum and lesson plans for Sunday School classes.
- [ ] Forms -- Build registration forms, surveys, or volunteer sign-up forms.
- [ ] Reports -- Generate reports to track attendance, giving trends, and membership growth.
- [ ] Messaging -- Send direct messages to church members.
- [ ] Custom Fields -- Add custom data fields to people profiles for tracking church-specific information.
- [ ] Custom Domain -- Set up a custom domain for your church portal. See Custom Domain Walkthrough.
- [ ] Import from another platform -- Bringing data over from another church management system? See Importing from Another Platform.
Setup Summary
| Step | Task | Time |
|---|---|---|
| 0 | Sign up and create your church | 5 min |
| 1 | Complete church profile | 5 min |
| 2 | Review and customize roles | 10-15 min |
| 3 | Invite your team | 5-10 min |
| 4 | Add your people | 10-60 min |
| 5 | Set up groups | 10-15 min |
| 6 | Create your first event | 5 min |
| 6.5 | Connect Stripe (if accepting giving) | 10 min |
| 7 | Post your first announcement | 5 min |
| 8 | Invite members to the portal | 5-10 min |
| 9 | Explore additional features | Ongoing |
Total estimated time for basic setup: 60-90 minutes (you have 30 days of full-feature trial to experiment).
Need Help?
- Click Help at the bottom of the sidebar to visit the Help Center.
- Browse the knowledge base for detailed guides on every feature.
- Contact our support team for personalized assistance. Have your Support PIN ready (found in Church Settings).
Tip: You do not need to set everything up in one sitting. Take it step by step, and involve your team as you go. The most important thing is to get started -- you can always refine your setup later.
Related Articles
- Sign Up and Create Your Church
- Trial and Plan Selection
- Welcome to TimelyChurch
- Dashboard Overview
- Navigating the Admin Panel
- Inviting Team Members
- Setting Up Roles and Permissions
- Church Settings
- Magic Link Login for Members
- Stripe Connect Setup
- Importing from Another Platform
- Custom Domain Walkthrough