
Managing Your People Directory
Your People Directory is the central hub for everyone connected to your church -- members, regular attendees, visitors, and more. From here you can search, filter, view, add, edit, and archive person records to keep your church database organized and up to date.
Viewing Your People Directory
-
In the left sidebar, open People and click People.
-
The page is titled People & Families. You will see a list of your active people, sorted alphabetically by first name.
-
Two tabs sit just under the page title: People and Families, each showing a live count. Stay on People for the directory, or switch to Families to view people grouped by household.
-
Use the Views dropdown (the first control in the toolbar, labelled with the current view, Active People by default) to jump to a pre-built view with its count:
- Active People -- everyone who is active (the default view)
- All People -- active and inactive people together
- Families -- the household view
- Under Quick Filters: Members, Visitors, Regular Attendees, Birthdays Today, Birthdays This Month, Inactive, and Archived
Selecting one instantly filters the list.
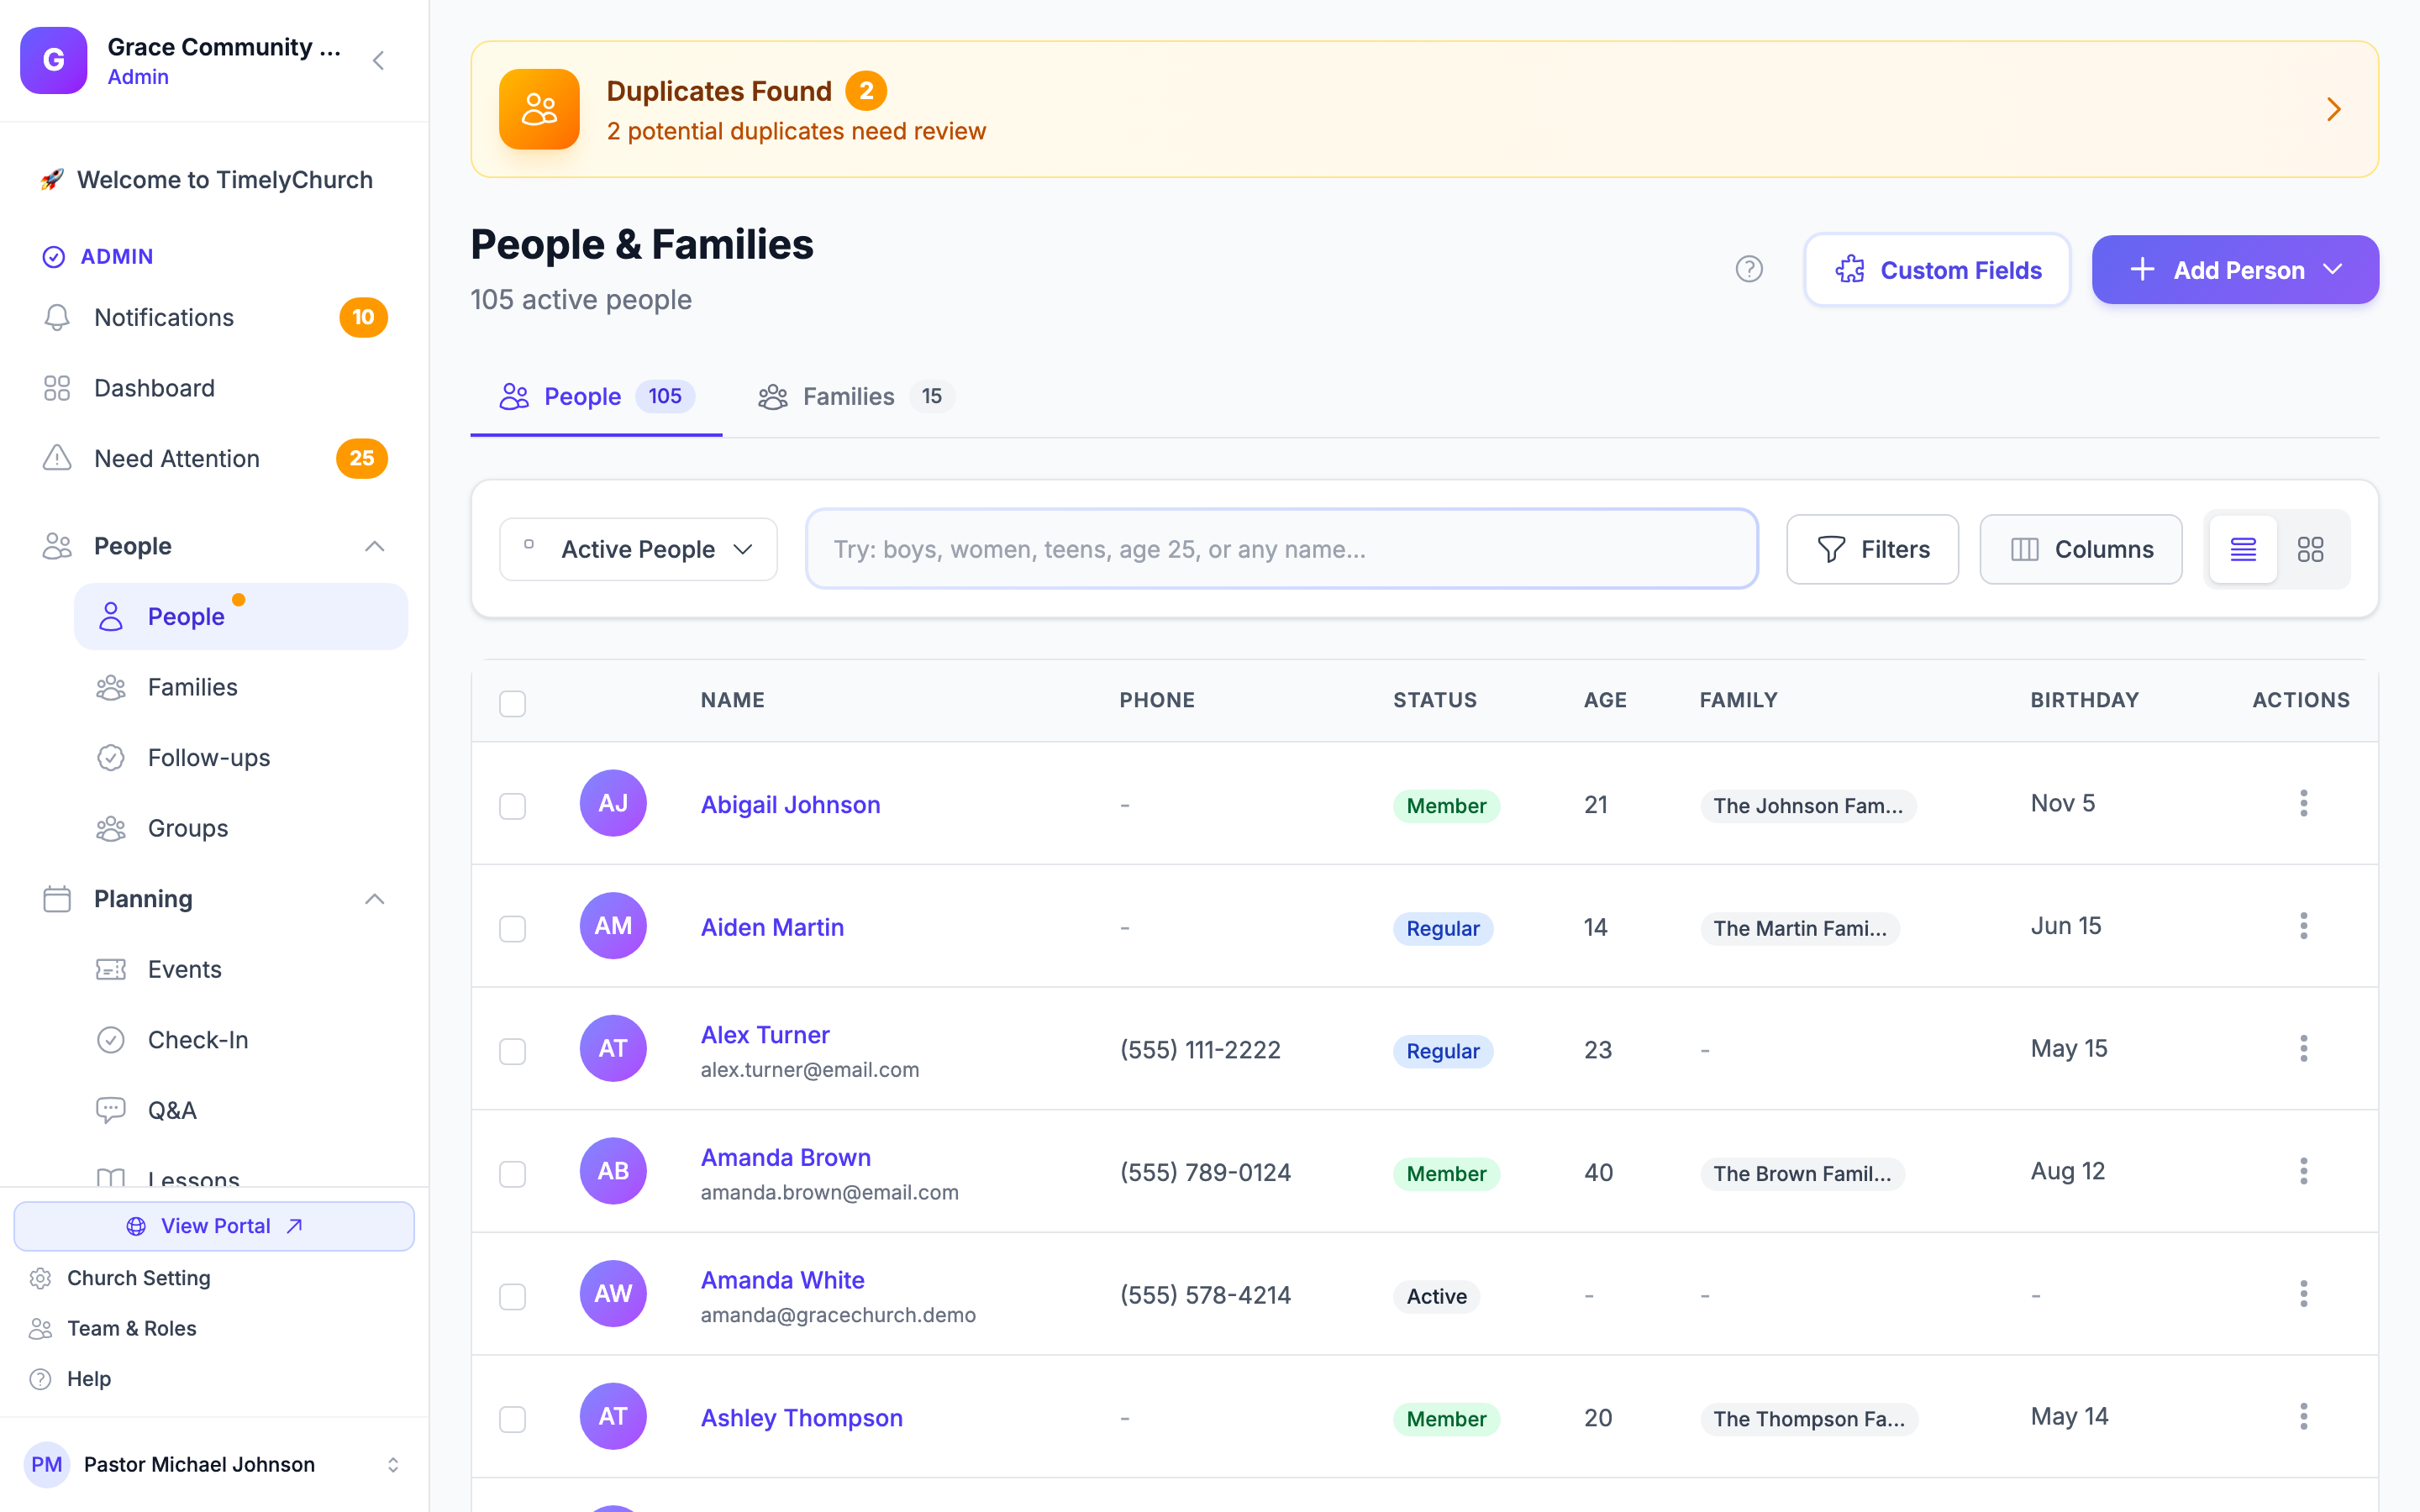
Tip: The count under the page title shows how many people are currently in view. When a filter or search is active, it also shows the filtered total "of" the full count.
Tip: If TimelyChurch has found possible duplicate records, an amber Duplicates Found banner appears at the top of this page. Click it to review them -- see Duplicate Detection and Merge.
Switching View Modes
On the People tab, TimelyChurch offers two ways to view individual people:
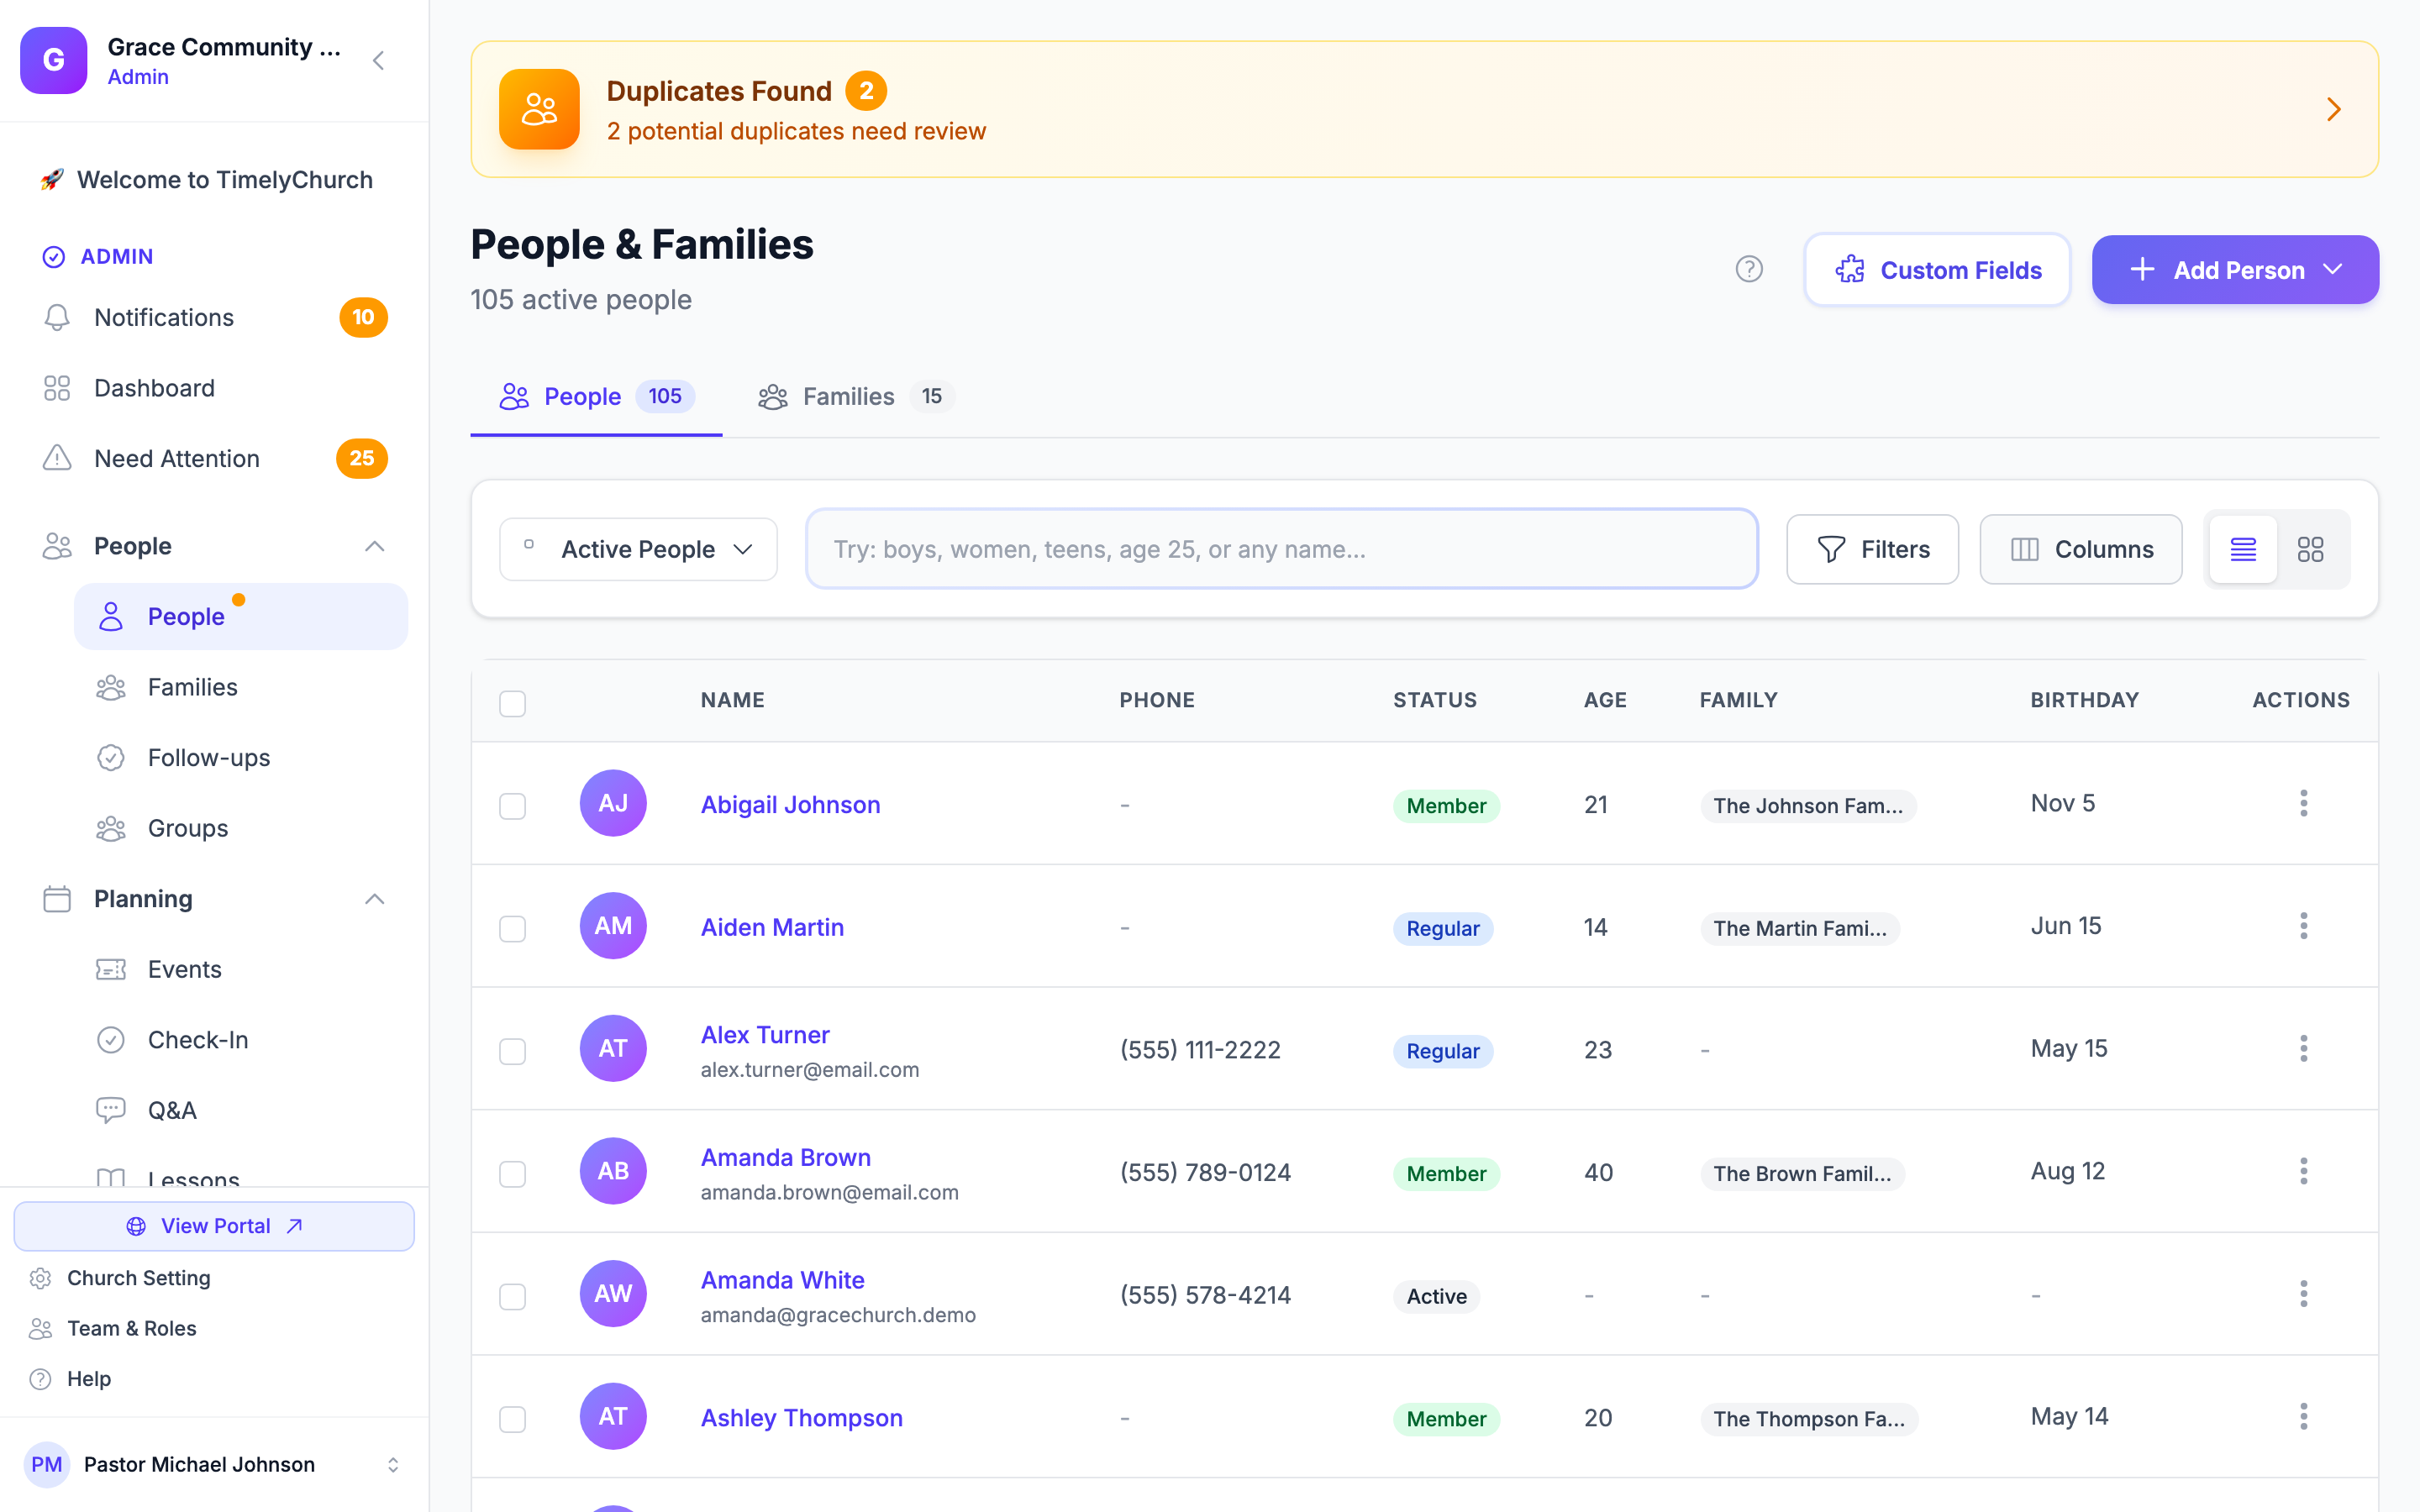
- List View -- A table showing name, phone, status, age, family, and birthday. Best for scanning through many records quickly.
- Grid View -- A card-based layout showing photos and key details at a glance.
To switch between them, use the list and grid icons at the right end of the toolbar.
In List View, the Columns button lets you choose which columns to show (Phone, Status, Age, Family, Birthday, and any of your custom fields).
To see household relationships instead, switch to the Families tab at the top of the page.
Searching for People
- Click the search box in the toolbar (it reads "Try: boys, women, teens, age 25, or any name...").
- Type a name, email address, phone number, city, membership status, or any other detail.
- The list updates as you type. Press Enter to search right away, or click the × in the box to clear the search.
Smart Search Keywords
TimelyChurch understands natural-language keywords so you can search the way you think:
| Type this... | What it finds |
|---|---|
men or women |
Adults 18+ filtered by gender |
boys or girls |
Children ages 0--12 filtered by gender |
kids or children |
All children ages 0--12 |
teens or youth |
Young people ages 13--19 (youth extends to 25) |
seniors |
People age 65 and older |
members or visitors |
People with that membership status |
age 27 or 27 years |
People who are currently 27 years old |
You can even combine keywords with names, for example: women Sarah will find females age 18+ named Sarah.
Tip: Smart search also looks through custom field values. If you created a custom field like "Allergies," searching for "peanut" will find anyone with that recorded.
Filtering People
For more precise results, use the Filters panel in the toolbar:
- Click the Filters button (next to the search box).
- Choose from the available filter options:
- Membership Status -- any of the membership statuses (Member, Regular Attender, Visitor, Participant, In Progress, No Longer Member, Inactive, Former, Campaign Donor)
- Gender -- Male or Female
- Marital Status -- Single, Married, Divorced, or Widowed
- Birthday -- Birthday Today or Birthday This Month
- Min Age and Max Age -- an age range (for example, 5 to 12)
- Group / Team -- people in a specific group, class, or team
- Has Email / Has Phone -- people who do or don't have an email address or phone number
- Active Status -- Active Only, All People, or Inactive Only
- In Directory -- Visible Only or Hidden Only
- Can Comment -- Can Comment or Cannot Comment
- Archived -- Active Only, Archived Only, or Include Archived
- Custom Field Filters -- expand this section to filter by any of your custom fields
- Click Apply to update the list.
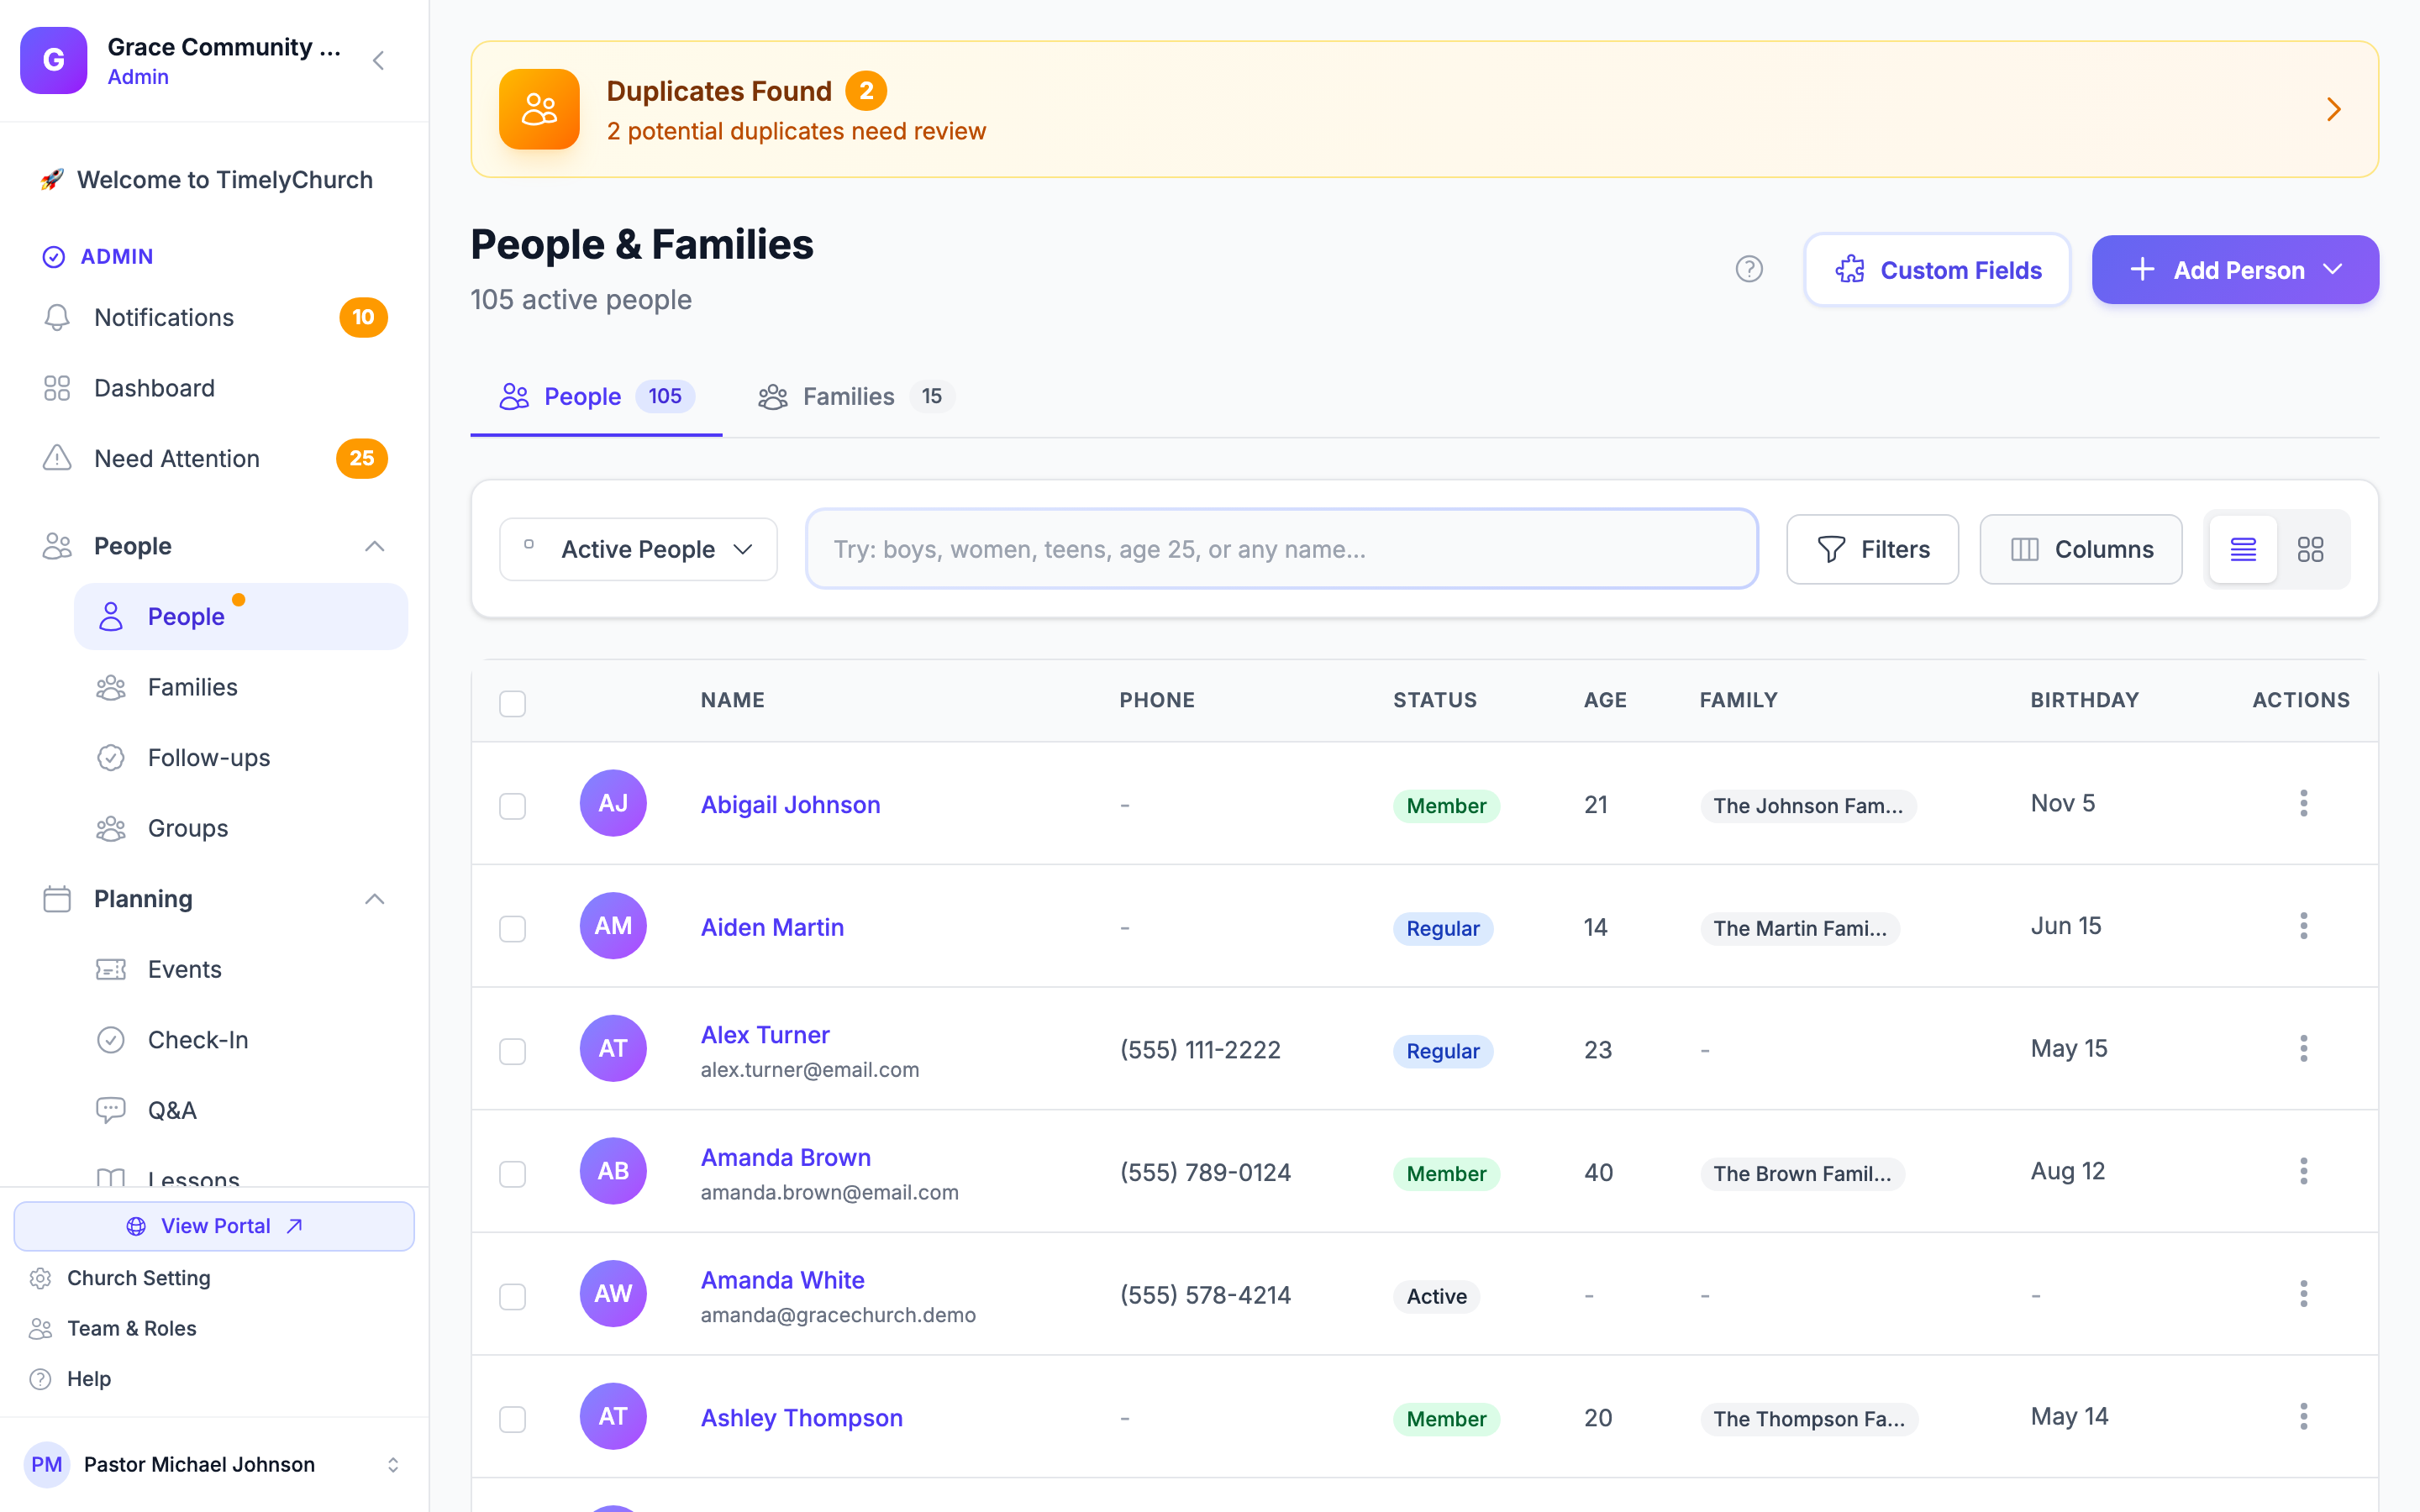
Tip: When filters are active, the Filters button is highlighted. Click Clear in the panel to reset back to the default view.
On a phone, tap the filter icon next to the search box to open a shorter set of filters (Status, Gender, Birthday, Active), then tap Apply.
Saved Lists
If you use the same filters again and again, save them as a list. Once at least one filter is applied, click Save as List, give it a name (for example, "Kids 5--12"), and it appears in the Lists dropdown next to the Views dropdown, with a live count. A list stores your filters, not a fixed set of people, so it is always current.
For the full guide, see Saved Lists (Smart Lists).
Adding People
All ways to add people live under the Add Person dropdown (the blue button with the chevron, top-right of the page). For full details, see the Adding People article.
- Add Person -- A form for entering details for one person
- Quick Add Multiple -- Add several people fast with just a name and optional email
- Import from File -- Upload a spreadsheet to add many people in bulk
- Email People -- Start a new email to people in your directory
- Create Family -- Start a new household record
You only see the items your role allows. For example, Import from File needs the People & Families Import permission, and Create Family needs permission to create families.
Next to the Add Person button you will also find Custom Fields (opens your custom field settings) and Export CSV (downloads your whole directory -- people on the People tab, families on the Families tab). See Importing and Exporting Data.
Editing a Person
- Click on a person's name to open their profile.
- On the Overview tab, click Edit Profile.
- Update the information you need to change -- name, contact details, address, membership status, photo, custom fields, and more.
- Click Save Changes to apply your changes, or Cancel to discard them.
For a full breakdown of every field on the profile, see the Person Profile article.
Deactivating a Person
If someone is no longer attending but you want to keep their record:
- Open the person's profile.
- Click the Actions menu (the ⋮ button, top-right of the profile).
- Select Deactivate.
- The person will be marked as inactive and hidden from the default People view.
To find inactive people later, choose Inactive from the Views dropdown, or set the Active Status filter to "Inactive Only."
Tip: Deactivating is different from archiving. A deactivated person still exists in your database and can be reactivated at any time (the same menu item then reads Activate). Their data is preserved.
Note: The Actions menu also lets you Invite to Team, Send Email, Send sign-in link, Copy Profile Update Link, Merge Profiles, and Disable Comments / Enable Comments for that person. See Person Profile Overview.
Archiving a Person
If you need to remove someone from your active directory entirely:
- Open the person's profile.
- Click the Actions menu.
- Select Archive.
- The person no longer appears in any views by default, but their data is preserved.
An archived person also drops off class rosters and group member lists. Their memberships are kept, so if you restore them they appear in their classes and groups again.
To find archived people:
- Go to the People page.
- Open the Views dropdown and choose Archived (or open Filters and set Archived to "Archived Only").
- You will see all archived records.
Restoring an Archived Person
- Find the archived person using the Archived view or filter.
- Click on their name.
- Open the Actions menu and click Restore to bring them back to your active directory.
Permanently Deleting a Person
- Open the person's profile.
- Open the Actions menu and click Delete Permanently.
- Confirm the action in the dialog. This cannot be undone.
Tip: Permanent deletion removes all data associated with that person. Only use this when you are certain the record is no longer needed.
Archiving and deleting need the People & Families Delete permission (included in Full Access).
Bulk Actions
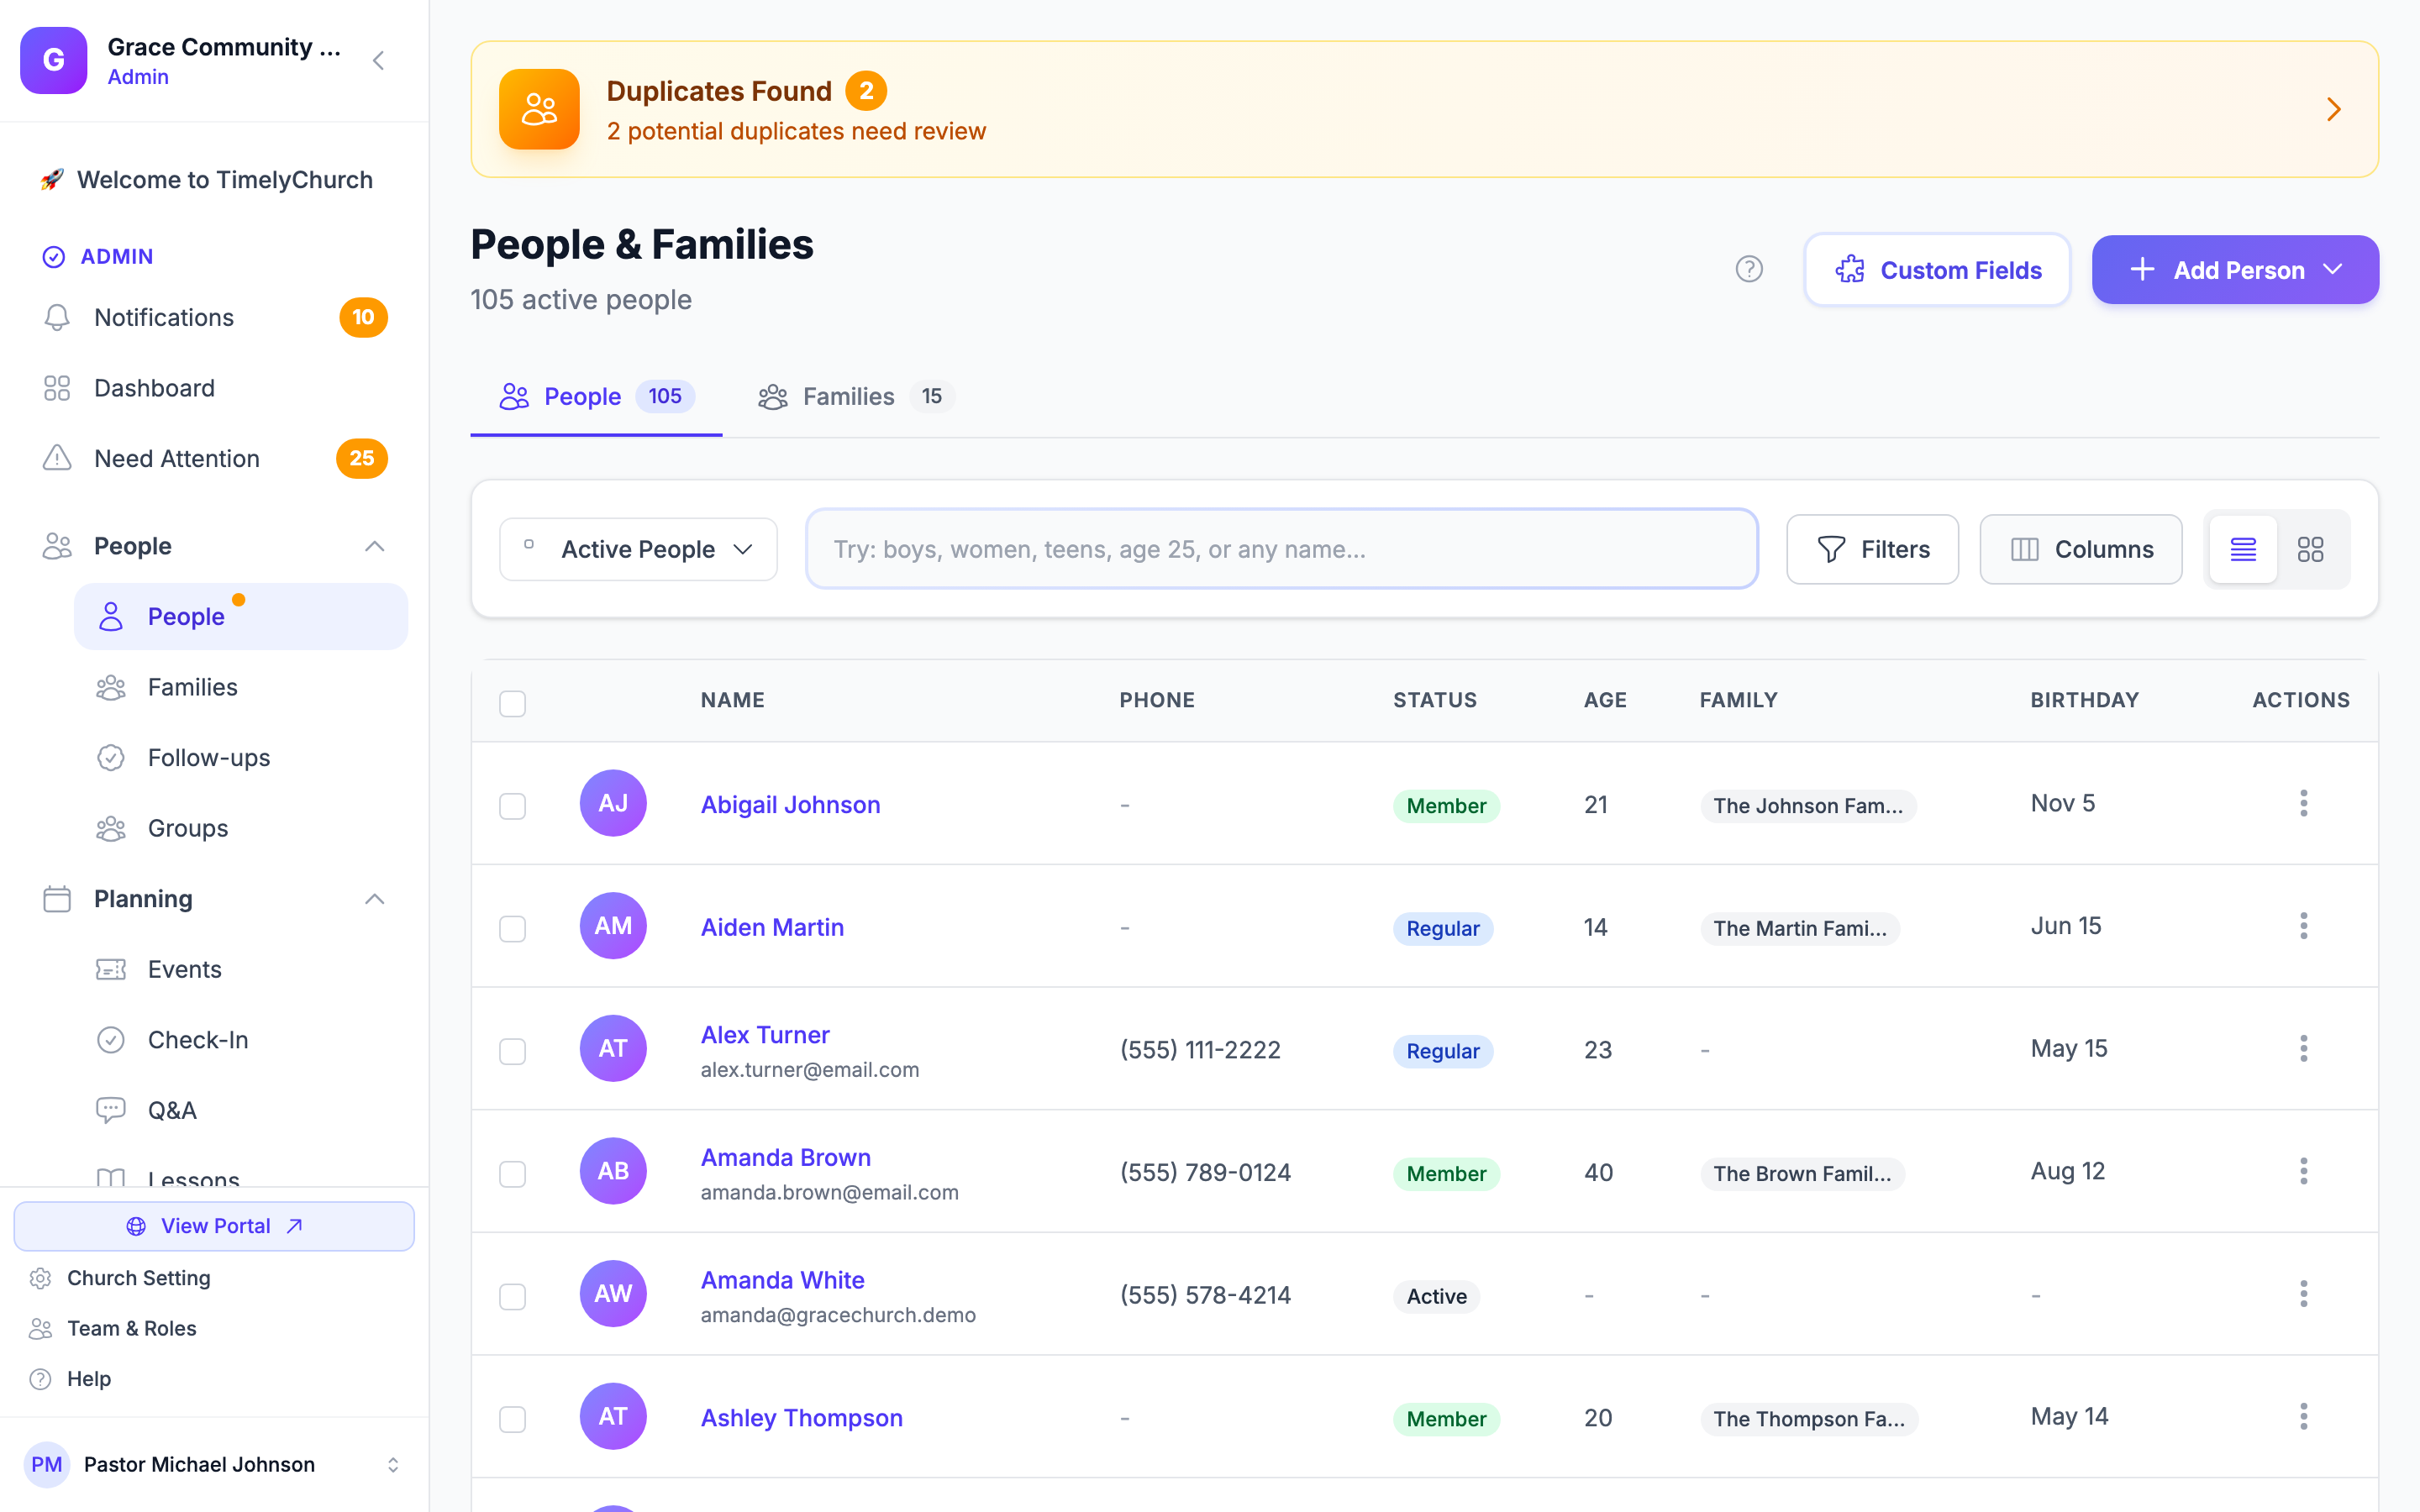
You can act on several people at once from the List view:
- On the People list, select the checkboxes next to the people you want to manage (or use the header checkbox to select all).
- A bulk action bar appears at the top of the list showing how many are selected.
- Choose an action:
- Enroll in Automation -- Add the selected people to one of your active email automations. Pick the automation and click Enroll people; anyone already enrolled is skipped. This button appears only when you have at least one active automation and your role can edit email campaigns.
- Archive -- Archive the selected people at once
- Delete -- Permanently remove the selected people
- Clear -- Deselect everyone
Archive and Delete appear only if your role has the People & Families Delete permission.
Who Sees What
What you can see and do on the People page depends on your role:
- View lets you browse the directory and open profiles.
- Create and Edit let you add people and change their details.
- Delete, Import, and Export are separate permissions for archiving or deleting people, importing a file, and downloading the CSV. Full Access includes all of them.
If your role's reach is set to Their teams, you see only the people in the teams you lead. See What Team Leaders See in People and Families.