
Staff Directory
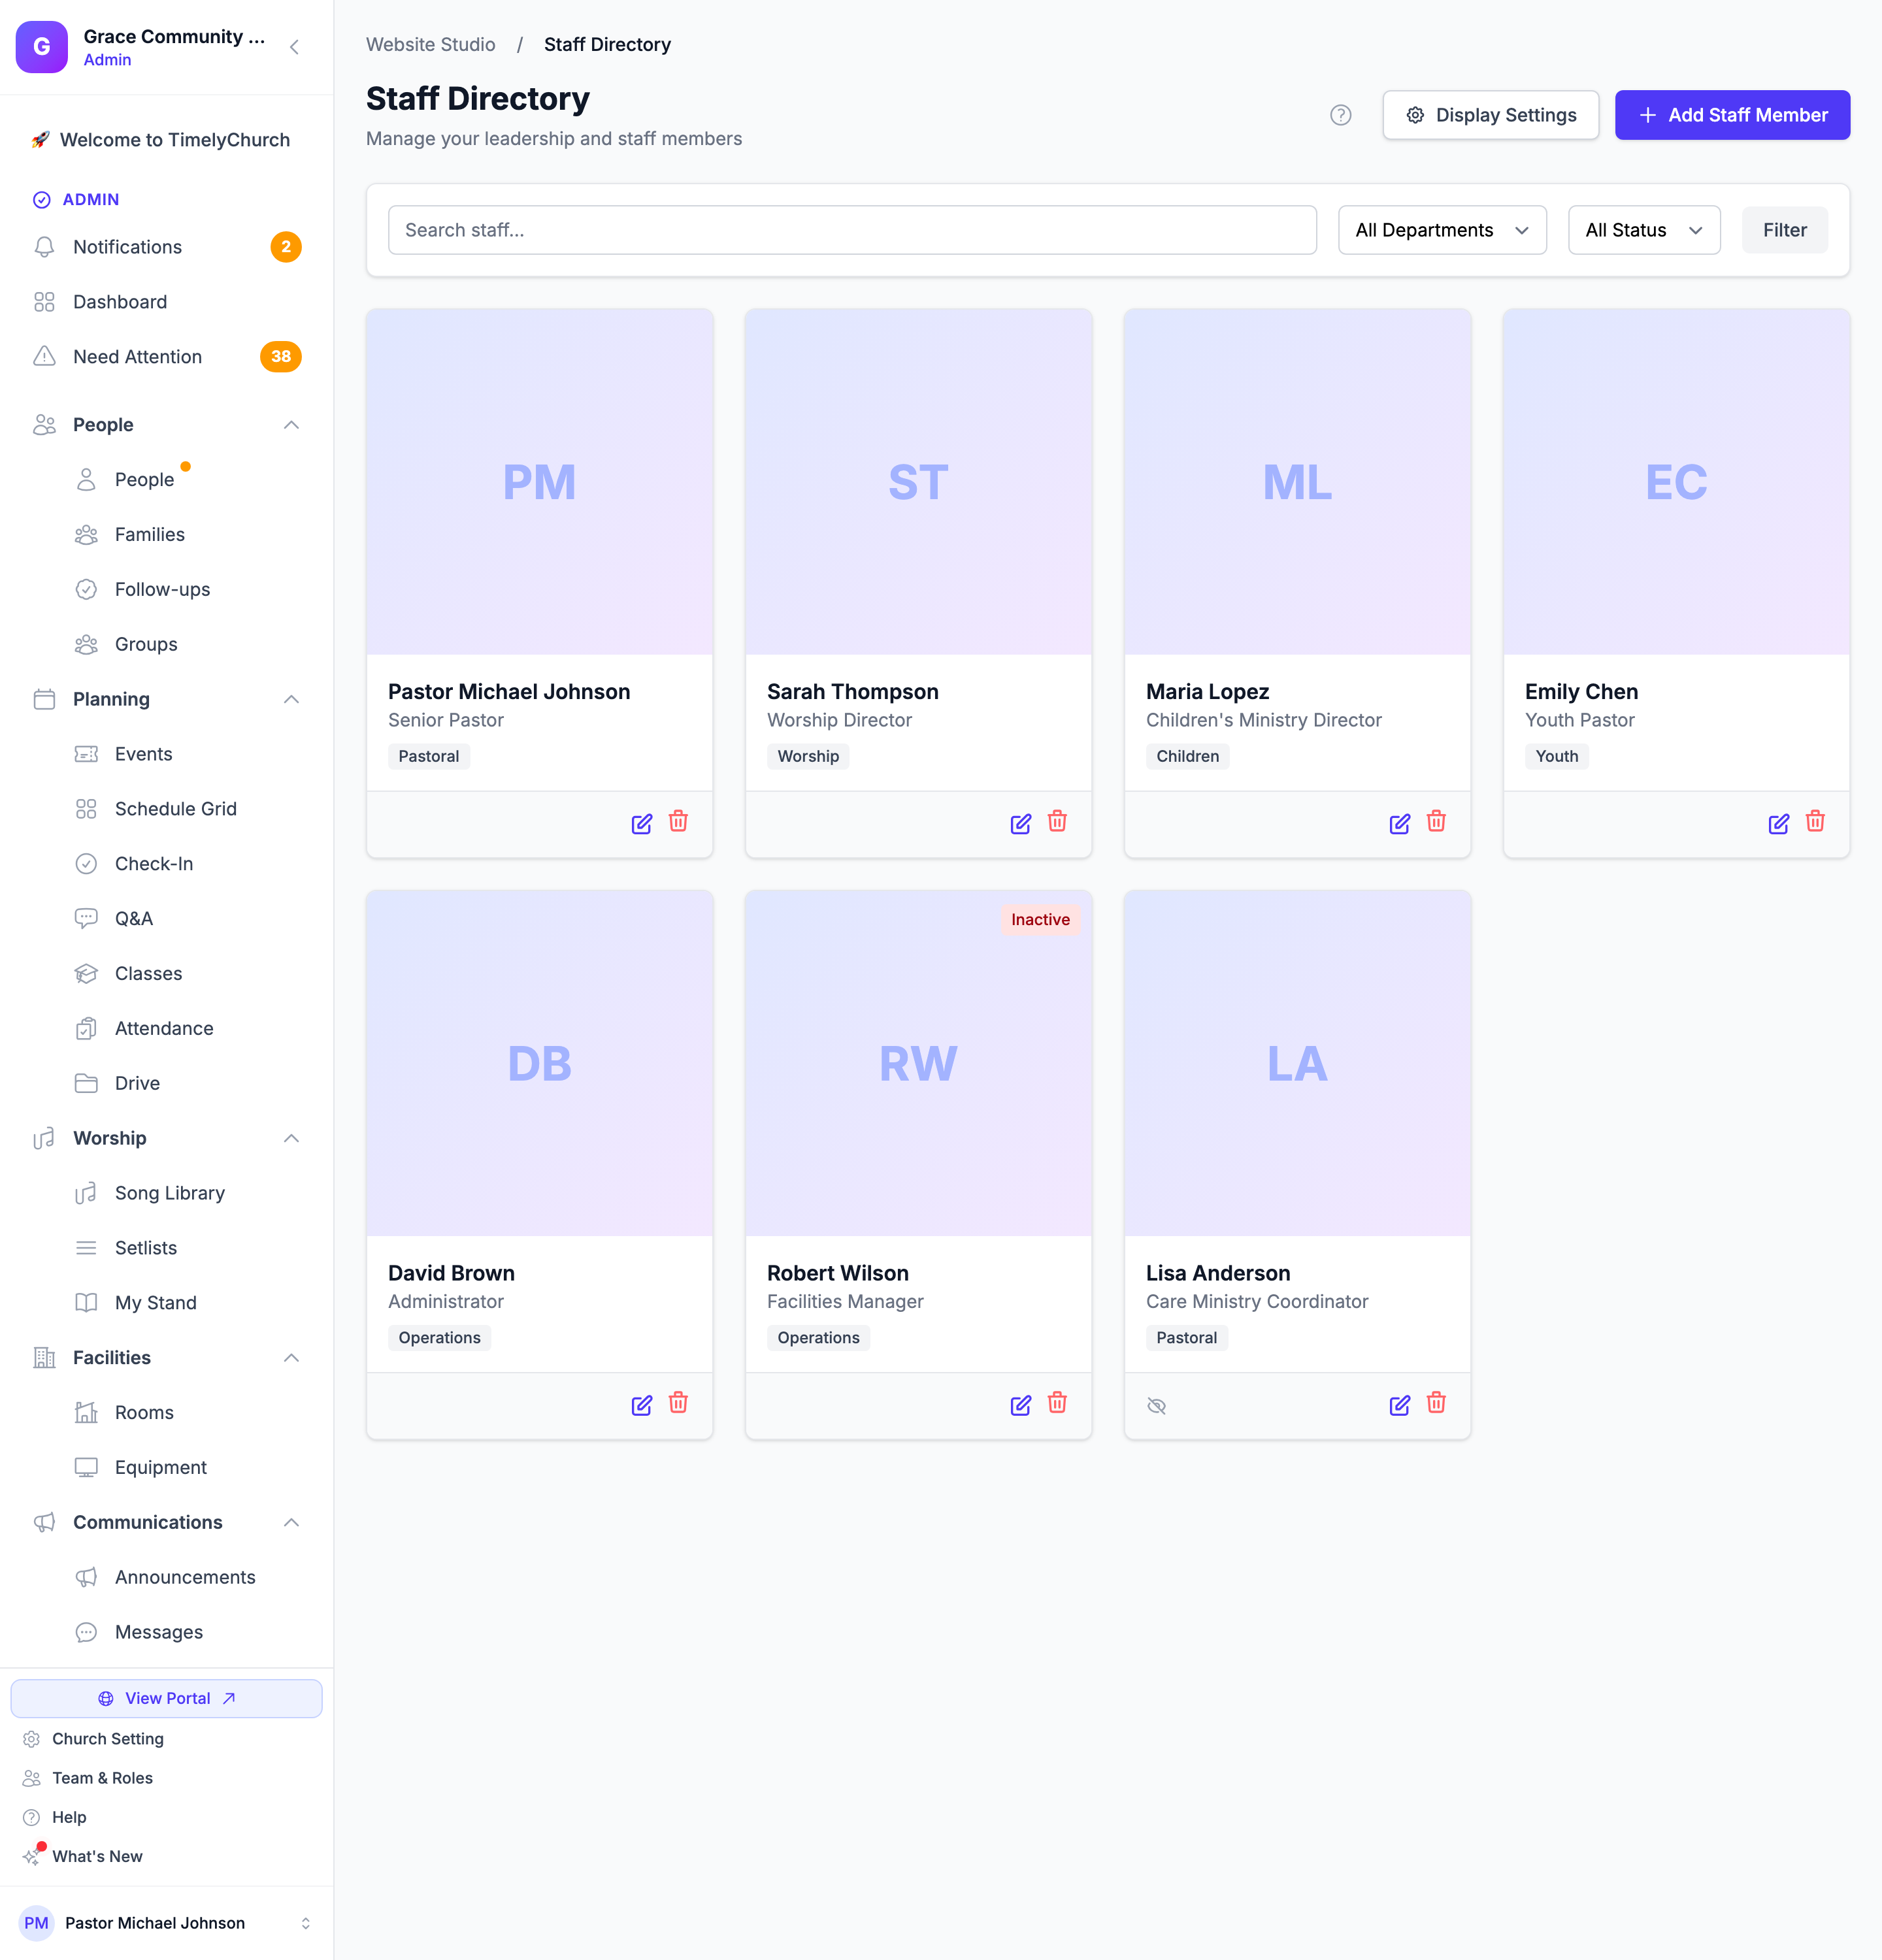
The Staff Directory lets you showcase your church's leadership and staff on your public website. You can add staff members with photos, bios, contact details, and social media links, then control how they are displayed to visitors.
Accessing the Staff Directory
- Click Website in the left sidebar to open Website Studio.
- On the dashboard, find the Staff Directory card and click Manage.
Adding a Staff Member
- Click the Add Staff Member button.
- Fill in the following information:
Link to People Directory (optional)
If this staff member is already in your People directory, start here. Click Search directory to link a person, search by name, email, or phone, and pick the person. Their name, email, phone and photo are filled in for you (marked (auto-filled)). Use Change to pick someone else or Unlink to remove the link. If they are not in your directory, choose Or skip — enter details manually below.
Website Profile
This is what visitors see on the public staff page.
- Photo -- If the person is linked and has a directory photo, it is used (Using directory photo); click Upload a different photo instead to use another one, or Use directory photo instead to switch back. Otherwise upload a photo. Recommended: a square image, at least 400x400 pixels, up to 5 MB. To remove an existing photo, check Remove current photo.
- Name (required) -- The staff member's full name.
- Title / Position (required) -- Their role at the church (e.g., "Senior Pastor", "Worship Leader", "Children's Director").
- Department -- Select the department they belong to (e.g., Leadership, Worship, Children, Youth, Administration, etc.).
- Email and Phone -- Their contact details. Each has its own Show publicly switch: only switch it on if the person is happy to receive public inquiries.
- Bio -- A brief biography or description.
Social Links & Visibility
- Social Links -- Add URLs for the staff member's social media profiles. Each field accepts a full URL.
- Active (currently on staff) -- Whether this person is currently on staff. Inactive members can be kept in the system but hidden from the public site.
- Show on public website -- Controls whether this specific staff member appears on your public website. You may want to keep some team members internal-only.
- Click Add Staff Member to save.
Editing a Staff Member
- In the Staff Directory list, click the edit (pencil) icon on the staff member's card.
- Update any fields as needed.
- Click Update Staff Member to save your changes.
Deleting a Staff Member
- In the Staff Directory list, click the delete (trash) icon on the staff member's card.
- Confirm the deletion when prompted.
Important: Deleting a staff member is permanent and cannot be undone.
Display Settings
The Staff Directory offers extensive layout customization to control how staff members appear to website visitors.
Accessing Display Settings
- On the Staff Directory page, click the Display Settings button.
- The Page Display Settings panel opens with all layout options.
Layout Styles
Choose from five Layout Style options:
| Layout | Description |
|---|---|
| Auto (Smart) | Automatically adjusts the layout based on the number of staff members. |
| Featured | A large hero display for the lead pastor or primary leader, with a grid layout for remaining staff. |
| Grid | Standard card layout in 4 columns. |
| List | Full-width horizontal cards showing more detail for each person. |
| Compact | Small cards with 6 per row, ideal for large teams. |
Photo Shape
Control how staff photos are displayed:
- Circle -- Photos cropped to a circle.
- Rounded -- Photos with rounded corners.
- Square -- Photos with no rounding.
Card Detail Level
Control how much information each staff card shows:
- Minimal (Name & Title only)
- Standard (+ Bio excerpt)
- Detailed (+ Contact & Social always visible)
Department Options
- Group staff by department -- When checked, staff members are organized under their department headings.
- Show department headings -- When checked, department names appear as section headers.
Saving Display Settings
Click Save Display Settings to apply your layout choices. Changes take effect immediately on your public website.
Filtering Staff Members
Use the filter bar at the top of the Staff Directory to narrow the list:
- Search -- Type a name to find specific staff members.
- Department -- All Departments or a specific department.
- Status -- All Status, Active, or Inactive.
Cards show an Inactive badge for people no longer on staff, and an eye icon (Hidden from website) for people who are not shown publicly.
Click Filter to apply, or Clear to reset.
Adding a Staff Section to a Page
To display your staff directory on a specific page:
- Go to Website Studio > Pages and open the page you want to edit.
- Click Add Section.
- Under Dynamic Content, select Staff Directory.
- The section will be added to the page and will automatically display your active, visible staff members.
- Click the edit icon on the section to customize the heading, subheading, and display settings (columns, layout).
Tip: The Staff section on a page pulls from the same staff members you manage in the Staff Directory. Any changes you make to staff members will be reflected automatically.
Best Practices
- Use high-quality, consistent photos. Square photos at 400x400 pixels or larger work best. Try to use photos with similar backgrounds and framing for a professional look.
- Keep bios concise. Two to three sentences is enough for most staff members. Share their role, a personal detail, and something about their passion for ministry.
- Be thoughtful about contact visibility. Only show email and phone for staff members who are prepared to receive public inquiries.
- Use departments to organize. Grouping by department helps visitors quickly find the right person to contact.
Next Steps
- Website Sections -- Learn about other section types
- SEO Settings -- Optimize your website for search engines